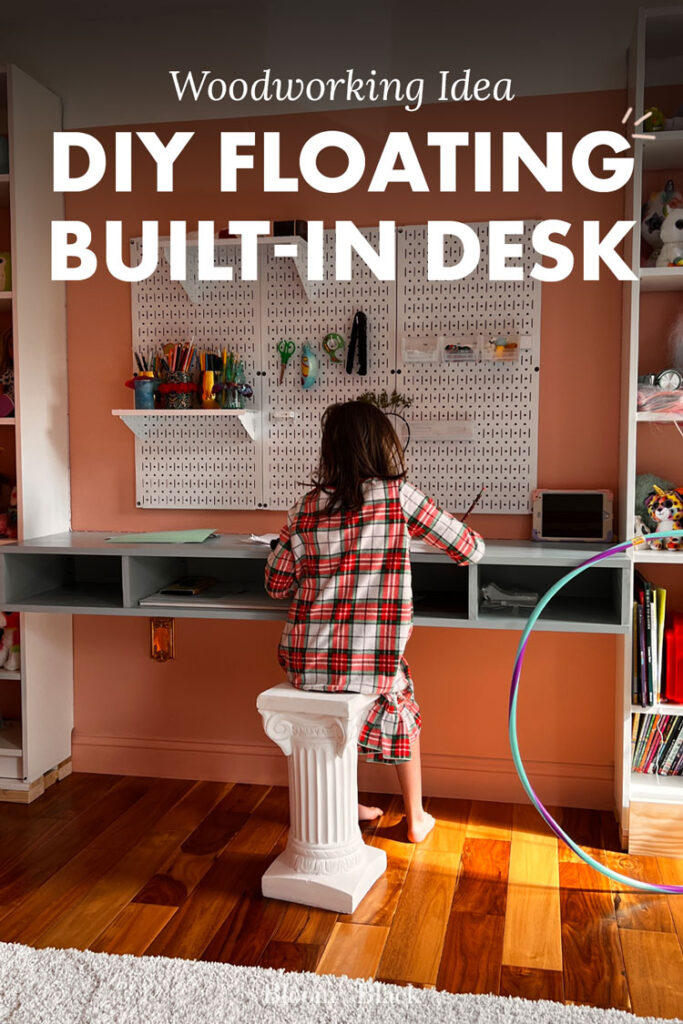
DIY Your Built-In Floating Desk in 7 Steps
My youngest daughter always has a project going. Just like her mom 🙂
Whether she’s drawing, writing, or creating a pair of glass slippers using all the Scotch tape in the house, she’s using every surface available to her for creating. It was high time that I built a workspace for her room.
A floating built-in desk was the perfect solution! Not only does it maximize the space in her smallish bedroom, but it helps tie in the freestanding Billy bookcases where she stores her books and toys.
In this blog post, I’ll walk you through an easy-to-follow, step-by-step guide to creating your own floating built-in desk. From planning your project and gathering your materials to cutting, assembling, and adding the finishing touches, I’ve got you.
Pin for later!
This post contains some affiliate links for your convenience. Click here to read my full disclosure policy. Thanks for supporting Bloom in the Black!
Materials and Tools
- Measuring tape
- 1 x 6 x 8 select pine boards
- Miter saw
- Pocket hole jig
- Wood glue
- 1 1/4″ pocket screws
- 2 1/4″ wood screws
- 1 1/2″ wood screws
- Sandpaper
- Paint or stain
- Primer (if painting)
- Level
- Stud finder
- Drill and drill bits
- Clamps
- Nail gun (optional)
Step 1: Measure Your Space and Plan Your Desk
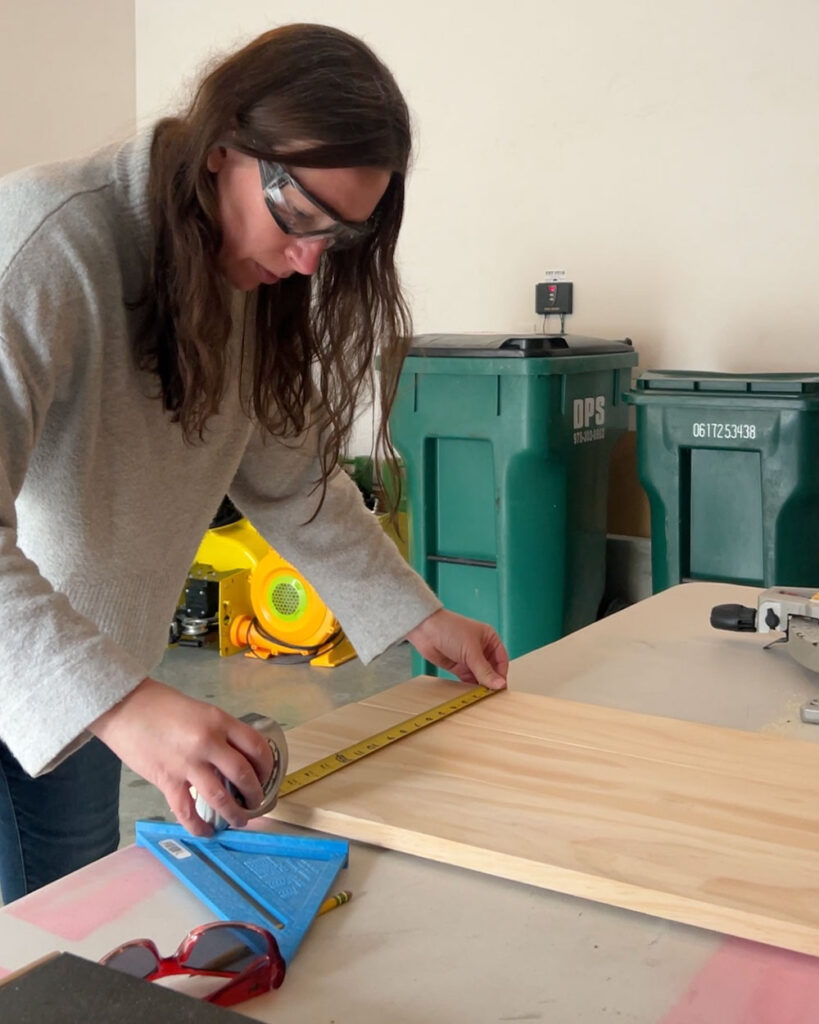
Measure the Area Where the Desk Will Be Installed
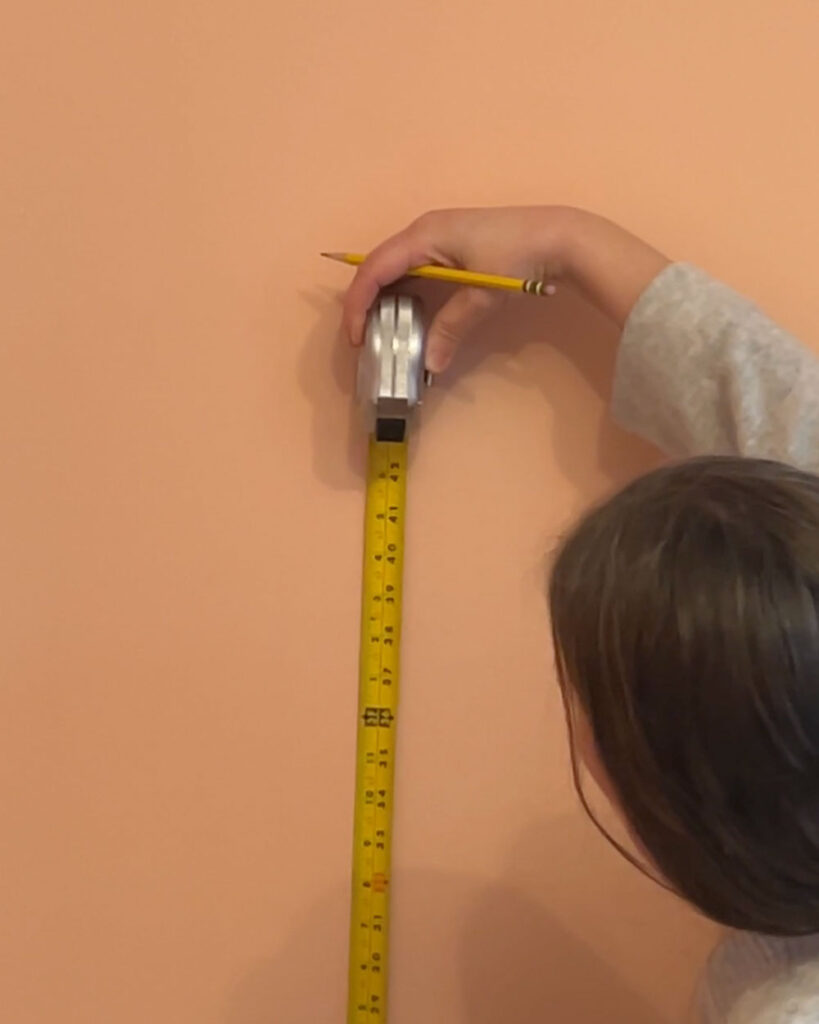
Before starting any DIY project, it’s crucial to first measure the available space accurately.
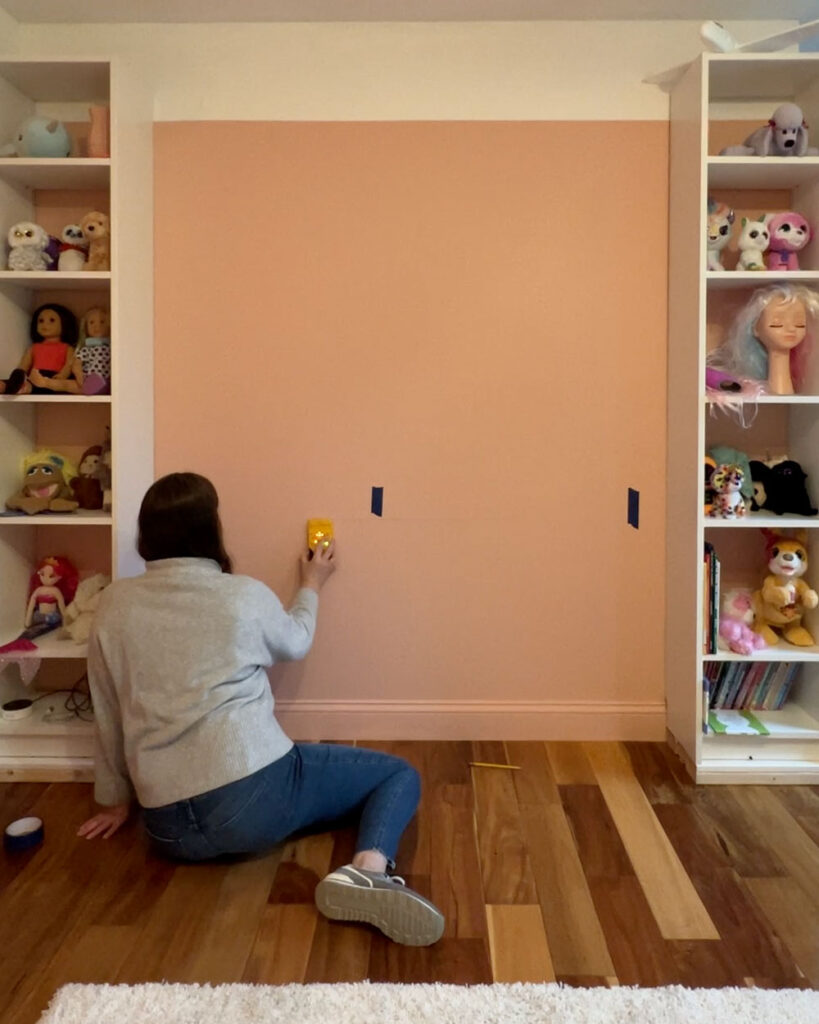
For building a built-in desk, you must measure the length, width, and height of the area where your future workspace would be. The average desk height is between 28″ and 30″ so mark the height on the wall and then drew a level line to guide where you’ll be building the desk.
Be sure to consider the location of your outlets, windows, and any surrounding furniture to ensure a proper fit.
Plan the Dimensions and Design of the Desk
Once you have the measurements of your available space, begin planning the dimensions of your desk, considering your specific needs and preferences.
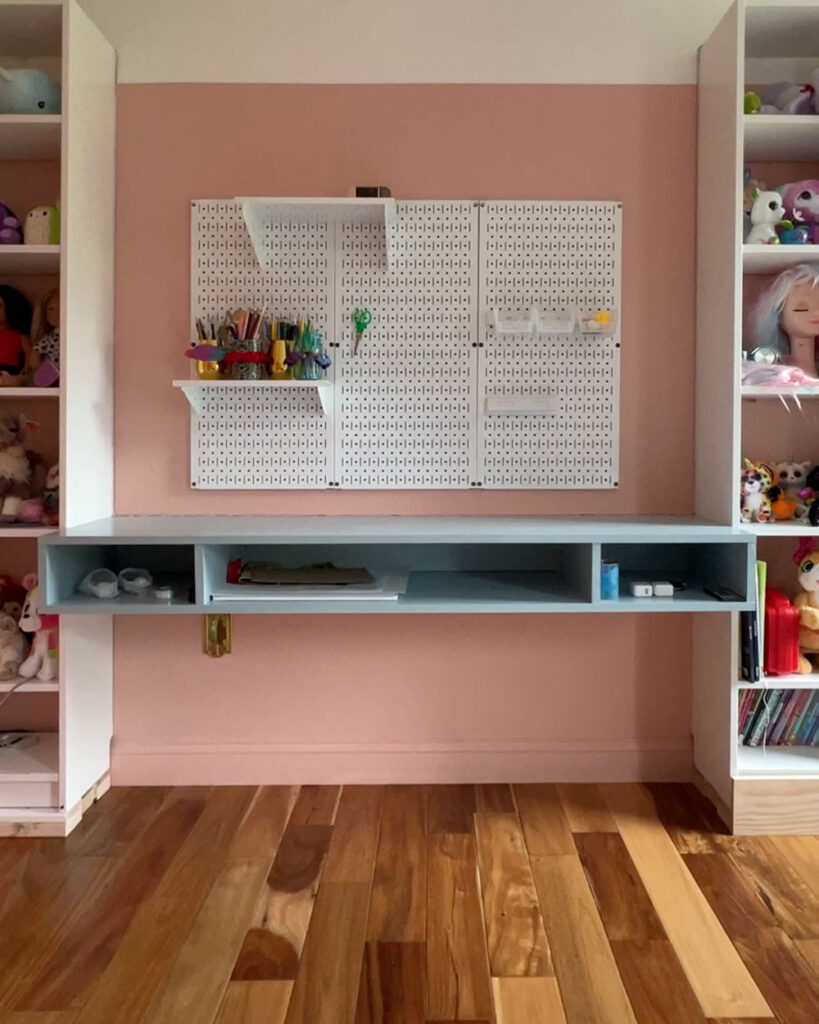
This desk needed to span the width between Josie’s bookshelves and be shallow enough that she could easily reach the pegboard on her back wall, so I decided on a width of about 65 inches and a depth of 16 1/2 inches. This allowed for ample workspace while still maintaining a comfortable fit in her room.
As for the height, keep in mind the standard desk height of 30 inches, but also factor in ergonomic considerations. Make adjustments based on your own comfort while sitting and standing, ensuring that the final height will support a healthy posture during extended periods of desk use.
In terms of design, I decided to create 3 cubbies to hold art supplies, leaving the center cubby large enough to accommodate giant pads of paper and completed artwork. You could make these cubbies into drawers if you wanted, but I opted to keep them open for this floating desk DIY.
I chose to use 1x6x8 select pine boards so that I could complete the desk using only my miter saw, but other materials like MDF or plywood are also good options if you want more precise measurements than you can achieve by adding up the board widths.
| Material | Pros | Cons |
|---|---|---|
| Plywood | Affordable, customizable, strong | Can warp, requires finishing |
| MDF | Smooth surface, inexpensive | Heavy, less durable |
| Solid wood | Attractive, durable | Expensive, somewhat limited by existing board width |
Make a Sketch or Create a 3D Model
With the measurements and design in mind, sketch out a plan for your DIY built-in desk, making sure to include all relevant dimensions and features. You’ll also use this sketch to estimate the amount of material you’ll need to purchase.
Alternatively, creating a 3D model using software like SketchUp could help visualize the desk in the room and further fine-tune the design. I took this course on how to design and plan furniture using SketchUp, and it’s proven to be super helpful for projects like this.
Now that you’ve measured your space and planned your desk accordingly, it’s finally time to build the darn thing!
Step 2: Cut the Wood Pieces and Assemble the Top and Bottom
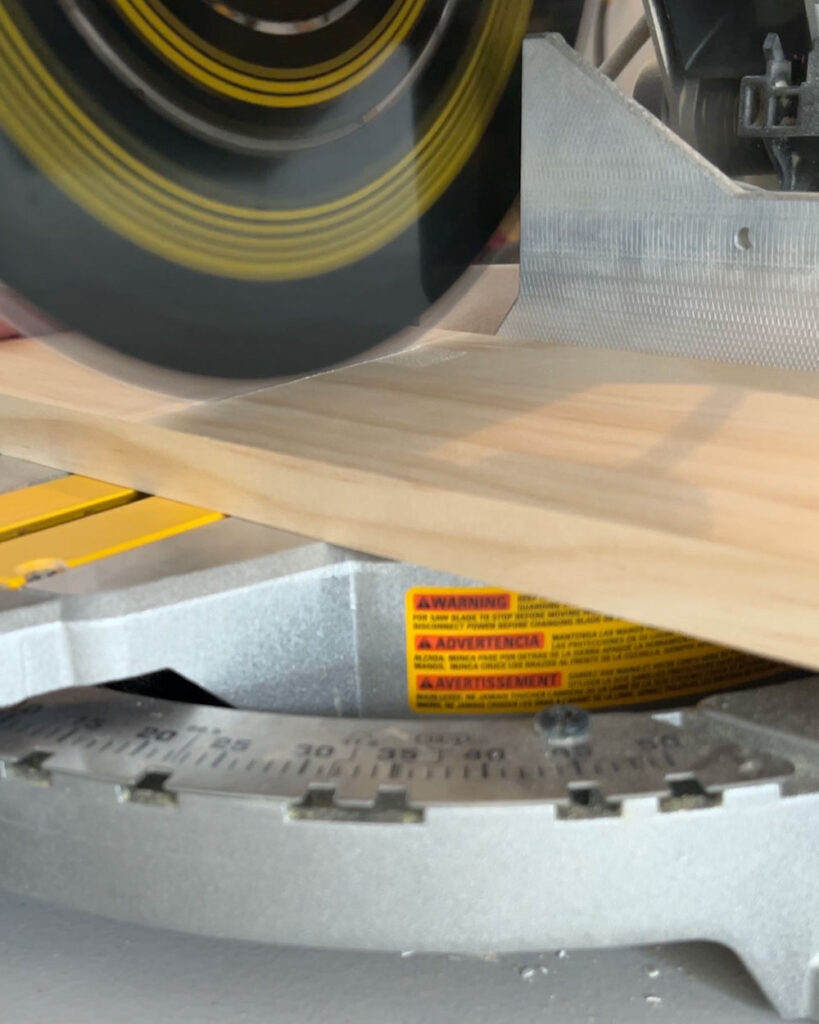
Cut the Boards to Size
Once you have your plan and measurements for your built-in desk DIY, it’s time to cut the wood pieces.
For this desk, I needed to cut:
- 7 lengths at 65″ (three to build the desktop, three to build the desk bottom, and one for the back support that attaches to the wall)
- 4 lengths at 15 3/4″ (two for the dividers and two for the sides)
I determined these measurements based on how long the desk would be (accounting for the 7 lengths at 65″) and how deep the desk would be minus 3/4″ to account for the depth of the backer board secured to the wall (desk depth is 16 1/2″ so minus 3/4″ equals 15 3/4″).
Cutting the wood as accurately as possible will help ensure a perfect fit and a professional-looking result. I always double-check my measurements before making any cuts to avoid any mistakes or wasted materials.
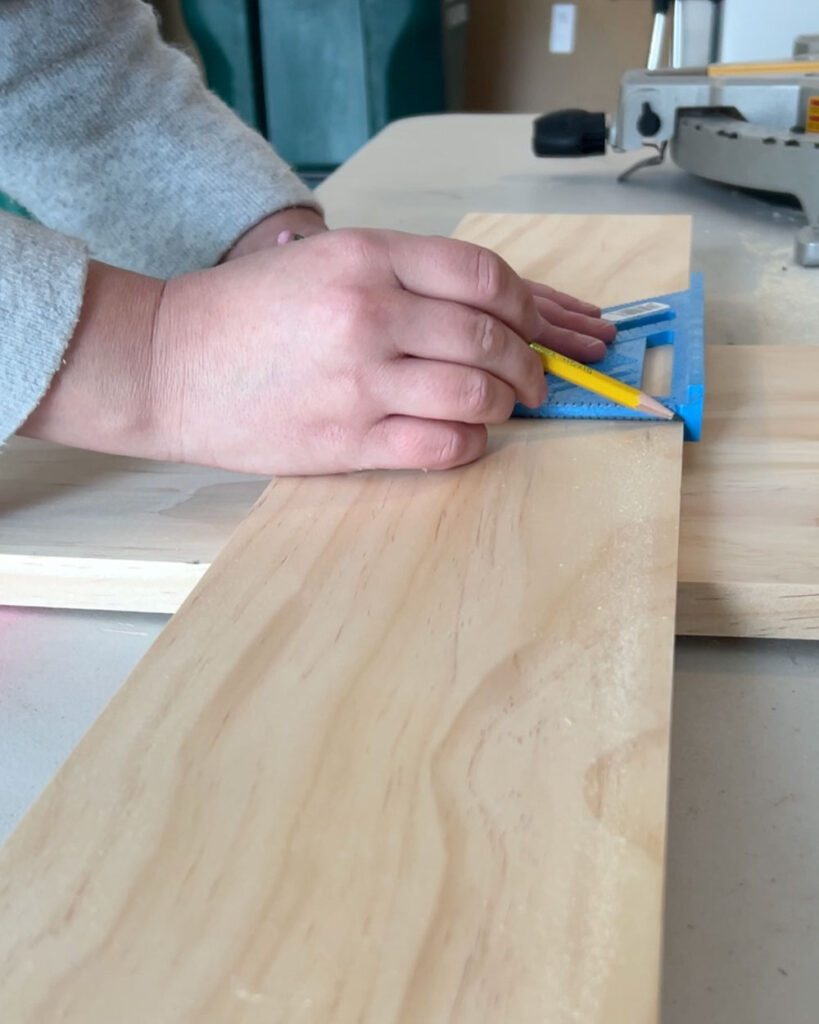
Be Precise with Measurements to Ensure a Perfect Fit
Being precise with your measurements is critical when cutting the wood pieces. A small mistake or inaccuracy might lead to imperfect joints or an uneven desk surface. To be as precise as possible, use a tape measure, a square, and a pencil to mark the exact cutting lines.
| Tool | Purpose |
|---|---|
| Tape Measure | Accurately measuring lengths and widths of wood pieces |
| Square | Ensuring perfect right angles when marking and cutting |
| Pencil | Marking cutting lines and measurements on the wood |
Remember, patience and attention to detail are the keys to a successful project.
Assemble the top and bottom of the desk
Once you have your boards cut, attach three of the 65″ boards on the long side using wood glue and pocket screws to create a solid piece for the top of the desk. Do this again to create the bottom of the desk.
Step 3: Sand and Finish the Wood
In this section, I’ll guide you through the process of sanding and finishing the wood for your built-in desk. Following these steps will ensure a smooth and professional-looking end result.
Sand All Edges and Surfaces
Before painting or staining, it’s essential to sand all the surfaces of the wood pieces.
I’ll be honest though. I cheated a little — I only sanded the surfaces that are visible once the desk is installed 🙂
Start by using an 80-grit sandpaper to remove any rough spots, then use a 120-grit, a 180-grit, then finally a 220-grit sandpaper to achieve a smooth, even finish. Remember to always sand with the grain of the wood to prevent scratches or uneven surfaces. Once all surfaces are sanded, vacuum the dust or use a tack rag to clean up.
Apply Primer (If Painting) and Allow to Dry
If you’ve decided to paint your built-in desk, applying a primer is a crucial step. This will help the paint adhere better and provide a smoother final appearance. Select a primer specifically designed for wood and follow the manufacturer’s instructions for application. Once the primer has been applied, give it sufficient time to dry before moving on to the next step.
If you’re impatient (like me, always), you can use a paint + primer in one to speed things along.
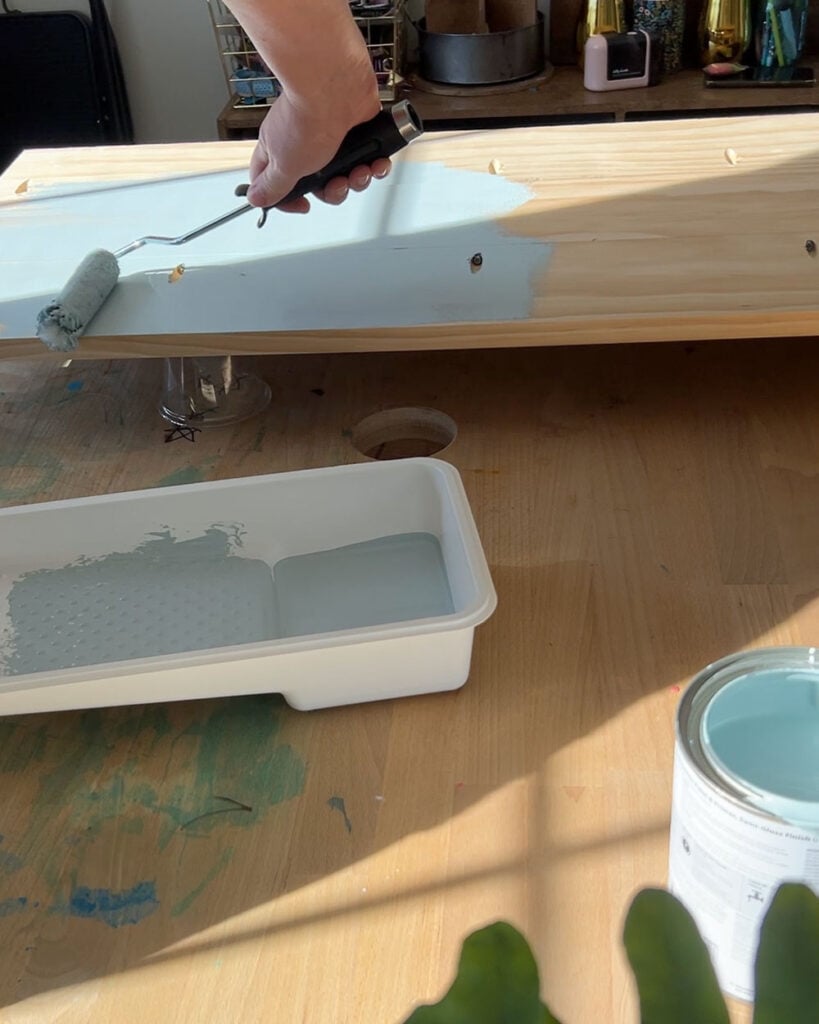
Paint or Stain the Wood Pieces and Let Them Dry Completely
Depending on your preferences and the style of your room, you can either paint or stain the wood pieces for your built-in desk.
- Painting: Choose a high-quality, semi-gloss paint that is suitable for wood. Apply the paint evenly with a roller, brush, or paint sprayer. Make sure to cover the entire surface, and pay attention to any edges or corners. Allow the first coat of paint to dry, and then apply additional coats as needed, following the recommended drying times on the paint can.
- Staining: Select a stain that provides the desired color and finish for your built-in desk. Using a brush, apply the stain following the grain of the wood. Allow the stain to penetrate the wood for a few minutes before wiping away any excess stain with a clean cloth. Follow the instructions on the stain can for drying times and any additional coats needed.
After you’ve applied the paint or stain, give the wood pieces enough time to dry completely before proceeding to the next step. Proper drying ensures a durable and long-lasting finish for your built-in desk.
Step 4: Find and Mark the Studs
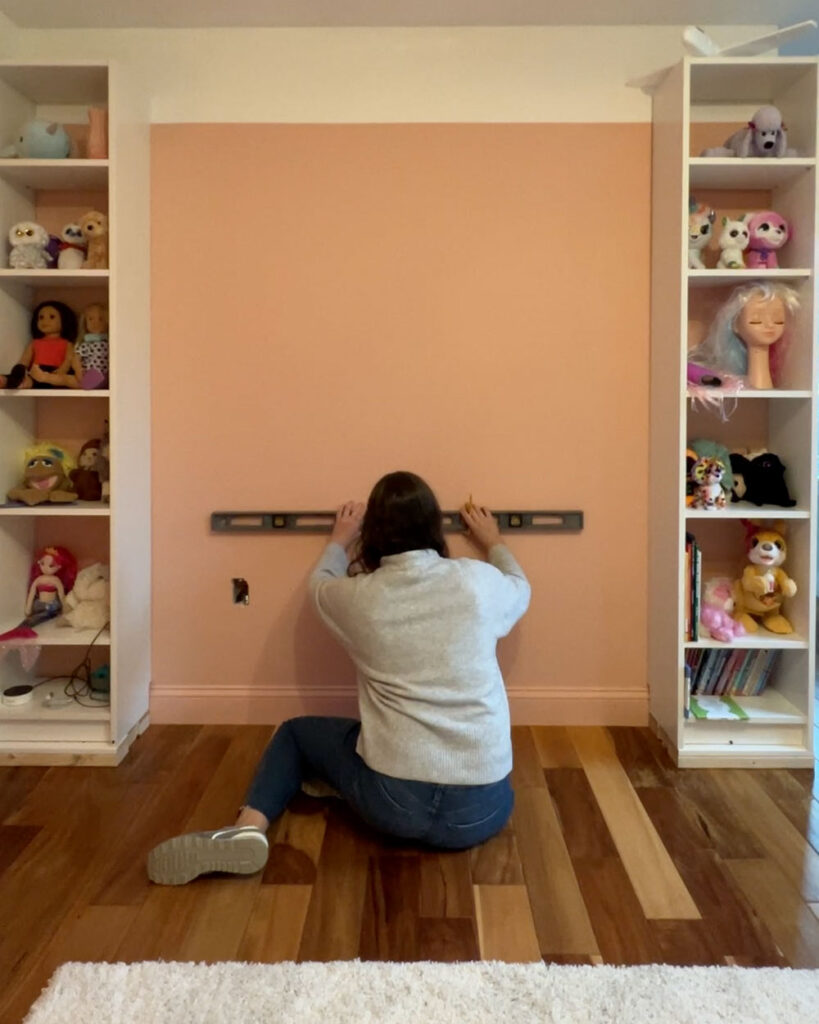
Use a Stud Finder to Locate Wall Studs, then mark them
You absolutely must attach your desk to studs to provide the necessary support for your built-in desk. Drywall anchors will NOT cut it.
To make sure you get accurate results, use a stud finder. Begin by scanning the wall horizontally. As soon as the device detects the edge of a stud, it will beep and light up. Mark that edge, then scan on the other side from the opposite direction to locate the other stud edge. Place a piece of painter’s tape between your two edge marks to indicate where that stud lies.
Repeat until you locate all the studs along the level line you created back in Step 1.
Step 5: Assemble the Desk
Attach the back Supports with Wood Screws
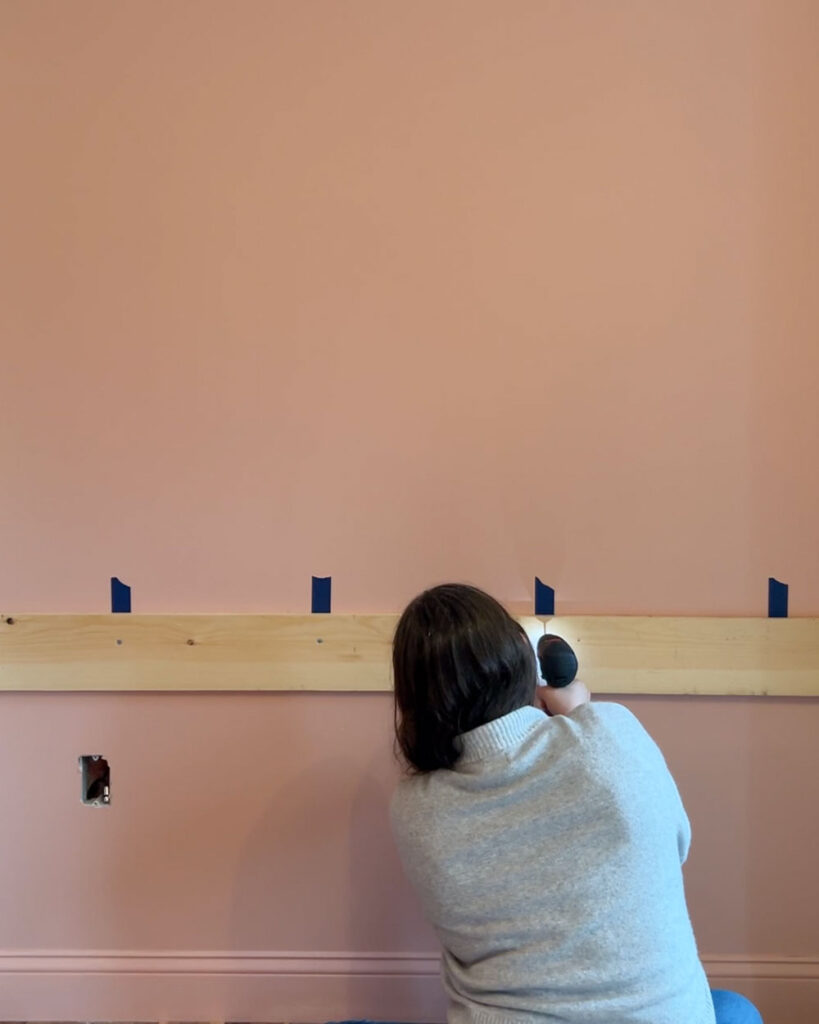
Next, it’s time to attach the desk supports to the wall. Start with your last 65″ board length (remember, we used the other six to create the desk top and bottom), and align the top of the board to the level line you drew on the wall.
Using 2 1/4″ wood screws, attach the board to the wall in the center of each marked stud. I suggest using a level after driving the first screw to make sure your board stays level before adding the second screw and forfeiting your opportunity to adjust the angle.
Use two screws per stud for the most secure fitting. Drilling pilot holes first will make this easier, but I know people who are great with a drill that don’t need them
Showoffs 😉
Install Sides and Dividers Using Wood Glue and Screws
Now we’ll add the side supports and dividers to create separate sections within the built-in desk.
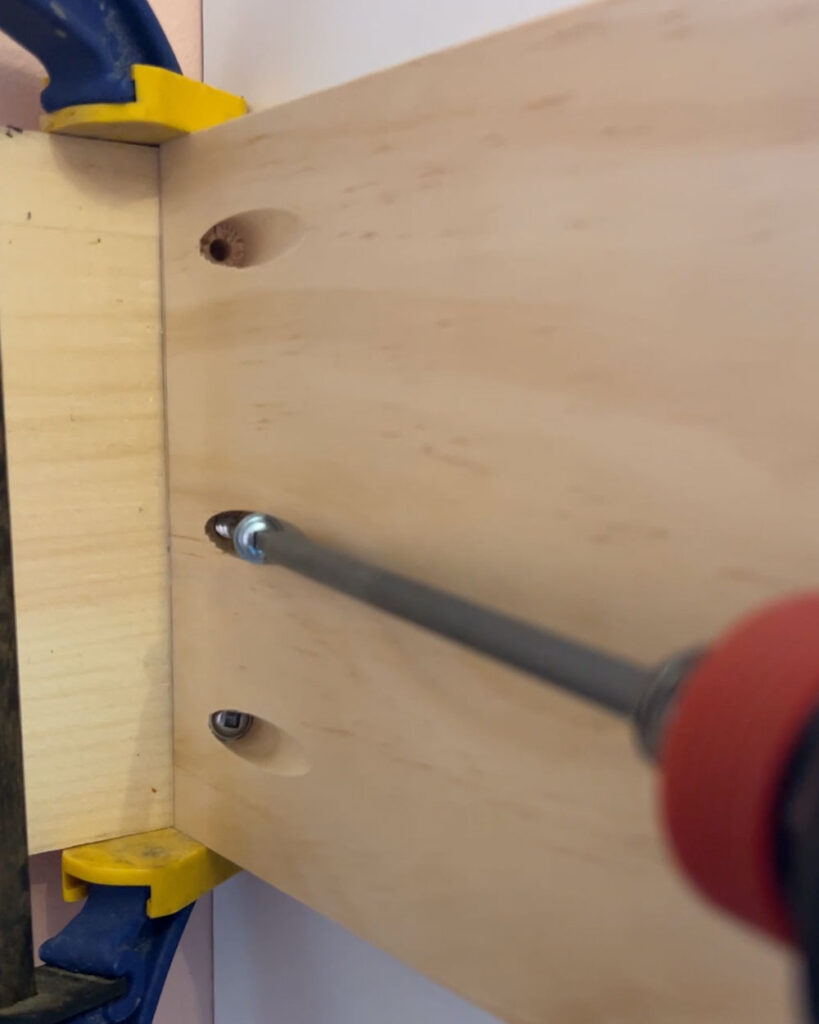
Grab the four 15 3/4″ boards and add three pocket holes to the end of each one. Attach them to the back support using wood glue and pocket screws. I used a clamp to hold the board in place while I worked.
Space the dividers out to create space for what YOU specifically plan to store. In my case, I needed a large spot to hold giant pads of paper, but you might need a larger number of small cubbies to hold other things. And you always have the option to convert these cubbies into drawers!
But that’s a tutorial for another time…
Make Sure Everything Is Level and Secure
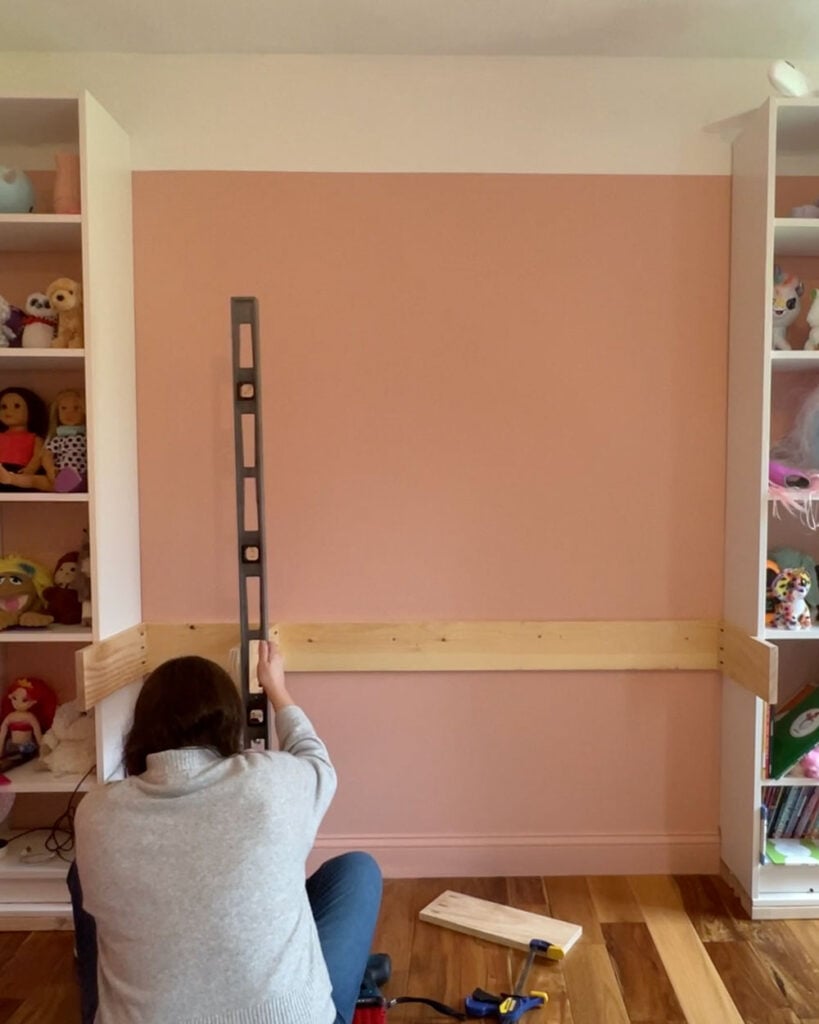
As you attach your dividers, double-check that all of the supports and dividers are level and secure. It’s essential to ensure that everything is in place and well-supported before moving on to the next step of the DIY built-in desk assembly process.
By following these steps closely, I was able to create a sturdy and functional built-in desk that met all of my needs. Whether I was using it for work, organizing my office essentials, or simply displaying my favorite photos and knick-knacks, my DIY floating desk provided the perfect combination of style and utility.
Step 6: Attach the Top and Bottom
Attach the top with wood glue
Run a bead of wood glue along the top edges of your built-in desk frame — spread it out a bit with a silicone brush to be sure the area is well covered. Then, carefully place the desktop onto the structure and make sure it aligns perfectly along the back edge and side support. The glue will take about 5 minutes to set up so you have to work quickly.
You can either place some heavy books o top to weigh it down while the glue sets up or shoot a couple of finish nails in to hold everything together while the glue dries completely. Follow the directions of your wood glue to determine how long it will take to dry.
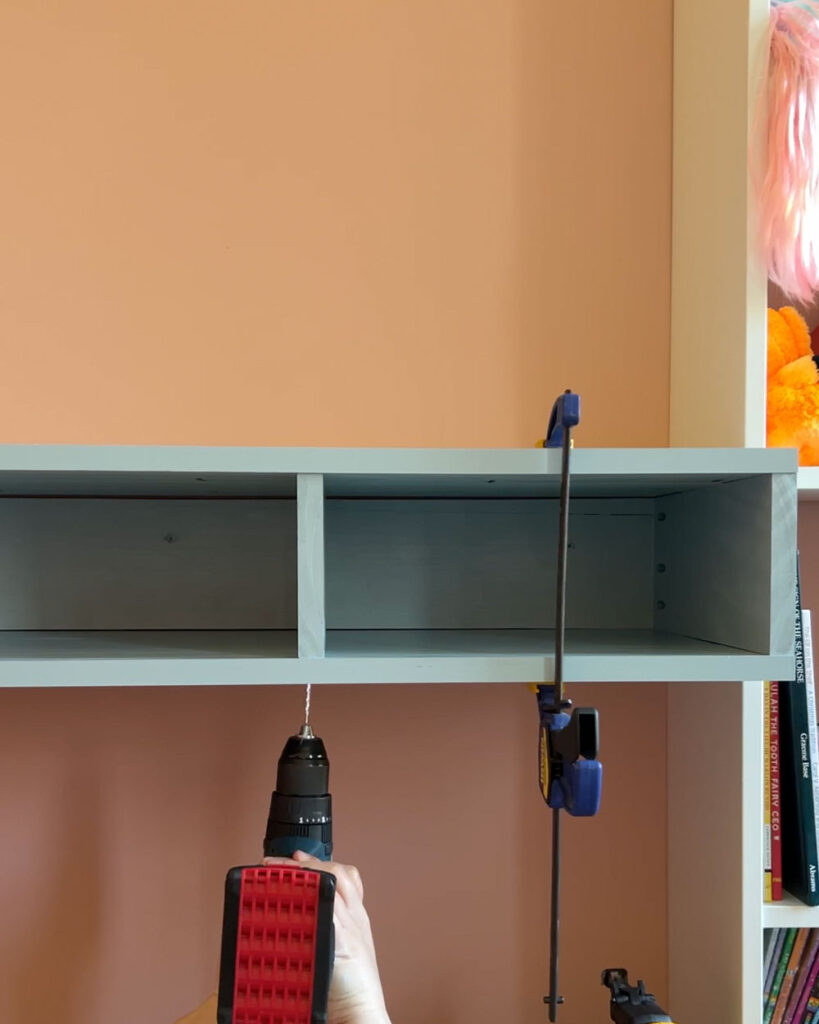
Attach the bottom with screws
Now it’s time to attach the bottom which is probably the trickiest part of the build. But you can do it!
If you can recruit an extra set of hands, it’s super helpful but not impossible to do on your own.
Lift the desk bottom into position and use several clamps to hold it in place. You can either have someone hold the back up for you, or shoot a couple of finish nail up through the bottom and into the back and side supports to temporarily hold things up for you.
Carefully identify where your dividers are and drill a pilot hole up through the bottom and into the dividers and side supports. Then attach everything with 1 1/2″ wood screws. I recommend at least three screws per divider.
Step 7: Finishing Touches
Touch Up Paint or Stain If Necessary
To make your DIY floating desk look polished and professional, fill in any nail holes with spackle and touched up any areas that need extra paint or stain. If you really want to go the extra mile, caulk any visible gaps to create a seamless appearance.
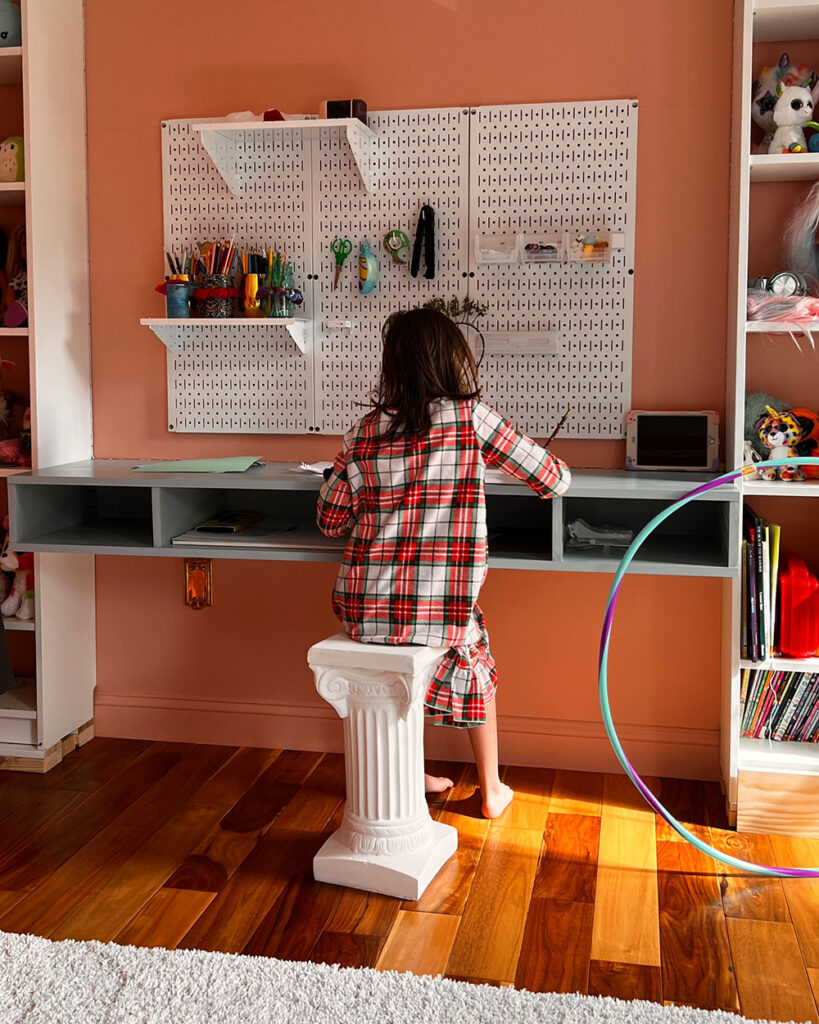
Style the Desk with Your Favorite Office Accessories
To make the workspace uniquely you, add your favorite office accessories and fun decor pieces. Also consider incorporating some lighting options like sconces near the desk, to further enhance the workspace, and create a lovely environment for both work and relaxation.
FAQ: Frequently Asked Questions about DIY Floating Built-in Desks
How much weight can a floating built-in desk hold?
The weight capacity of a floating desk depends on the materials used, the thickness of the wood, and the strength of the supporting structure and wall studs. Typically, a well-constructed floating desk can hold between 100-200 pounds. If you opt to use brackets, be sure to check the weight limits and ensure they are securely fastened to the wall studs.
What type of wood is best for a floating built-in desk?
Pine boards, plywood and MDF (medium-density fiberboard) are popular choices for floating desks due to their durability, affordability, and ease of use. Hardwoods like oak, maple, or walnut can also be used for a more high-end look but may require more skill to work with and can be more expensive.
Can I install a floating built-in desk on a wall with no studs?
Installing a floating desk on a wall without studs is not recommended, as it will not provide the necessary support and could lead to accidents or damage.
How can I add storage to my floating built-in desk?
There are several ways to add storage to your floating desk. You can incorporate shelves or cubbies into the design, install floating shelves above the desk, or use desk organizers, file boxes, and storage baskets to keep your workspace organized.
How do I make sure my floating built-in desk is level?
Use a level to ensure the desk surface and supports are level during installation. Make adjustments as needed before securing everything in place with screws. Regularly check the level after installation to ensure it remains stable and secure.
Can I add a keyboard tray or drawers to my floating built-in desk?
Yes, you can add a keyboard tray or drawers to your floating desk, but it will require additional hardware and support. Make sure to account for the extra weight when choosing brackets and ensure they are securely fastened to the wall studs. Additionally, take extra care during the planning stage to accommodate the necessary clearances and hardware for these features.