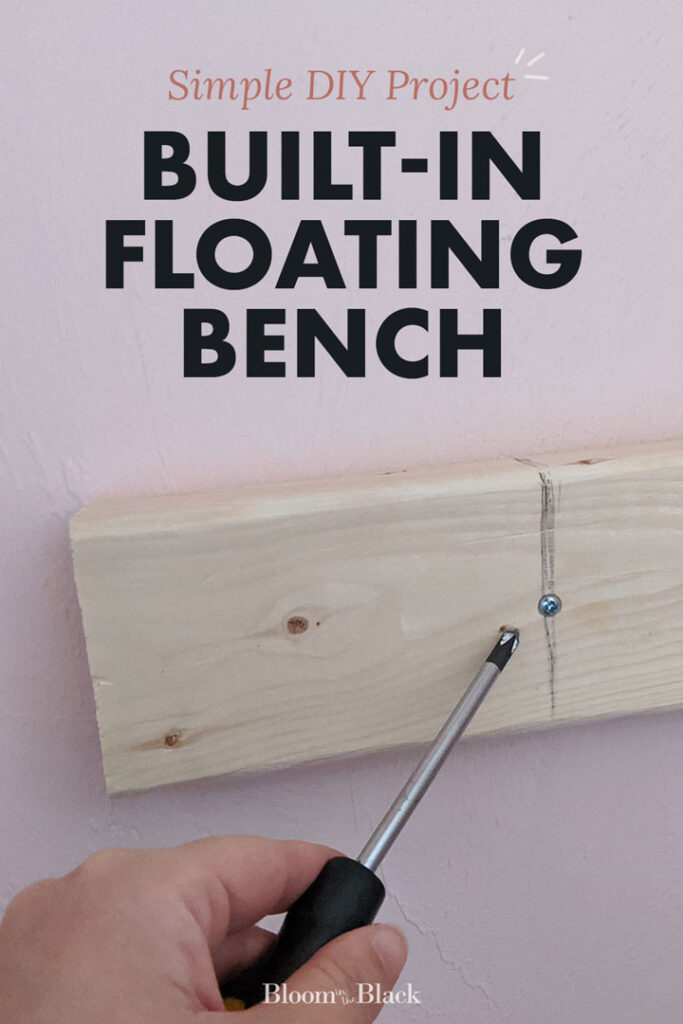
How to Build a Floating Bench (Without Buying Brackets)
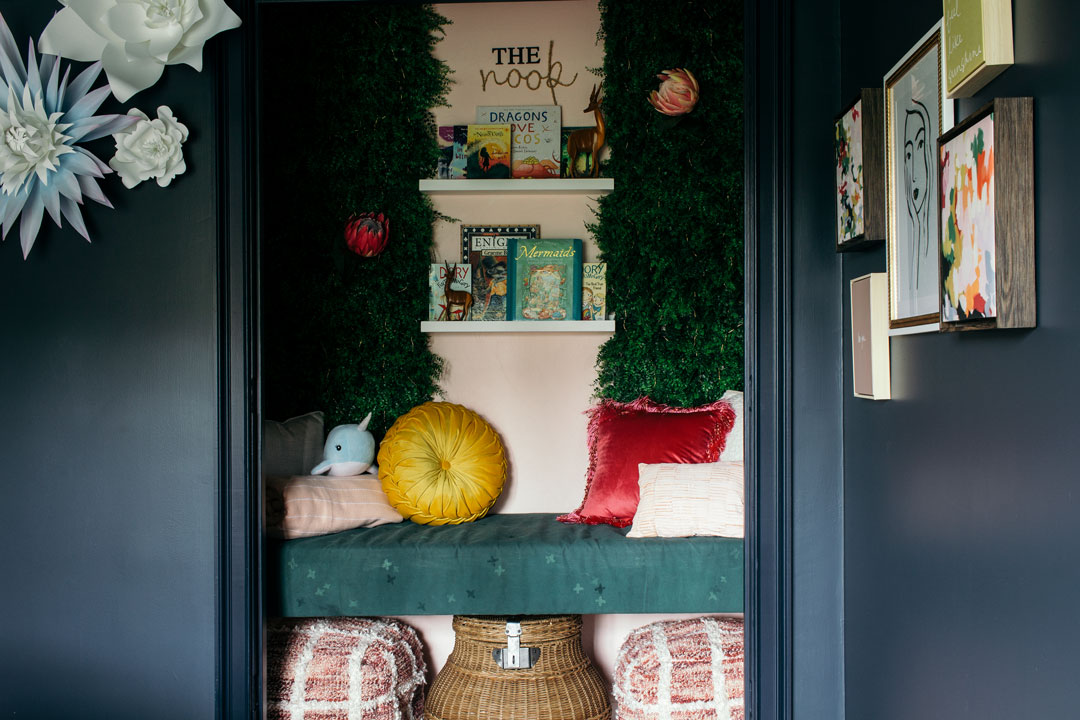
When the girls and I decided to redesign their shared bedroom and realized the closet was no longer needed, we decided to turn it into a reading nook. And what’s the most important element in a cozy reading nook? Seating. Big, settle in, practically a bed seating.
I’m a beginner builder, but I knew I could easily DIY a built-in floating bench, and in this post, I’ll explain how you can make one too! I’ve seen a bunch of beautiful wood versions online, but I knew I had to make this one upholstered to encourage maximum cuddly reading bliss.
Here’s more about making the entire book nook if you’re interested.
Pin for later!
This post contains some affiliate links for your convenience. Click here to read my full disclosure policy. Thanks for supporting Bloom in the Black!
How to Build an Upholstered Floating Bench Seat in a Closet
Basically, you’ll screw a level frame of 2x4s into the studs, adhere 3″ upholstery foam, and staple batting and fabric over the whole structure. Assuming you have the necessary tools on hand, the materials should cost you around $70 to build a 66″ x 24″ bench.
MATERIALS NEEDED
- 2x4s
- Stud finder
- Corner brace
- Plywood sheet
- 3″ upholstery foam (this post has great ideas for sourcing affordable foam)
- Dropcloth or preferred upholstery fabric
- Batting (very optional)
- Chop or hand saw
- Drill
- 3″ screws
- Staple gun
Step 1: Measure the space
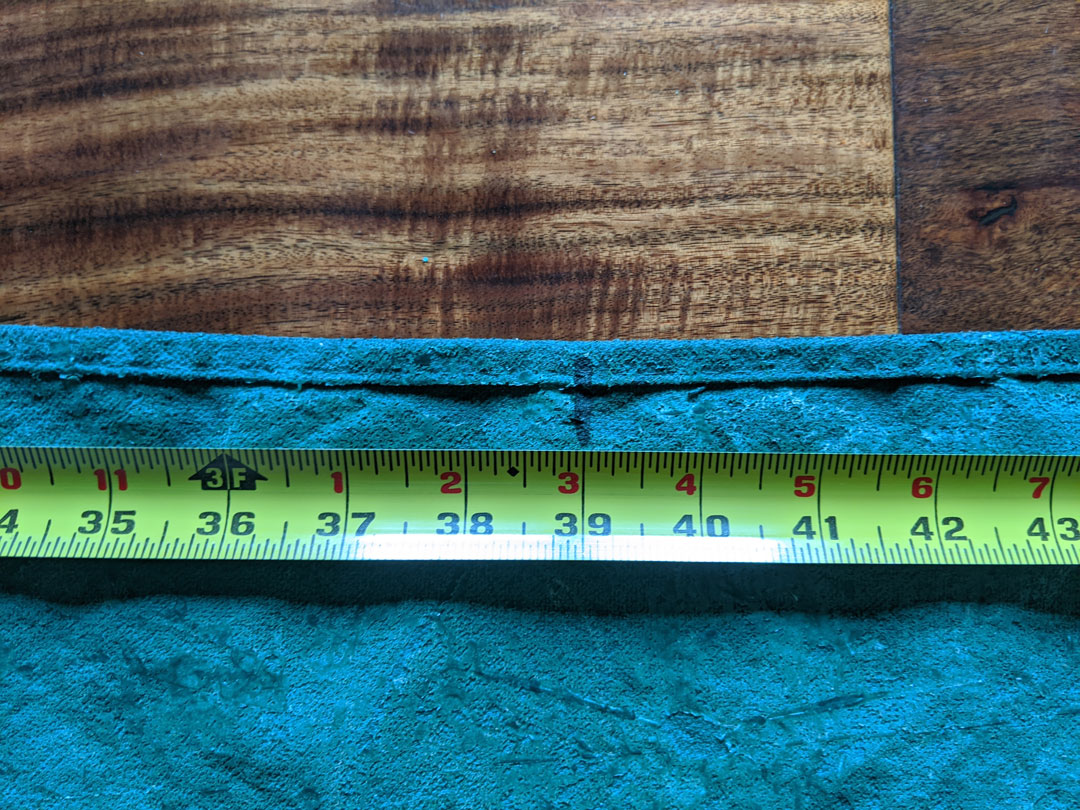
Measure the wall you’ll be installing your floating bench on. Since I was making a DIY closet bench I measured the back wall from edge to edge and decided on the depth I wanted (24″ in my case).
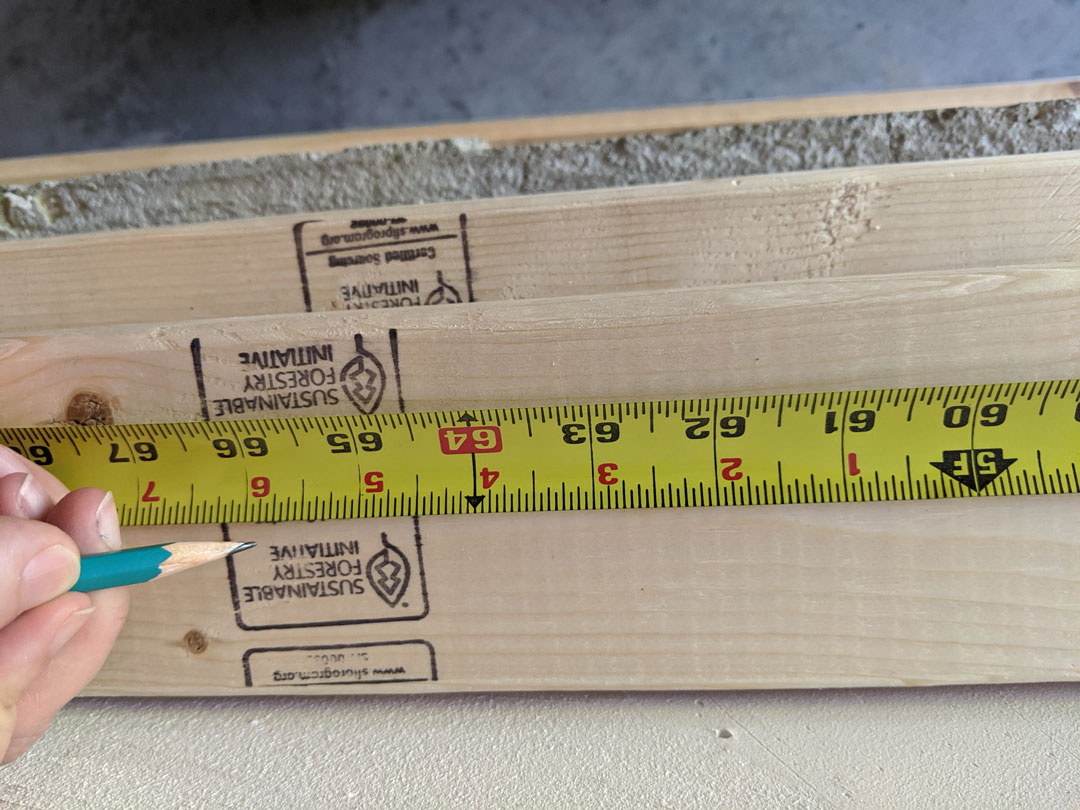
Once you have your measurements, determine how many 2x4s you’ll need in linear feet. You’ll need a back, a front, two sides, and a center brace. In my case, I had a 66″ closet so I needed two 66″ 2x4s for the front and back (66″ x 2 = 132″).
For the side and brace pieces, I butted the wood up to the front and back pieces so I needed that 24″ length less the depth of the front and back 2x4s (roughly 24″ – 4″ but 2x4s aren’t exactly 2″ deep. To make two side braces and a double thickness center brace, I needed 4 20″ pieces (20″ x 4 = 80″)
You don’t have to be exact unless space constraints dictate you do). I used 20″ side and brace pieces so my bench technically ended up being 23″ with zero consequences.
So ultimately I needed 212″ linear inches of 2×4 i.e 3 pieces.
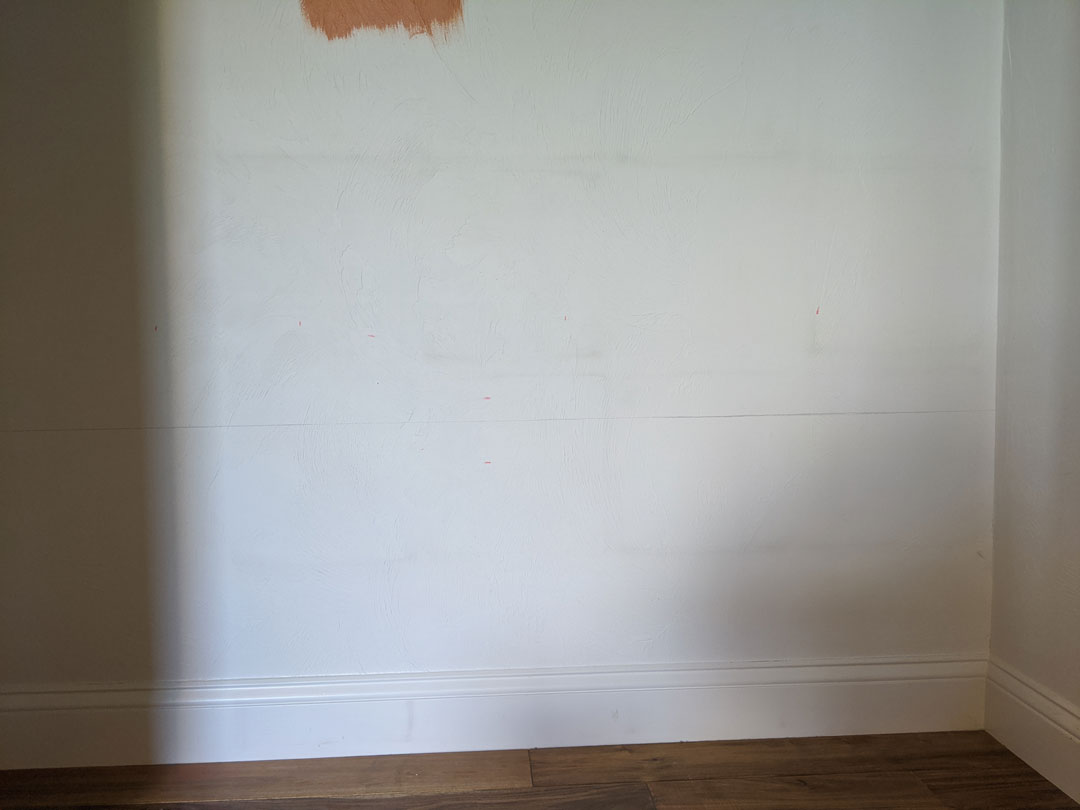
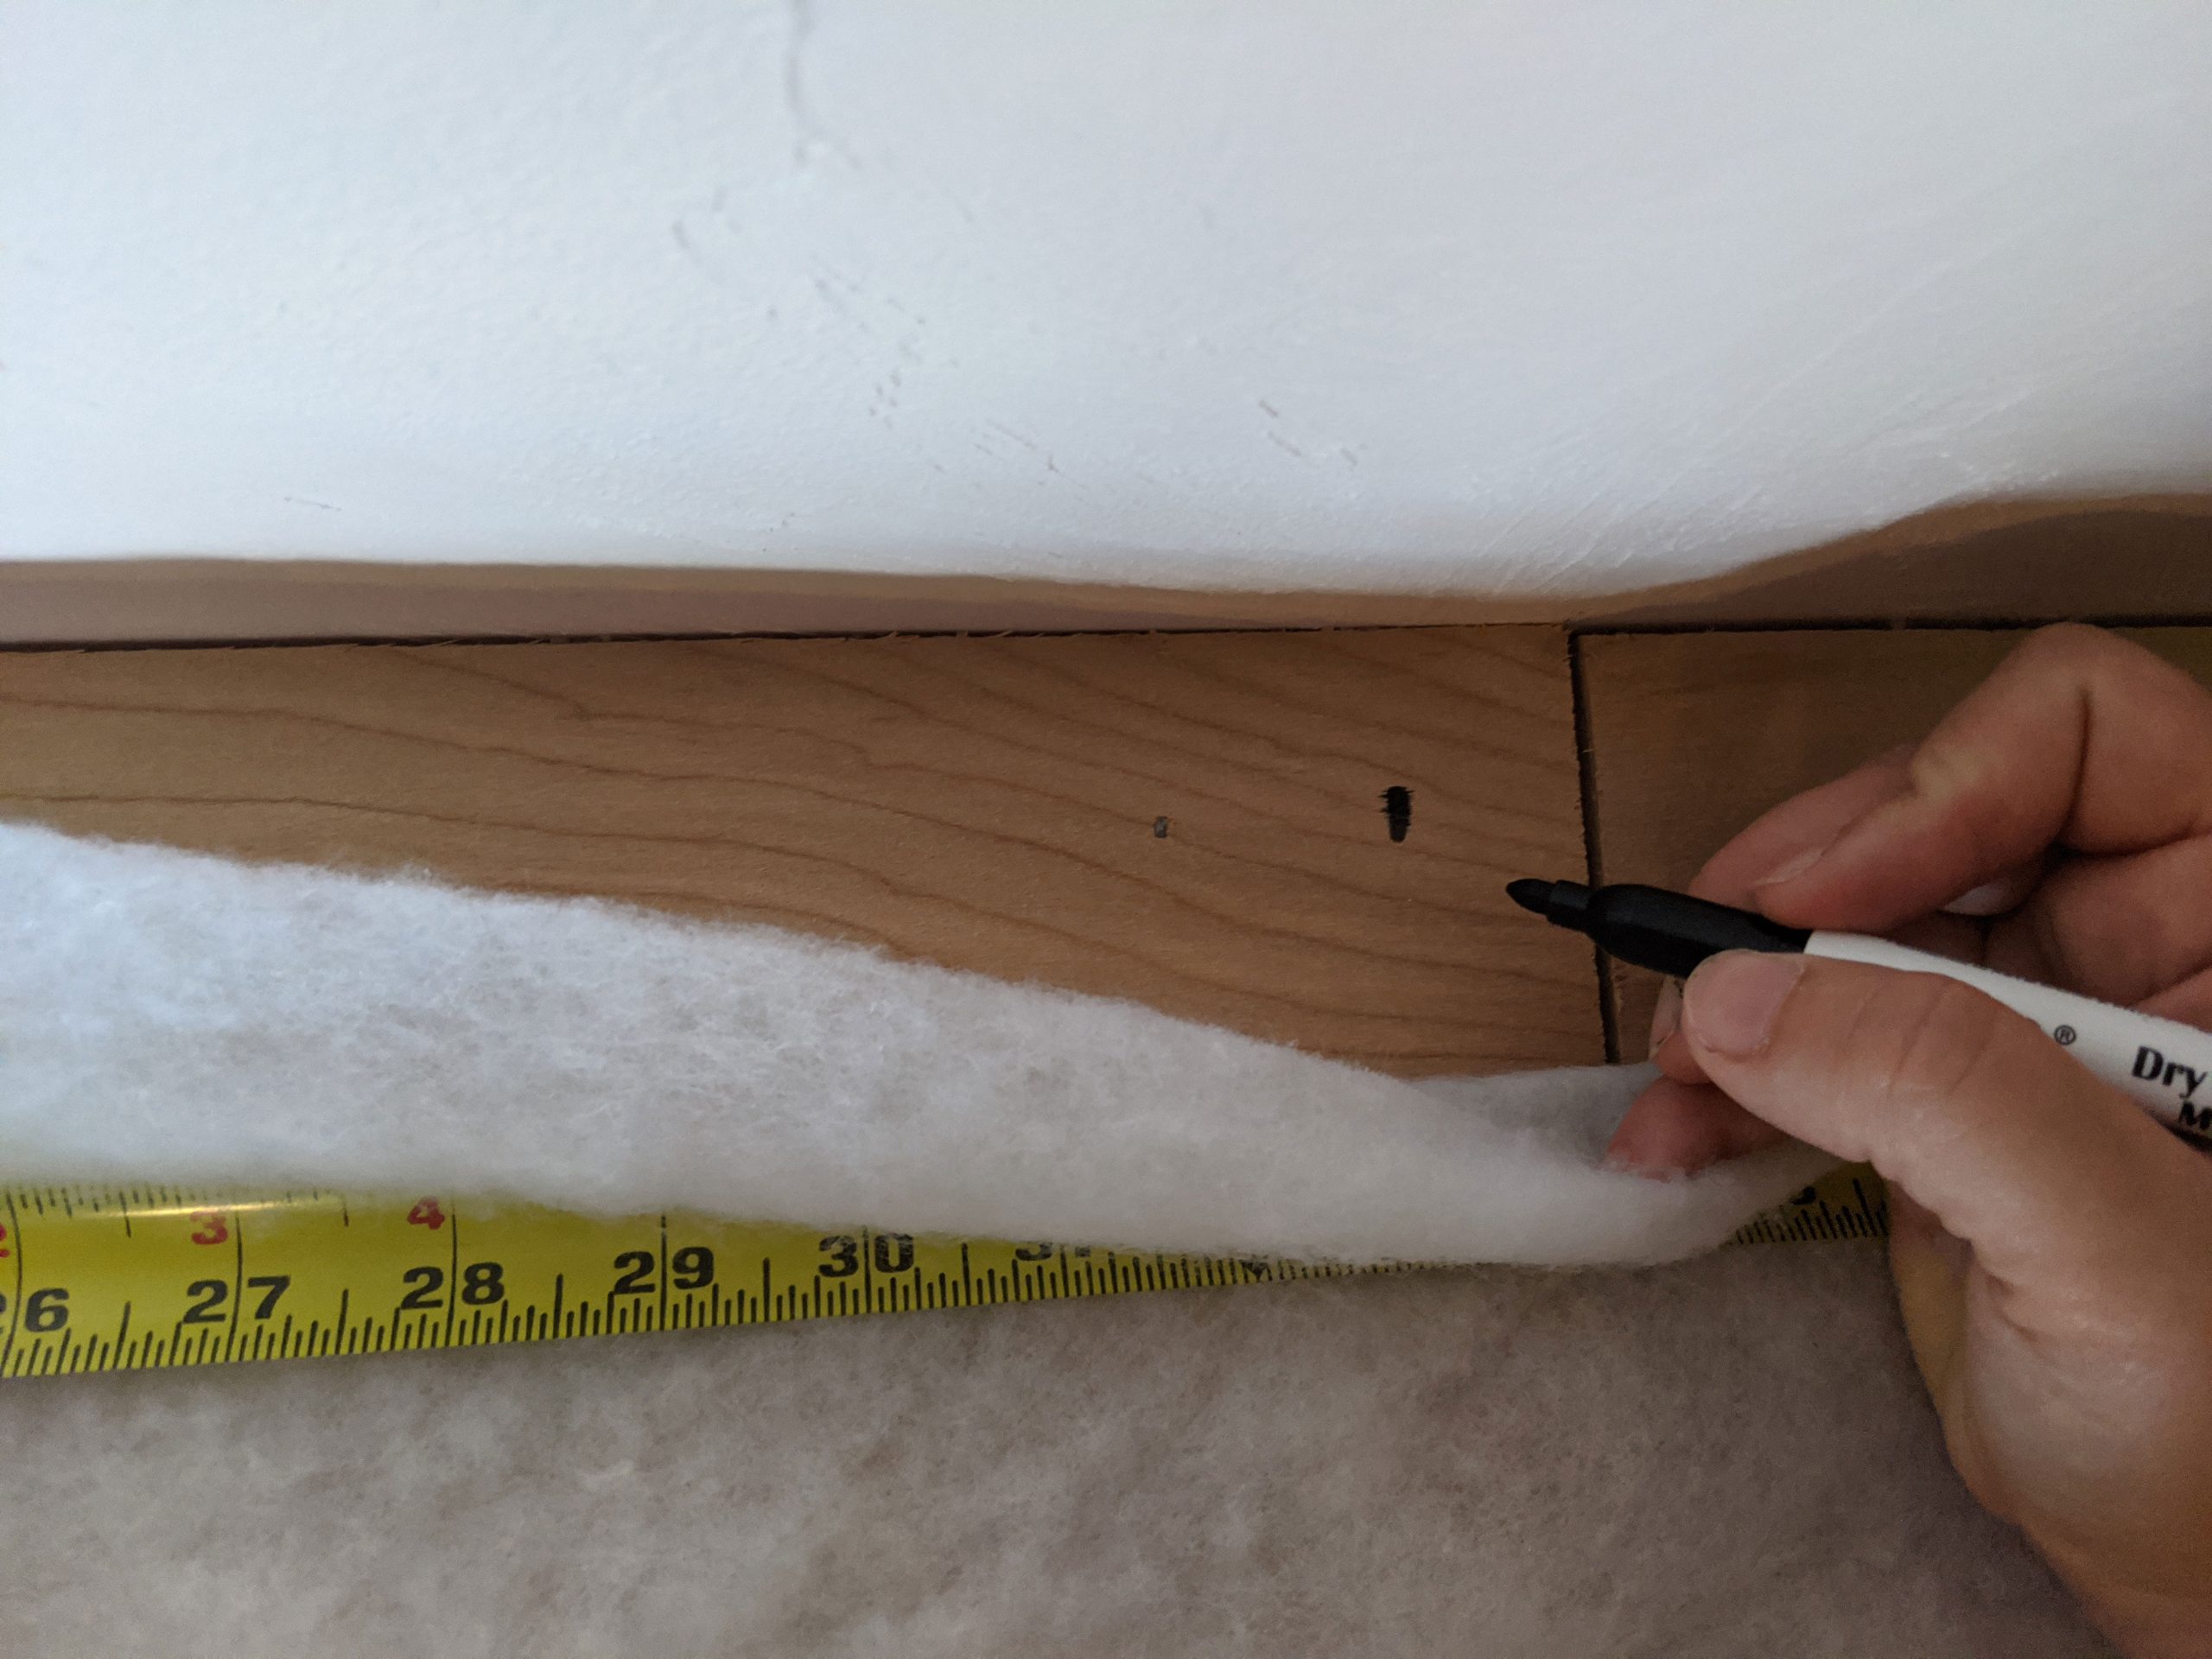
Step 2: Mark a level line on the wall
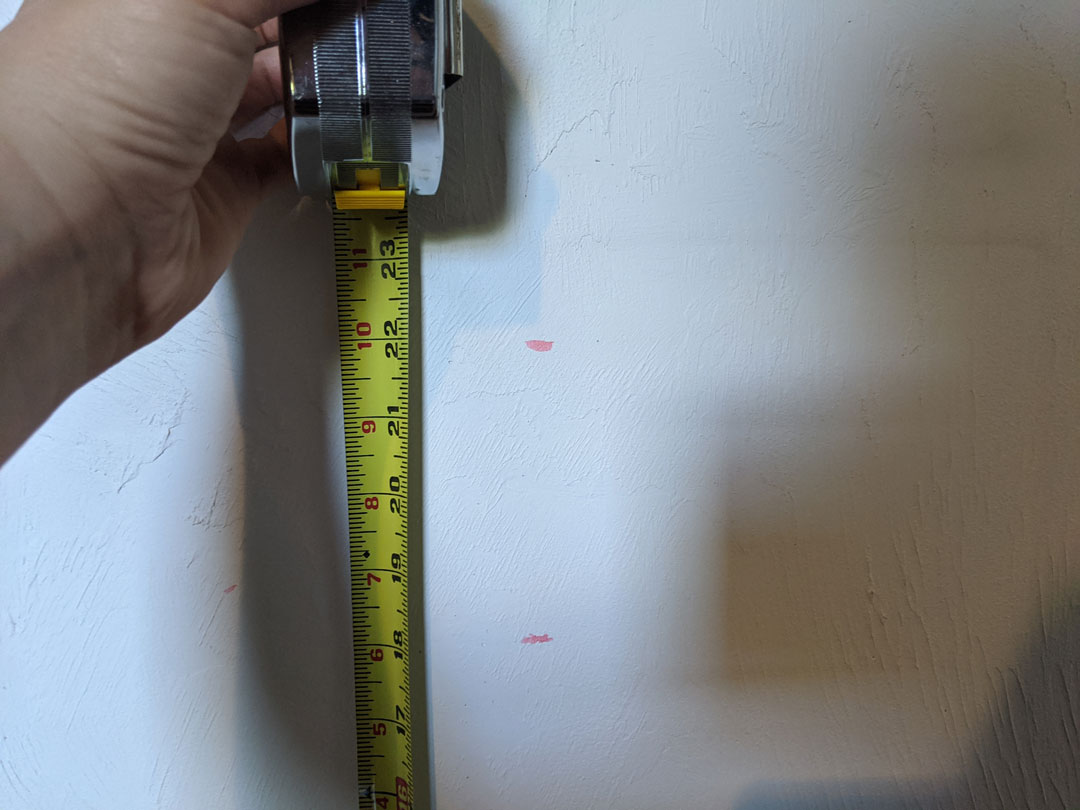
Decide how high you want your bench to be, then mark a level line on the wall. Keep in mind that you need to add the height of the 2×4 (roughly 4″) plus the depth of the upholstery foam (3″ in this case).
For our closet reading nook, the girls wanted something fairly high up, and I wanted to be able to slide their laundry basket underneath, so I measured for a 20″ under bench clearance:
20″ (clearance) + 4″ (board height) + 3″ (cushion height) = 27″ (top of bench)
Mark the wall where the top of the bench will reach.
Next, make a few more marks at the bench height, then connect them with a straight edge. Use a level or this app to determine whether the line is level. How far off is it? If less than 1%, go with that. If it’s a lot — like in an old house — re-mark to a true level, so the bench is comfortable. It may not be level to the floor, but that’s the charm of old homes, right?
Make another level line three inches below your top line. This will be the line you align the 2×4 back brace to.
Step 3: Find your studs
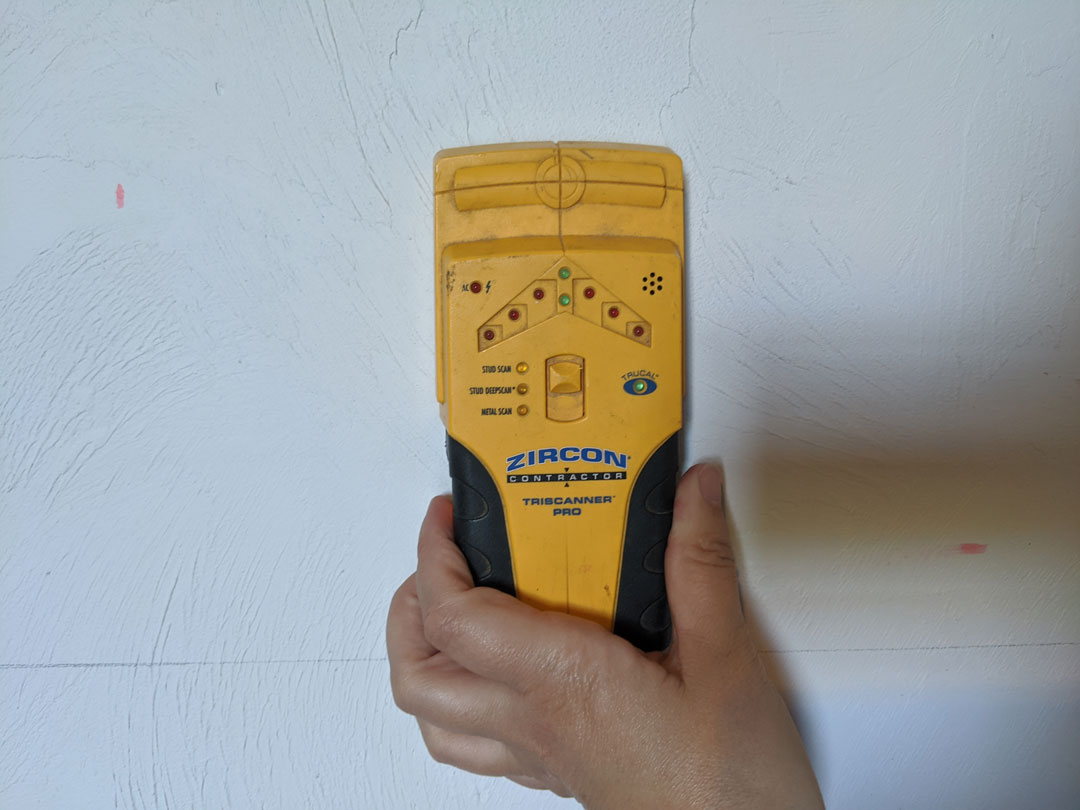
Use a stud finder to locate and mark the studs along the level line you just drew. It’s fine if you can’t drill into a stud for every screw; just be sure to use a wall anchor when there’s no stud and hit a minimum of two studs on the back brace, and one on each side.
This rough formula works for a bench that’s 6 feet or less. For a longer bench, you’ll want to hit more studs and add more center braces (continue reading for clarification).
Step 4: Mark the stud locations on your back brace
Cut a 2×4 to the desired width of your bench and mark the stud locations on the board. You can certainly drill pilot holes directly into the wall along a level line if you’d like, but I found it difficult to match up with where I was drilling on the board, so I don’t think it’s worth it.
Instead, hold the 2×4 along the bottom level line and draw a line down the face of the board from where you marked all the studs on the wall. As long as you drill a pilot hole then a screw into this line, you’re golden.
Step 5: Screw the back and side braces to the wall
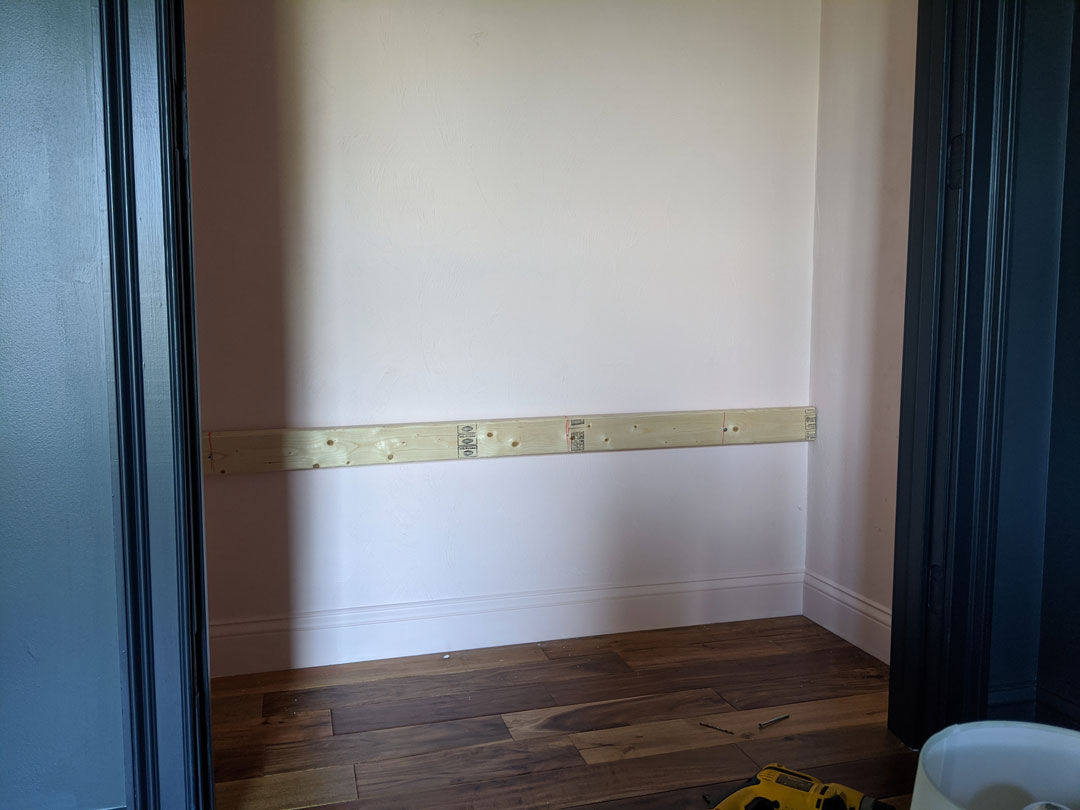
Using the stud lines you just drew on the board as a guide, drill pilot holes and 3″ screws into your back brace and the wall. Use this same method I outlined for the back brace to level and drill the side braces into the sides of the closet.
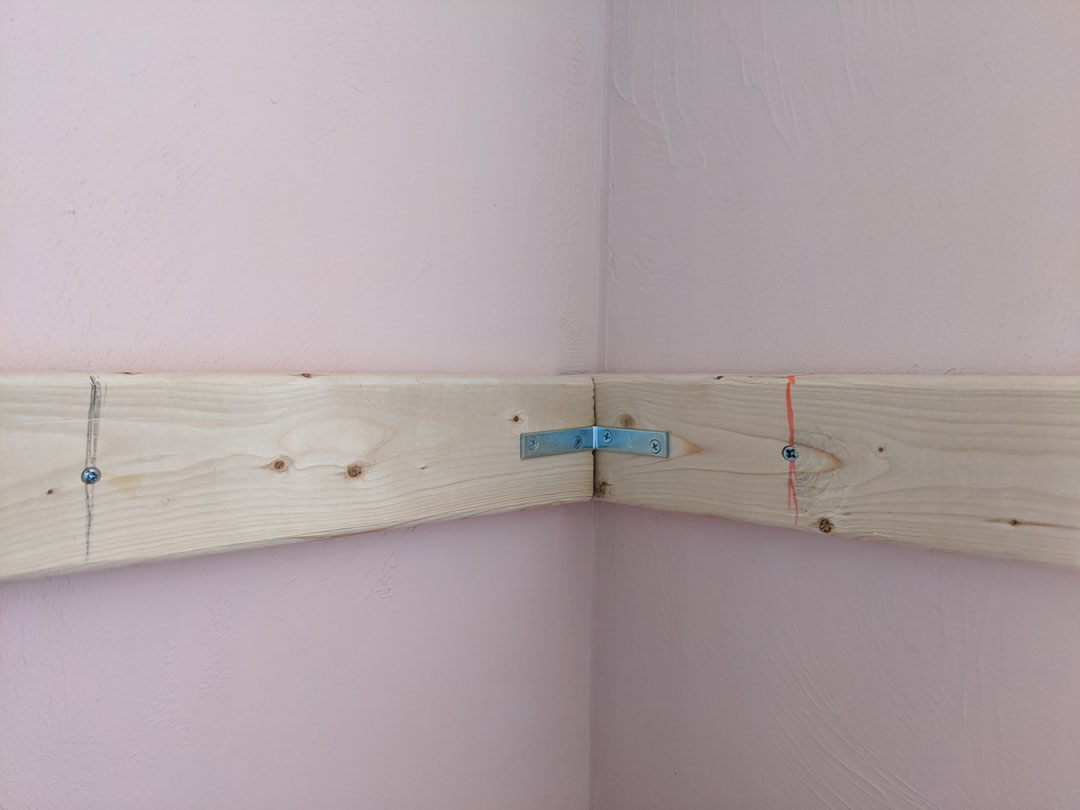
Be sure to butt the side brace pieces directly up against the back brace.
Step 6: Screw the front 2×4 into the side braces
Grab the other long 2×4 you cut (the front brace) and screw it into the side braces. Depending on how much room you have, you can do this with pocket holes, directly from the front of the piece, or using the corner braces we’re about to reinforce the whole frame with.
Note: Be sure to check for level, but if you hung the other braces correctly the front brace should automatically be level.
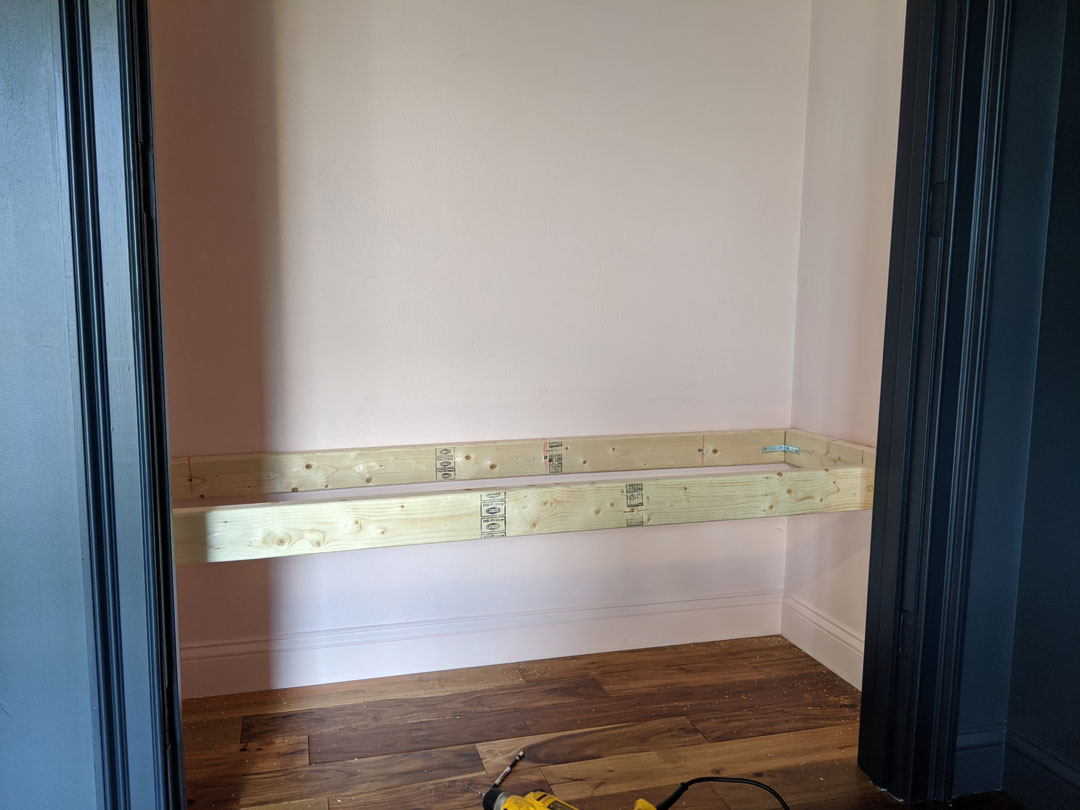
Step 7: Add a center brace
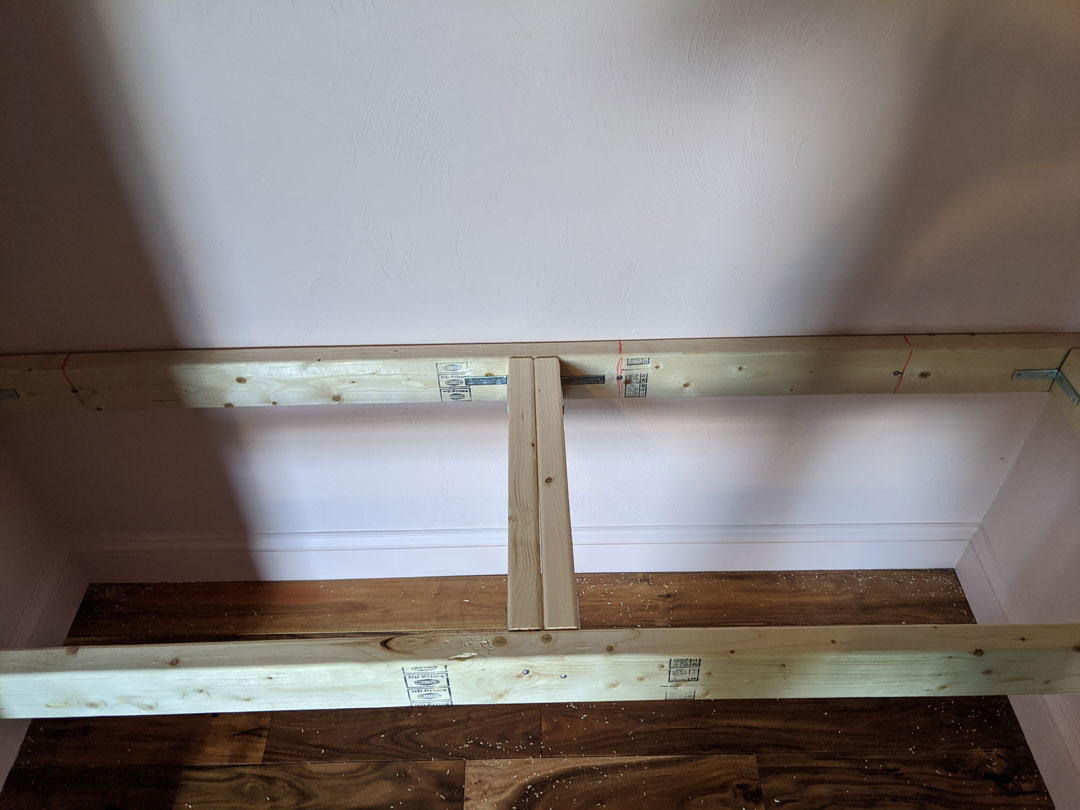
Use two 2x4s cut to the size of your side braces to create a center brace. This won’t be necessary for a shorter bench, but in general, you should have a perpendicular brace every three-ish feet. Mine was a little less, but with rambunctious kids, I figured the more reinforcement, the better!
Add the brace using two of the corner braces to attach the center brace pieces to the front and the back. I didn’t use anything the “stick” the two boards together, just placed them right next to each other. I used two, so I’d have a chunky center piece to attach the plywood top to.
Step 8: Reinforce each corner with a corner brace
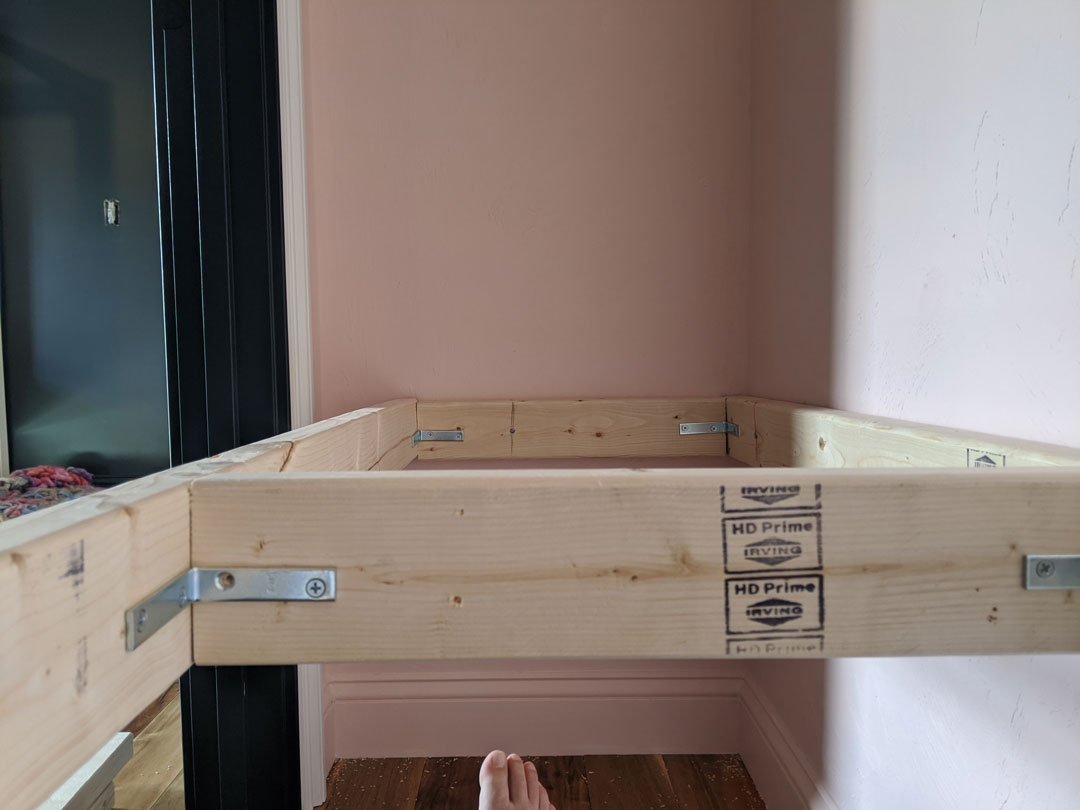
Strengthen your floating bench frame by attaching a corner brace (or two) to each corner of the structure. You could opt to do this with pocket holes and additional screws, but I feel like the corner braces are easier, faster, and just as effective. If you’re prioritizing cost savings, go with the pocket hole method.
Step 9: Cut and attach the plywood top
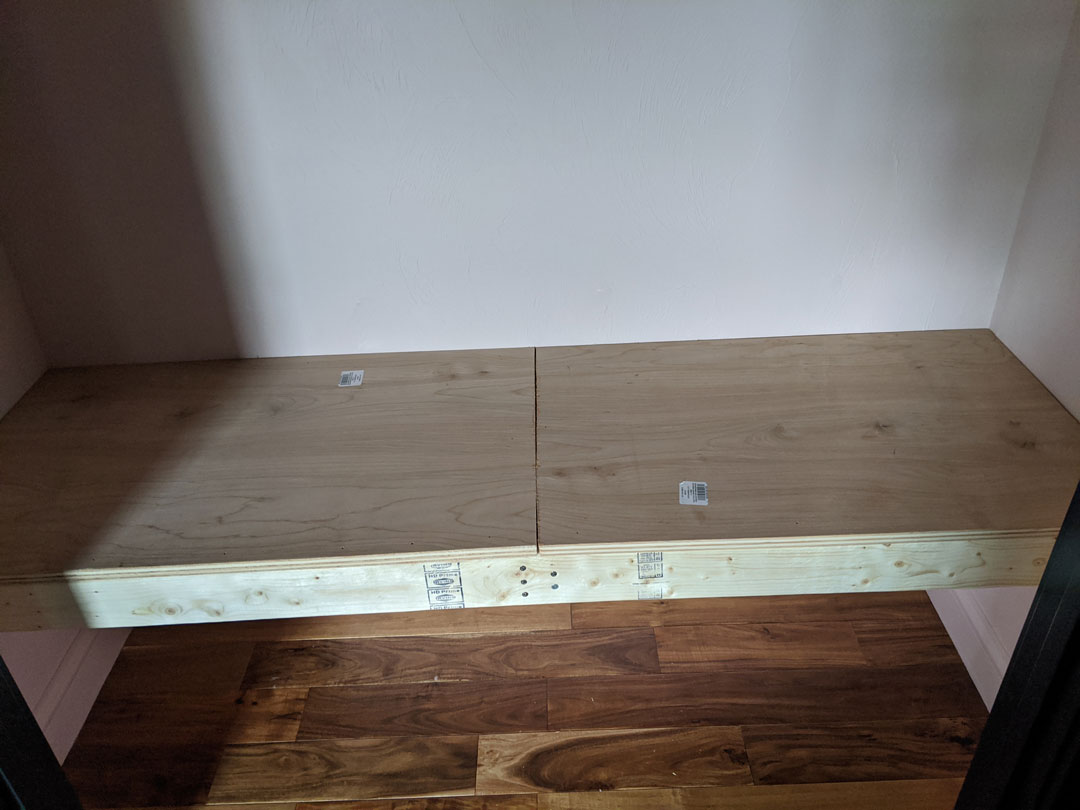
Cut your plywood sheet to the size of the bench top and attach with pin nails. You don’t need a ton since gravity is working in your favor, just enough to hold the plywood in place.
I opted to cut the plywood into two smaller pieces and use the center brace to attach the plywood along the center seam. This made it way easier to cut, transport, and fit the plywood into the second-floor closet space. Since we’re upholstering the top, the seam doesn’t matter.
Step 10: Cut your foam to size
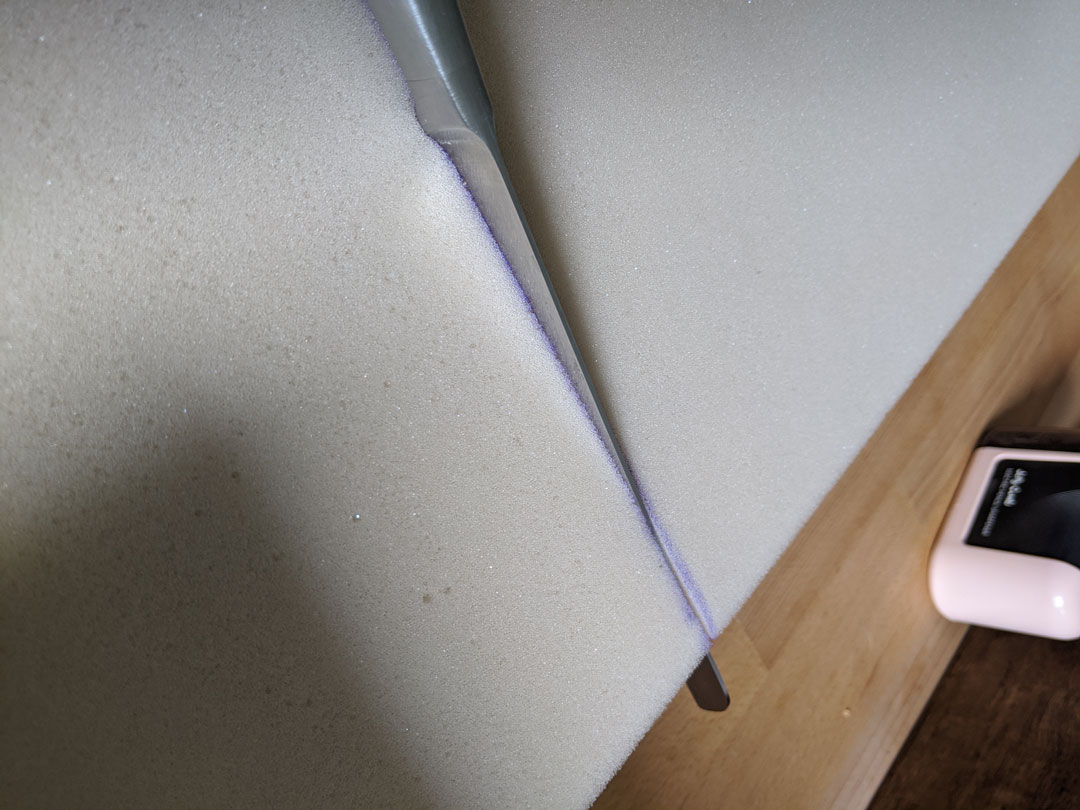
Measure and cut your upholstery foam to the size of the bench. Here’s a quick post teaching you how to cut upholstery foam if you’re not sure how to do it cleanly.
Step 11: Cut your fabric to size and mark the center
Measure your fabric and cut it semi-close to the final size you need. Use the length of the bench and add 3″ to each side (so the bench length plus 6″), and the bench depth plus 18″. That’s more than you need but better than not having enough fabric to work with.
Once you cut the fabric to size, find the center of the back edge of the fabric and make a mark on the wrong side, then also mark the center of the bench and a straight line 1.5″ – 2″ in from the back of the wall.
Step 12: Staple the back edge of your fabric along the back line of the bench top
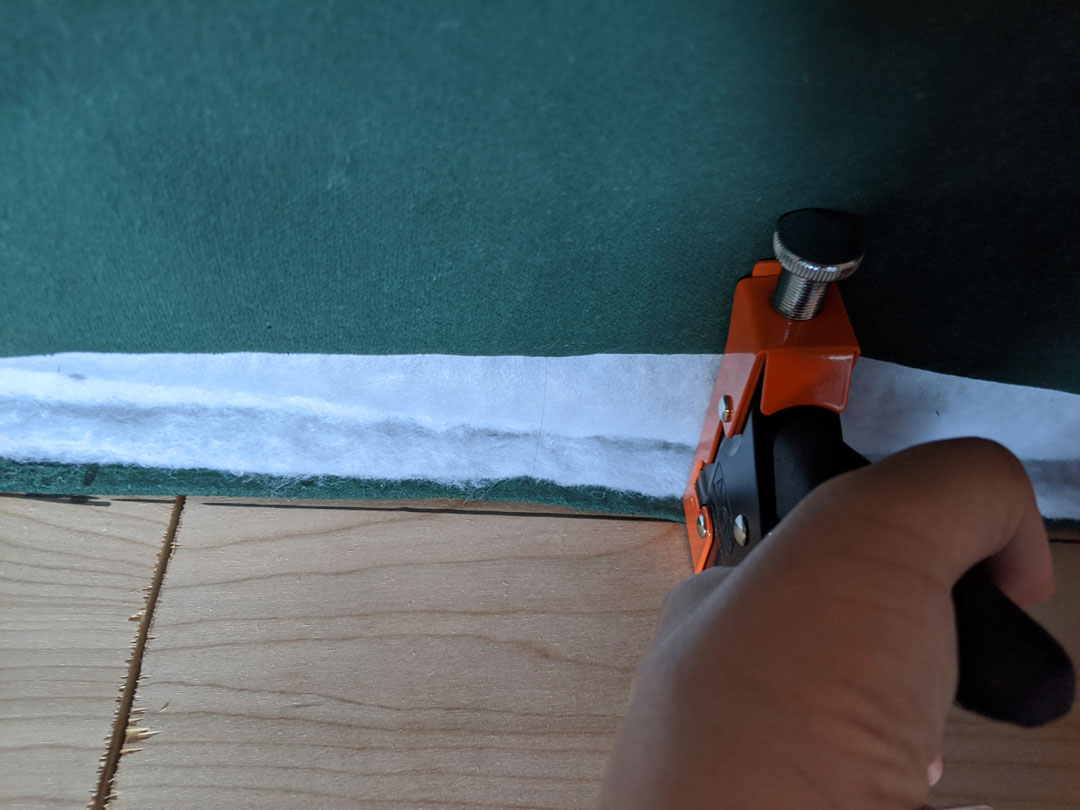
Using the line you just made, center the fabric and staple the back edge to the bench top. Align the center mark of your fabric to the center mark on the bench top and staple the back edge, aligning the edge of the fabric to the back line you drew. Staple first at the center and as close to the wall as you can. Add staples every few inches, pulling the fabric tight, until you’ve stapled all along the back edge.
Step 13: Place the foam on the bench then continue stapling the fabric
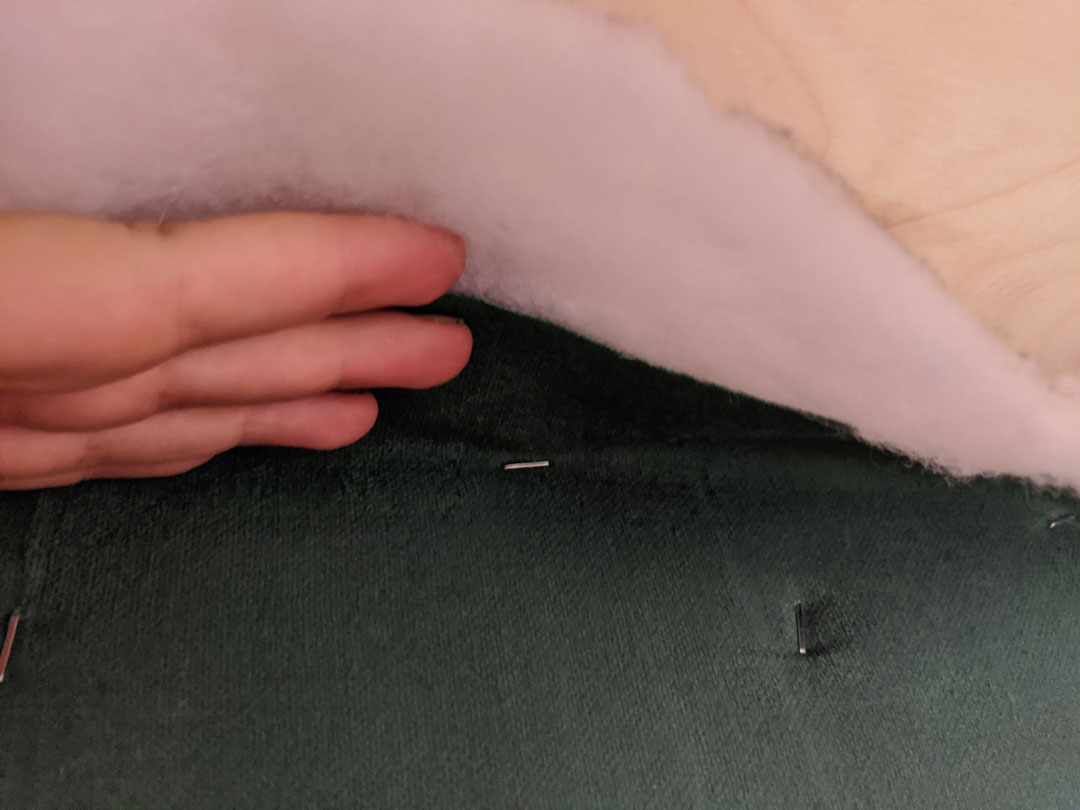
Position the foam on top of the bench and push it as tightly against the back wall as you can. Then, pull the fabric to the front of the bench, wrap underneath the frame, and begin stapling from the center out on the underside of the frame. Be sure to pull everything as tightly and evenly as you can.
Tuck the extra fabric along the sides of the foam. The tension of the front and back staples will hold it in place.
Step 14: Stapling the corners
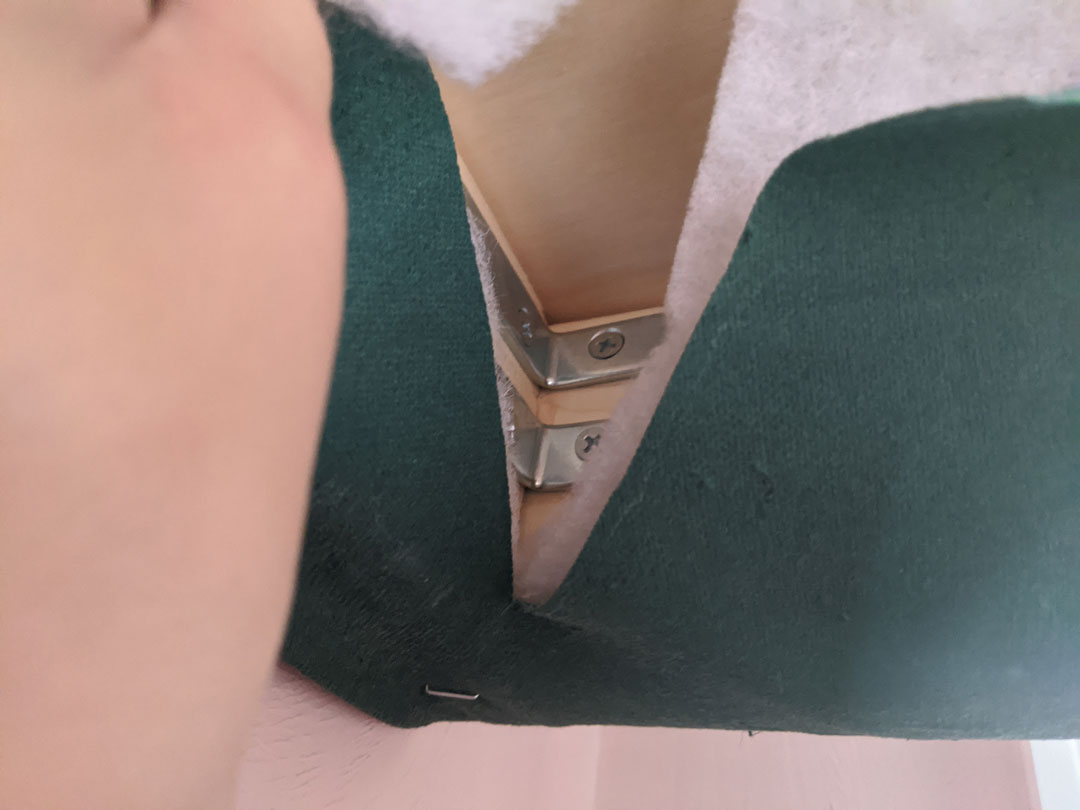
The corners can get messy, you need to cut them a bit. At the front corners where the braces meet, cut a diagonal slit before stapling the fabric to the frame. This will prevent pulling and bunching.
Step 15: Remove the excess fabric
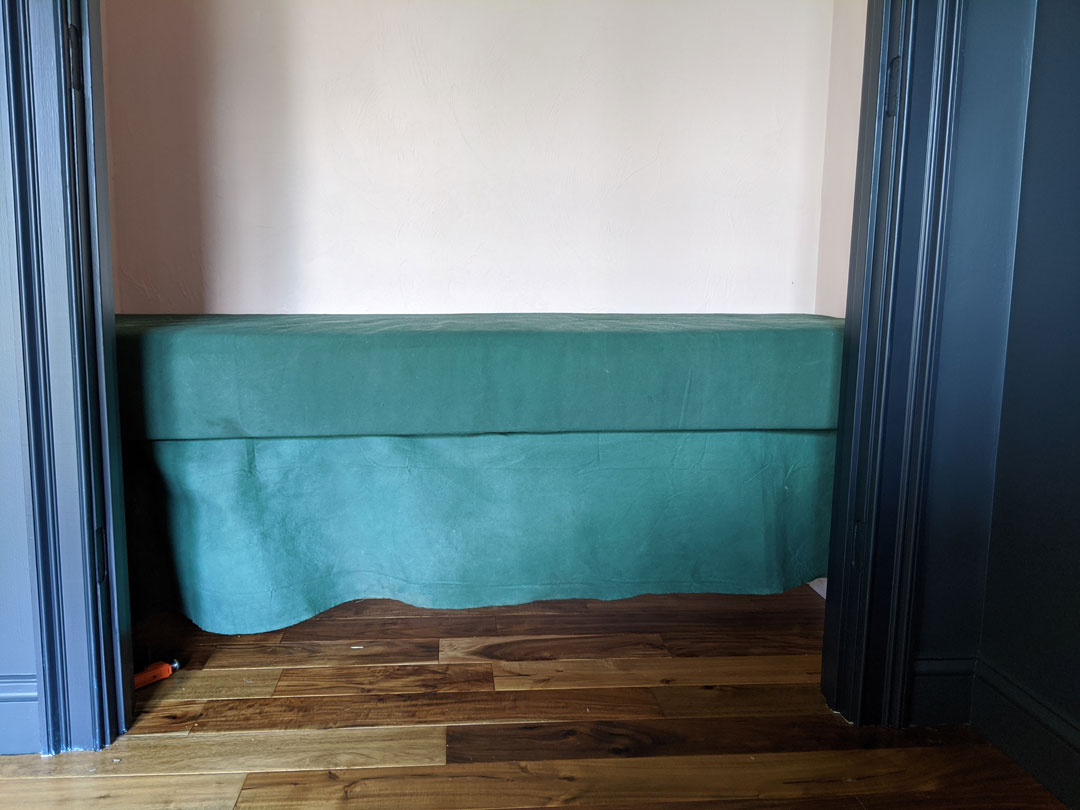
Cut the excess fabric off the frame. Since we were generous with the overhang on the front you’re likely to have 10 or so inches hanging down that needs to be cut off.
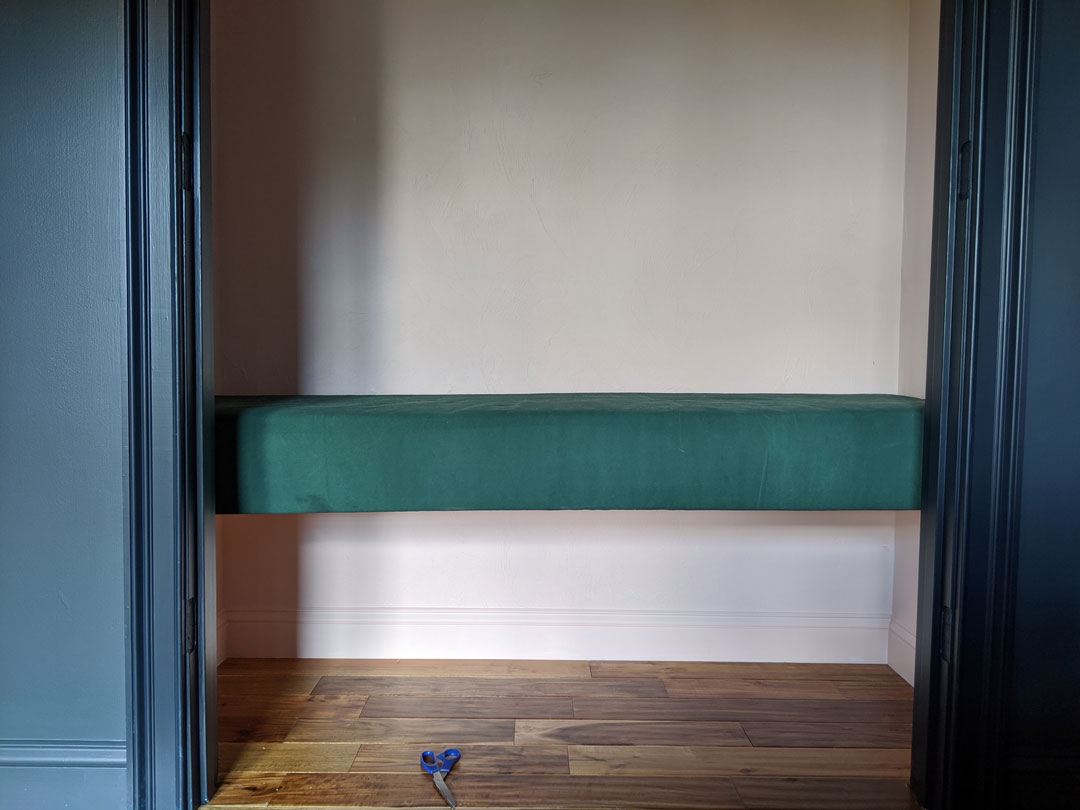
Project complete!
You built a bench! How cool are you? And how pretty is this bench???
For more on the entire closet book nook build, check out this post.
Want more? Here’s the full collection of Bloom in the Black DIYs.