How to Dry Orange Slices in the Oven
When it comes to seasonal decorating, I like to start early, and I like it to last as long as possible. Both in terms of staying power and in terms of appropriateness (i.e. works for fall, Thanksgiving, Christmas, AND the rest of winter!).

One of my favorite classic ways to decorate for the holidays is with dried orange slices. You’ve seen those right? They work for boho, rustic, natural, scandi, midcentury, farmhouse, and traditional decorating styles.
In this post, I’ll teach you how to dry orange slices using only your oven, share how to store them, and how long you can expect them to last.
Pin for later!

This post contains some affiliate links for your convenience. Click here to read my full disclosure policy. Thanks for supporting Bloom in the Black!
How to Make Dried Orange Slices
To make dried orange slices, you’ll bake them at a very low temperature for 4 – 6 hours, flipping them every 30 minutes to prevent burning.
The orange slice decor projects I’ll show you at the end of the post take 5 minutes or less and require the most basic of craft supplies.
MATERIALS NEEDED
- Oranges
- Serrated knife
- Paper towels
- Wire rack or parchment paper
Step 1: Slice oranges thinly
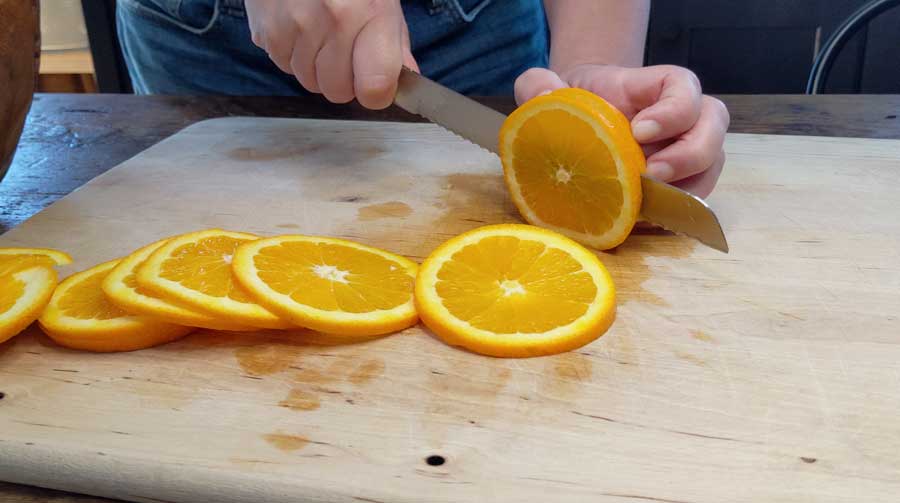
Preheat your oven to 200 degrees and cut your oranges into 1/4″ slices or thinner. I started with a chef’s knife and that was a big mistake. Don’t do what I did — use a serrated knife. A bread knife is perfect for this, but a steak knife will do in a pinch. Want super thin slices? Use a mandoline.
Slice up as many oranges as you’d like, just keep in mind that these will need to bake in a single layer. Be sure you have enough pans, wire racks, and room in your oven to accommodate all of your orange slices.
Step 2: Dab oranges to remove excess moisture
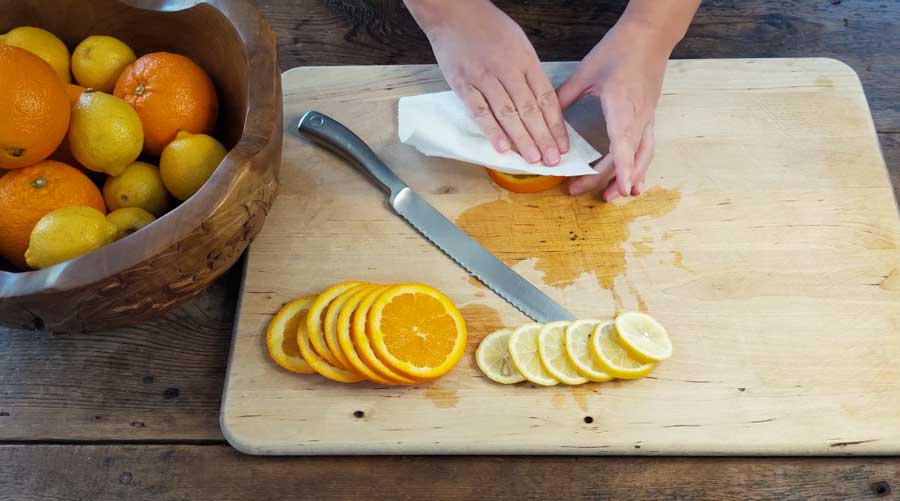
Using a paper towel, blot up all the extra juice and moisture from your orange slices. You want them as dry as possible before placing them in the oven.
The oranges will still dehydrate if you skip this step but it will take much longer to dry the citrus slices and could result in uneven color.
Step 3: Bake oranges
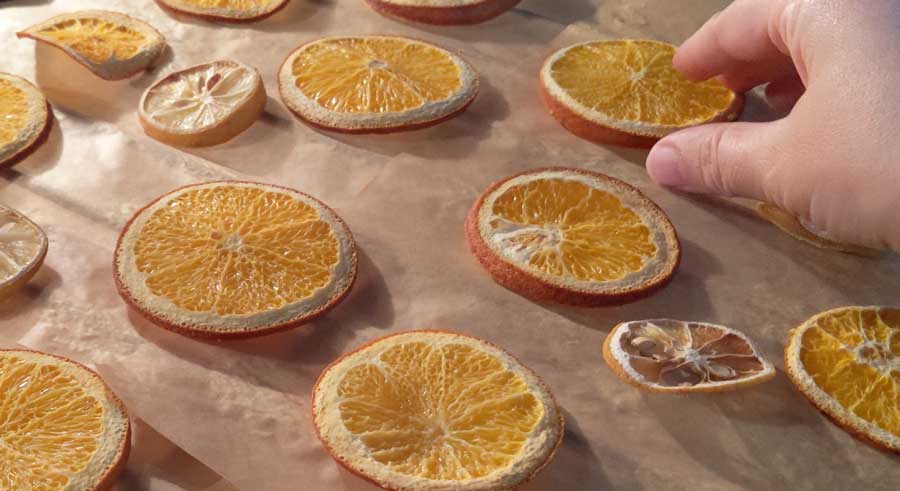
Finally, you’ll bake your oranges for 2 – 6 hours at 200 degrees, flipping them every 30 minutes. This project is mostly hands-off, except for the fact that you need to be available to flip the oranges. If you don’t flip them periodically, they won’t dry evenly and could potentially burn.
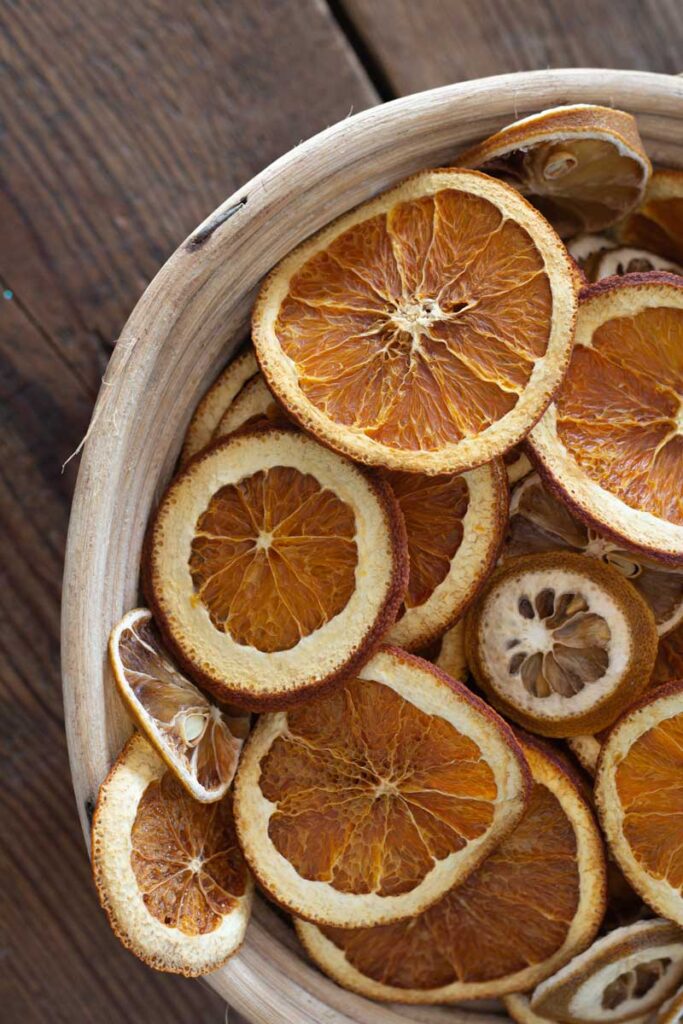
Just check every time you flip to see if they are becoming slightly glassy like a stained window. Once they are, they’re done! Your dried oranges will continue to dry out over the next month or so.
You can choose one of two baking methods:
Method 1 for drying orange slices
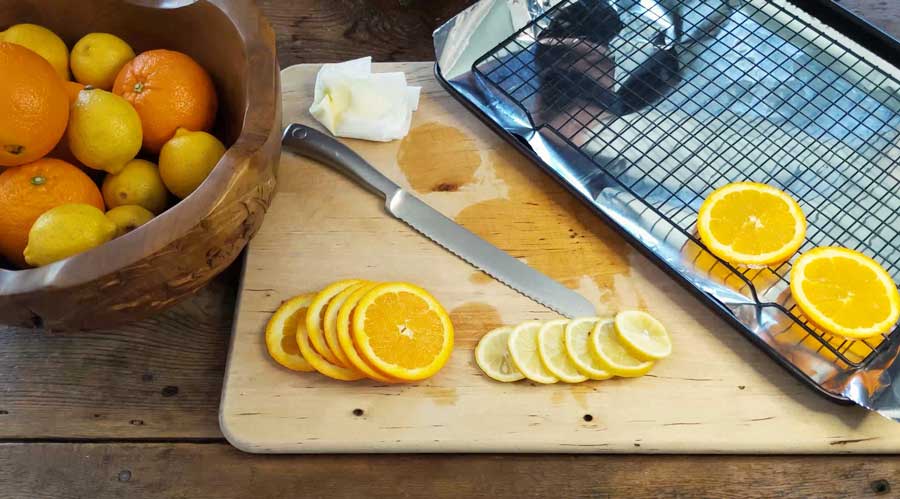
Place the oranges in a single layer on top of a wire rack placed on a cookie sheet. Having the warm oven air circulating all around the citrus slices will allow them to dry slightly more quickly.
Do not place them directly onto a cookie sheet or they will stick and become gummy.
Method 2 for drying orange slices
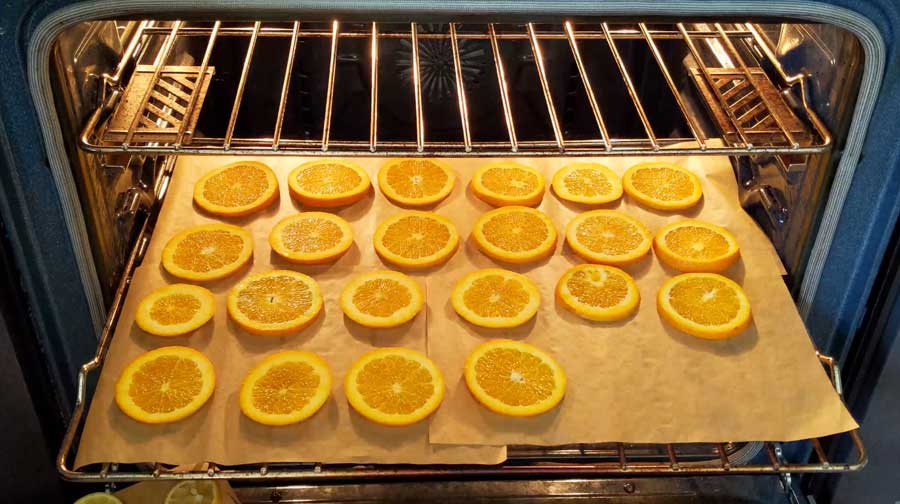
Alternatively, you can cover your oven rack with parchment paper and lay the citrus slices directly on the paper-covered rack. This allows you to dry FAR more slices at once and may result in more even color. The downside is that it can take slightly longer for your orange slices to dry thoroughly.
Watch the video below to see the different results from each orange drying method:
How long does it take to dry oranges slices in the oven?
The total time to dry oranges slices in the oven will be between 2 – 6 hours. The length of time will depend on how thick your slices are and how hot your oven runs. I sliced mine a little on the thick side, so they took a solid 6 hours. If you use a mandoline, your orange slices could need as little as 2 hours to dry.
How long do dried orange slices last?
If you’ve dehydrated them properly, your orange slices will last approximately two years. If you didn’t remove enough moisture during the baking process, they may develop mold while in storage. When properly dried, mold will not develop, but they won’t look as good past the two-year mark.
Luckily, dried orange slices are cheap and easy to make year after year!
A bag of these orange slices can make a very affordable gift! Here are 10 more affordable gift ideas.
Easy Decorations You Can Make With Dried Oranges
How to Make a Dried Orange Wreath
Materials for wreath:
- Dried orange slices
- Grapevine wreath form
- Glue gun
- Jute twine
- Dried bay leaves and nutmeg (optional)
To make a dried orange wreath, you need dried orange slices, a grapevine wreath form, and a glue gun. For my wreath, I used a 6-inch grapevine form but you can go as large as you’d like. Squirt a dab of hot glue to the white pith edge or skin of the orange slice and press to wreath to adhere.
It’s important to apply the glue to the skin because it’s the highest point of the slice. If you add glue to the orange flesh you might not catch the wreath with the glue.
Continue gluing slices in overlapping layers until you’re happy with the look. You might choose to embellish your wreath with bay leaves and nutmeg as I did in the video below:
How to Make Dried Orange Ornaments
Materials for ornaments:
- Dried orange slices
- Glue gun (this is my favorite budget model)
- Jute twine
To make dried orange ornaments, you need dried orange slices, jute twine, and a glue gun. Simply cut 4″ – 6″ lengths of twine (longer for ornaments that hang lower, shorter to hang higher), and glue the ends to make a loop. Then, glue the loop to the back of the orange slice. Easy peasy! Watch the video below for a demonstration:
How to Make a Dried Orange Swag
Materials for swag:
- Dried orange slices
- Glue gun
- Jute twine
- Pine clippings
To make a dried orange swag, you need dried orange slices, jute twine, a glue gun, and some pine clippings. Gather your pine clippings (I used three in lengths varying from 12″ – 18″) and hold the branch ends together. This will be the top of your swag. Wrap in jute twine and glue to secure. Glue three orange slices to the top in an arrangement that looks good to you. Watch the video below for a demonstration:
Now you’re all set for the fall season, the holidays, and beyond!
Want more? Here’s the full collection of Bloom in the Black DIYs.