How to Stencil an Accent Wall (Costs 80% Less Than Wallpaper)
Have you ever wanted to DIY an accent wall somewhere in your home but thought you couldn’t afford it? That was me when I decided to redesign my drab master bedroom into a dark and moody retreat. I was dreaming of adding a lush wallpaper accent wall behind the bed, but wallpaper can be pricey.
But a stenciled accent wall is both affordable and easy to DIY.
In this post, I’m going to teach you how to stencil an accent wall, for 1/5 the cost of most wallpaper.
Pin for later!

This post contains some affiliate links for your convenience. Click here to read my full disclosure policy. Thanks for supporting Bloom in the Black!
How to Stencil an Accent Wall
The basic steps to stenciling an accent wall are to paint the base, stencil from the center, and work your way out. If you’re conservative with the amount of paint you load your brush with and clean your stencil periodically you’re almost guaranteed amazing results.
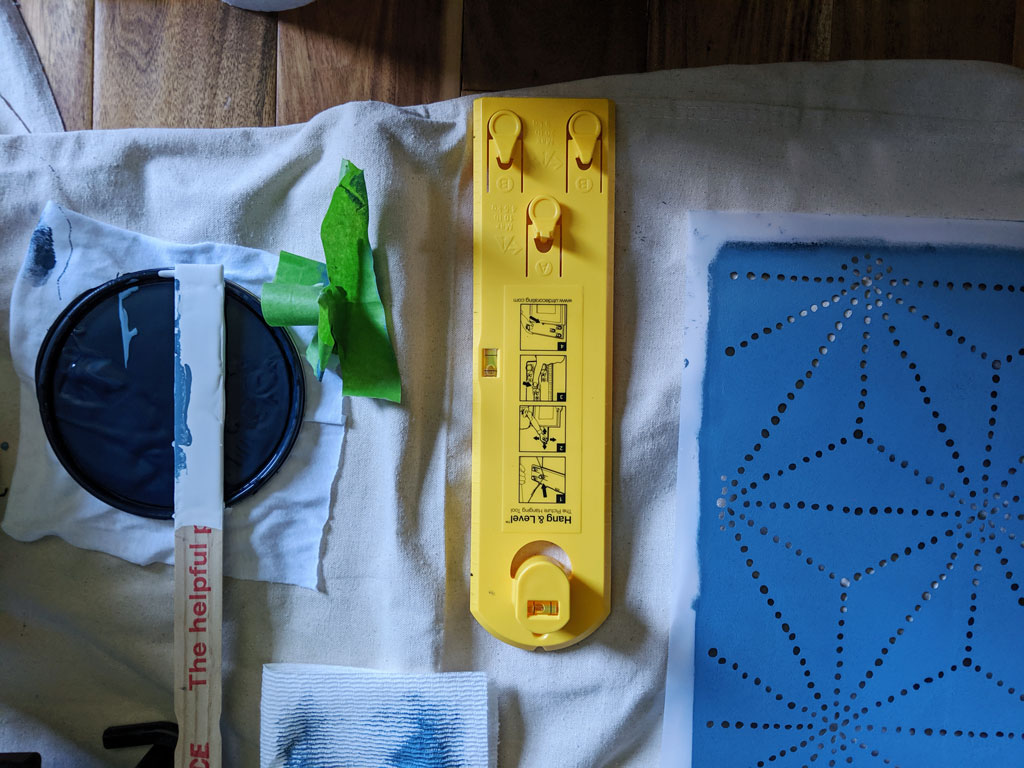
MATERIALS NEEDED
- Stencil, preferably large (I used this one)
- Small foam roller
- Paint tray (use a plate in a pinch, but a tray is easier)
- Paper towels
- Level
- Painter’s tape
- Tape and Drape (optional)
- Paint of your choice (one for the background, and one for the pattern)
Step 1: Paint the wall
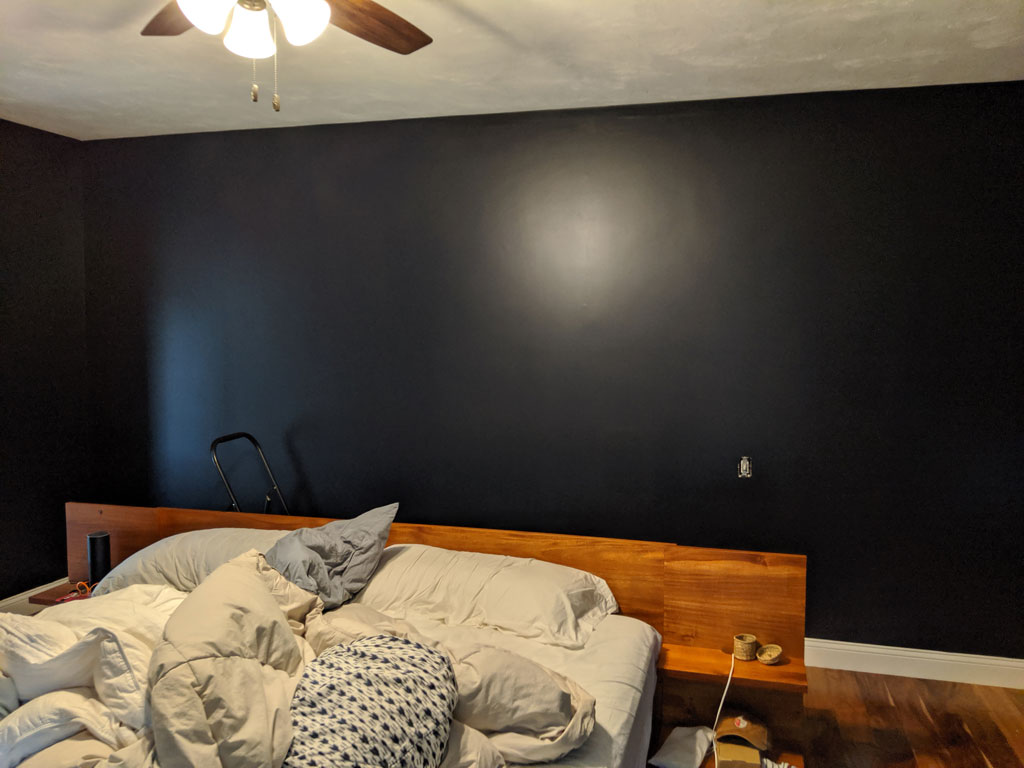
First, you’ll paint the wall the color you’d like for the background. Even if you’re keeping the wall the same color, I still recommend a fresh coat of paint for the best results.
The reason? It may be more beat up than you think, and the last thing you want is to notice after you’ve already started stenciling. It’s too late at that point unless you want to start over!
Be sure to tape off the adjacent walls so no paint migrates over. A simple line of painter’s tape will do in a pinch, but I like the coverage that the Tape and Drape gives. I got a little sloppy with the stencil at the corners and it saved me from a mess.
Step 2: Locate the center of the wall
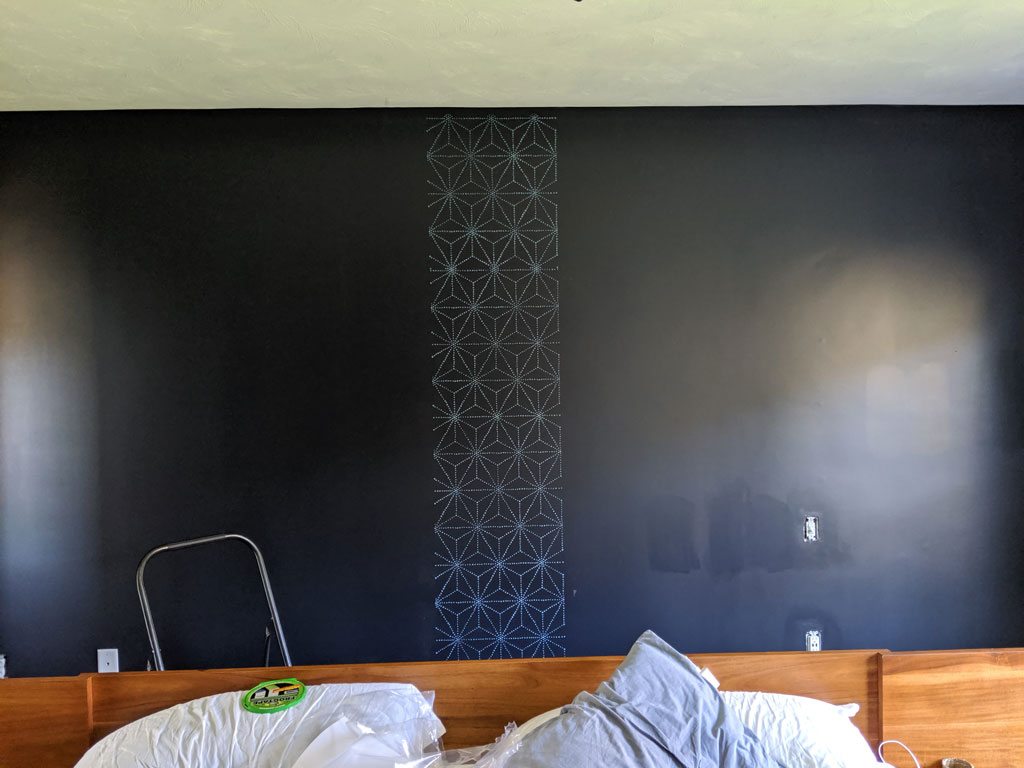
When stenciling an accent wall, you need to start from the center of the wall, moving top to bottom, then alternating left and right. Locate the centerline of the wall. Then, using painter’s tape, and secure the stencil at the top of the wall, directly centered over your imaginary line.
Step 3: Level the stencil
Check your stencil with a level. It’s most important that the stencil is level vertically. Most houses, even new ones like mine, tend to settle and the horizontal planes become slightly tilted.
When it comes to pattern, you ALWAYS want the vertical to be straight. If the horizontal is noticeably out of level, just cheat the stencil up a bit so the lowest point is flush with the ceiling and the high point overlaps a bit.
Once you have your stencil in position, retape as necessary.
Step 4: Roll on your stencil paint
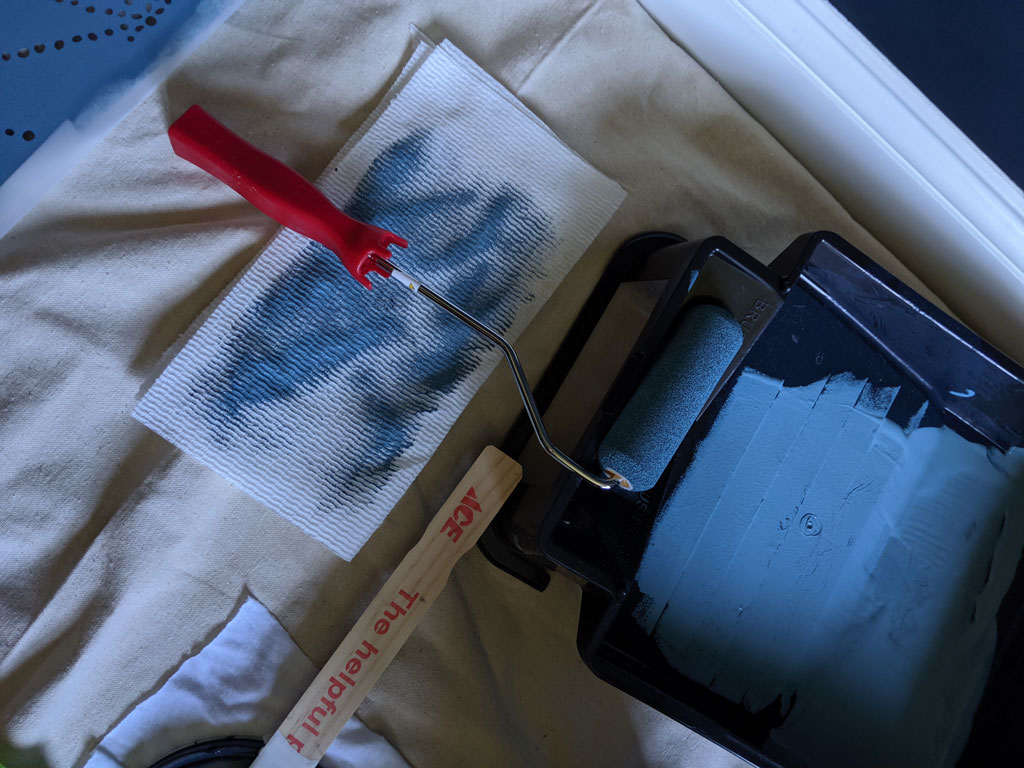
Pour the pattern color into a paint tray and with a small foam roller, begin to roll the paint onto the stencil. Coat the roller with paint from the tray, then pass the loaded roller lightly over a folded paper towel to remove the excess paint.
This technique is called dry rolling and will prevent your paint from bleeding under the stencil. It feels like a lot of paint is wasted, but it’s a necessary step that is well worth doing for the best results.
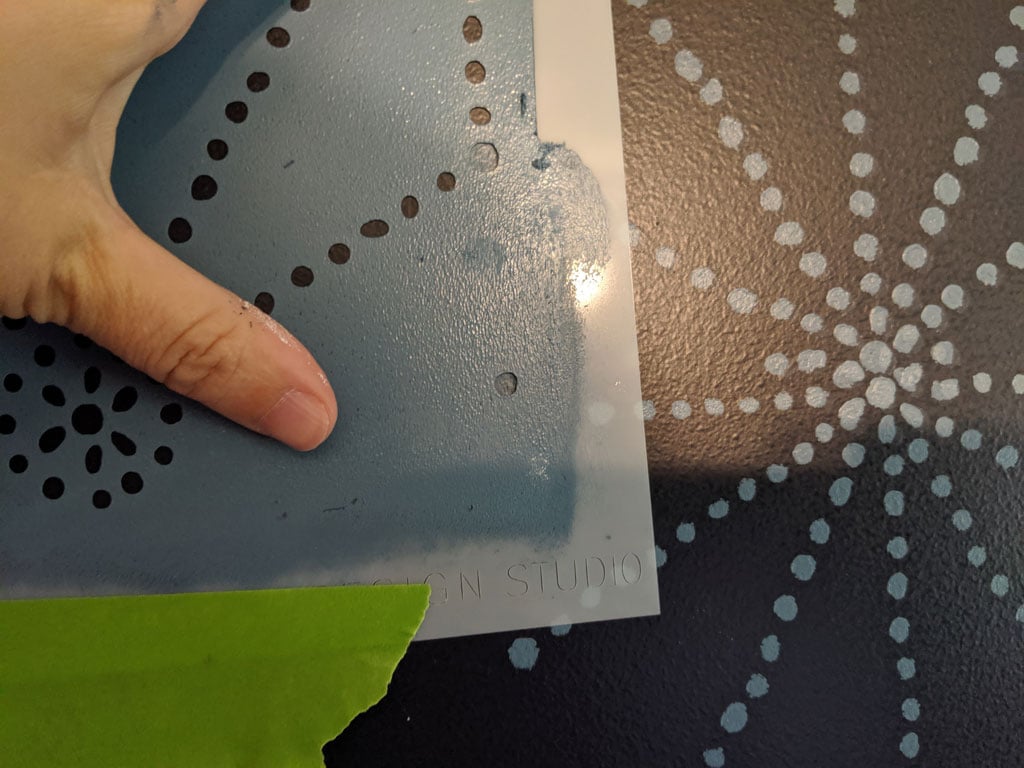
Once you’ve completely painted your stencil, reposition it directly below the part you just painted. Most stencils will have registration marks that help you precisely position your stencil each time.
Helpful hints for stenciling an accent wall:
- Always have a few strips of painters tape torn off and stuck nearby so you can quickly and easily grab one as your tape inevitably loses stickiness through repeated repositioning.
- Always work from top to bottom. When you finish a row, move to the left and start at the top again. When you finish that row, move over to the right and start at the top again. Repeat until complete!
- Periodically wash your stencil. You’ll know you need to because the holes will start to clog with paint. The larger the pattern in your stencil, the less frequently you’ll need to wash it.
- When you reach a corner, either bend the stencil to access the corner or, if you won’t be reusing it, cut it to fit. Some people will gasp at that, but it definitely makes life easier!
Step 5: Touch up the stenciled areas with paint
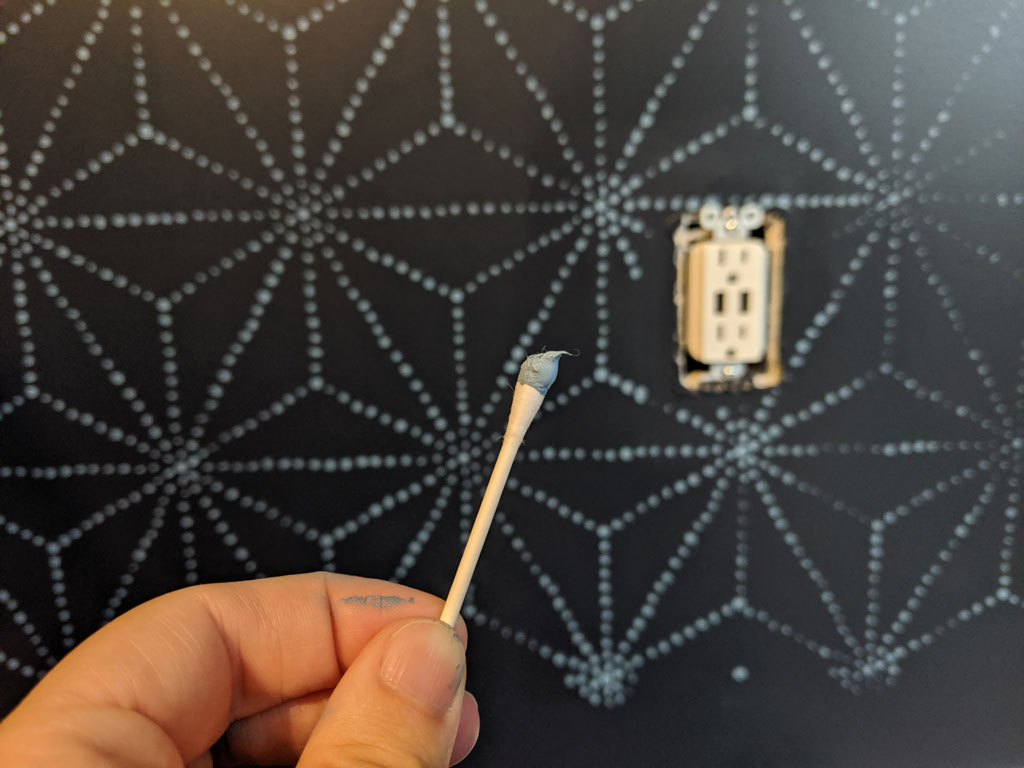
Using a small brush or cotton swab, go in and touch up the paint. A few of my dots were a little faint and small in spots I had trouble getting flush to the wall or when I didn’t wash my stencil soon enough. I simply dabbed paint on those spots and all was well.
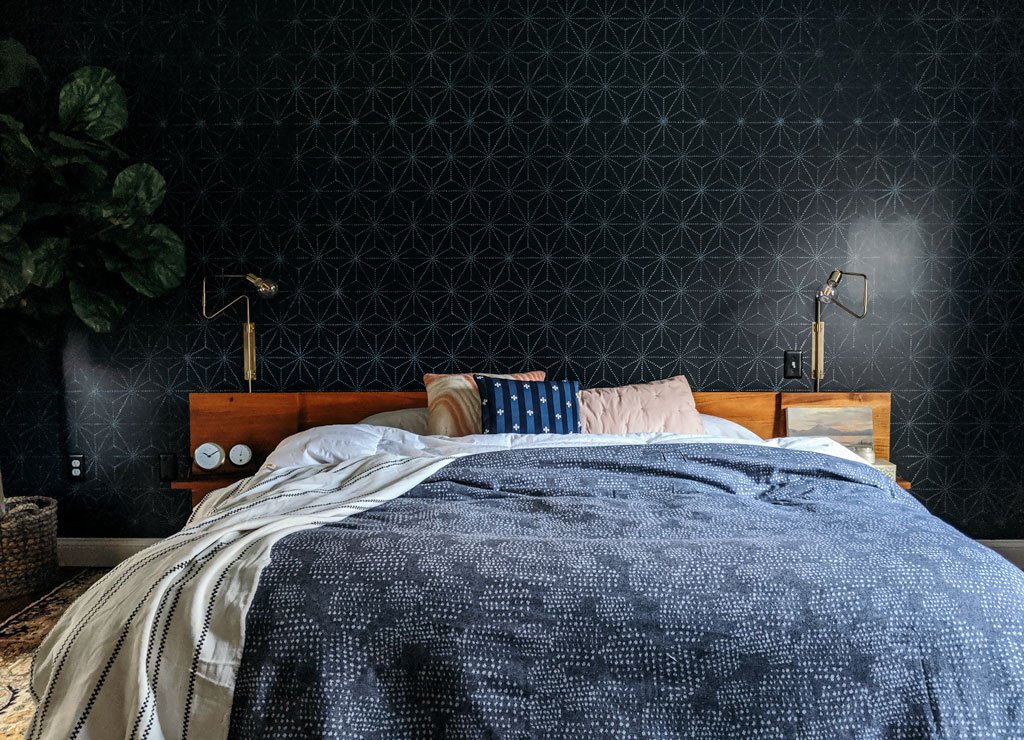
Your stenciled accent wall is complete!
Your wall is done and looking gorgeous. Can you believe how much less that cost than doing wallpaper? Same look, 1/5 the price.
Want more? Here’s the full collection of Bloom in the Black DIYs.