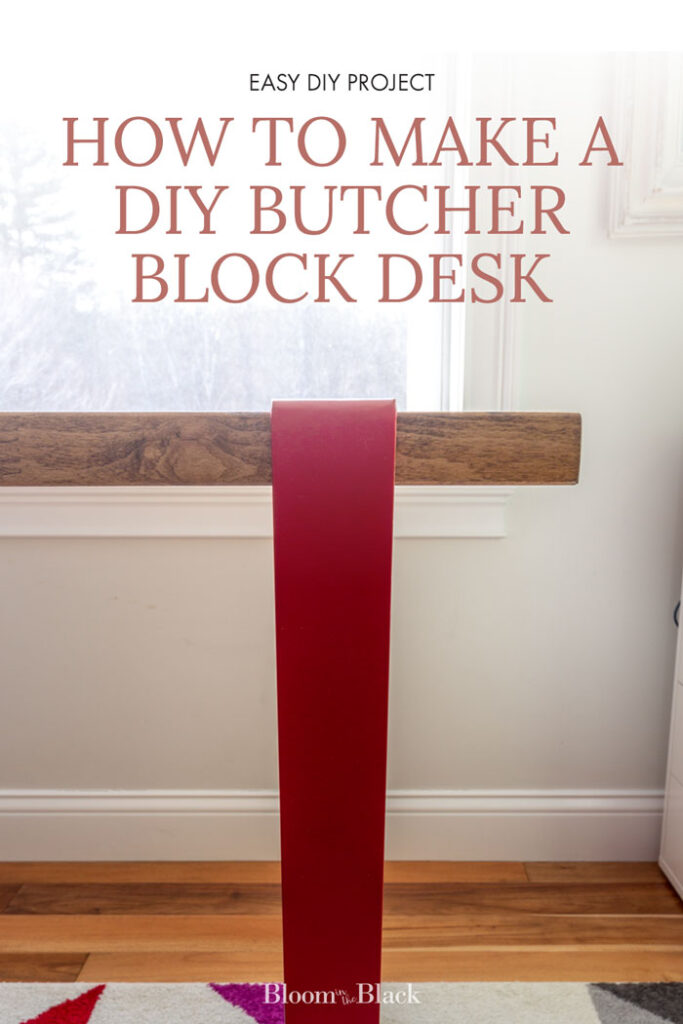
DIY Butcher Block Desk in 5 Easy Steps (with Pictures)
Is there anything worse than a tiny desk?
Seriously. I had this gorgeous rattan desk that I obviously bought for looks. But once I added my monitor, laptop, keyboard, and elbows, there wasn’t an inch for my mouse to move! Basically, zero work surface.
Luckily I’ve had a lot of experience building simple desks and tables throughout my years as a WFH warrior. Here are just a few iterations:
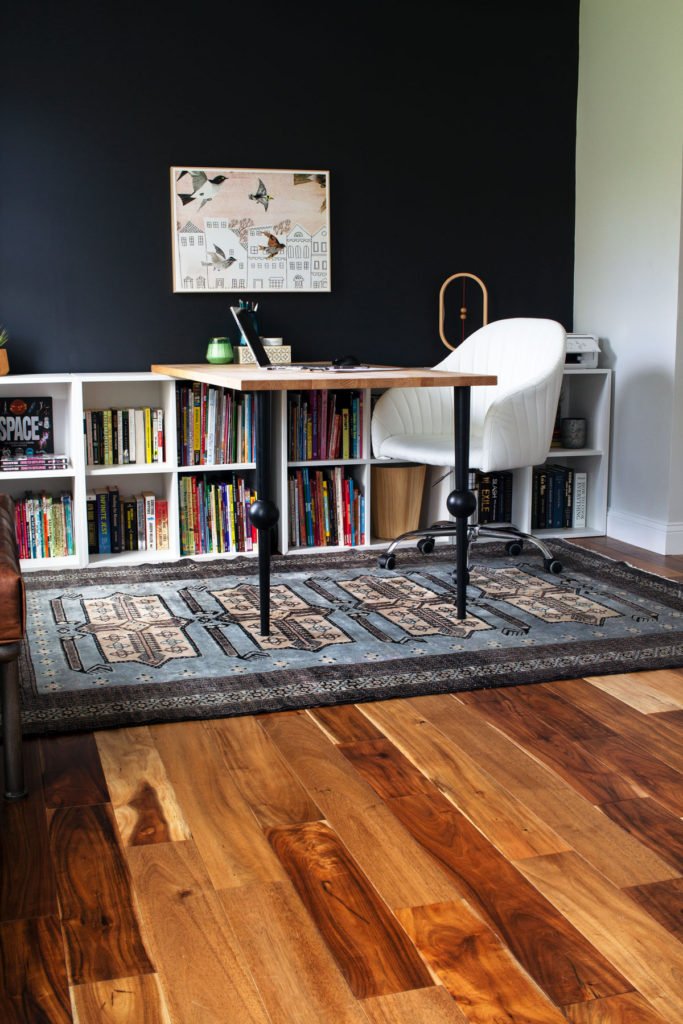
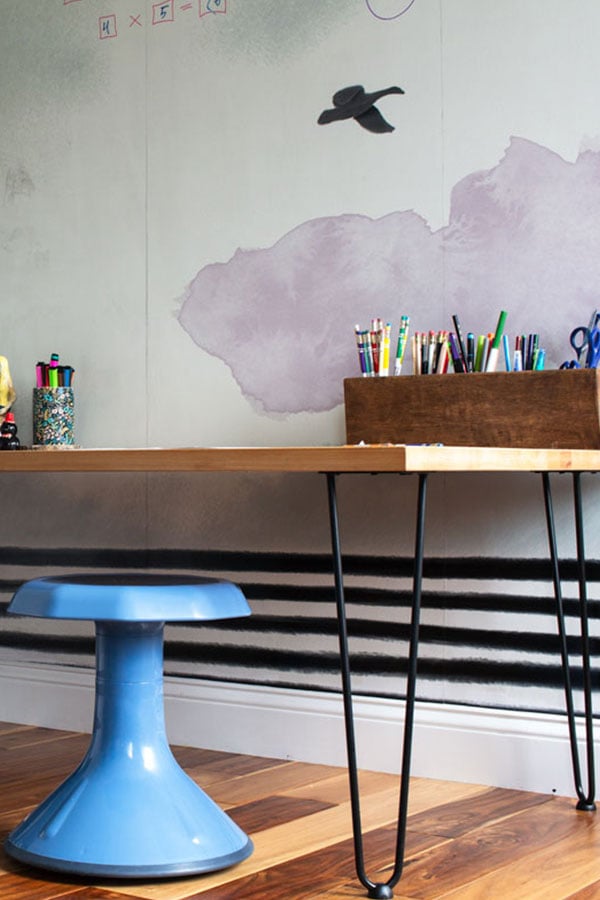
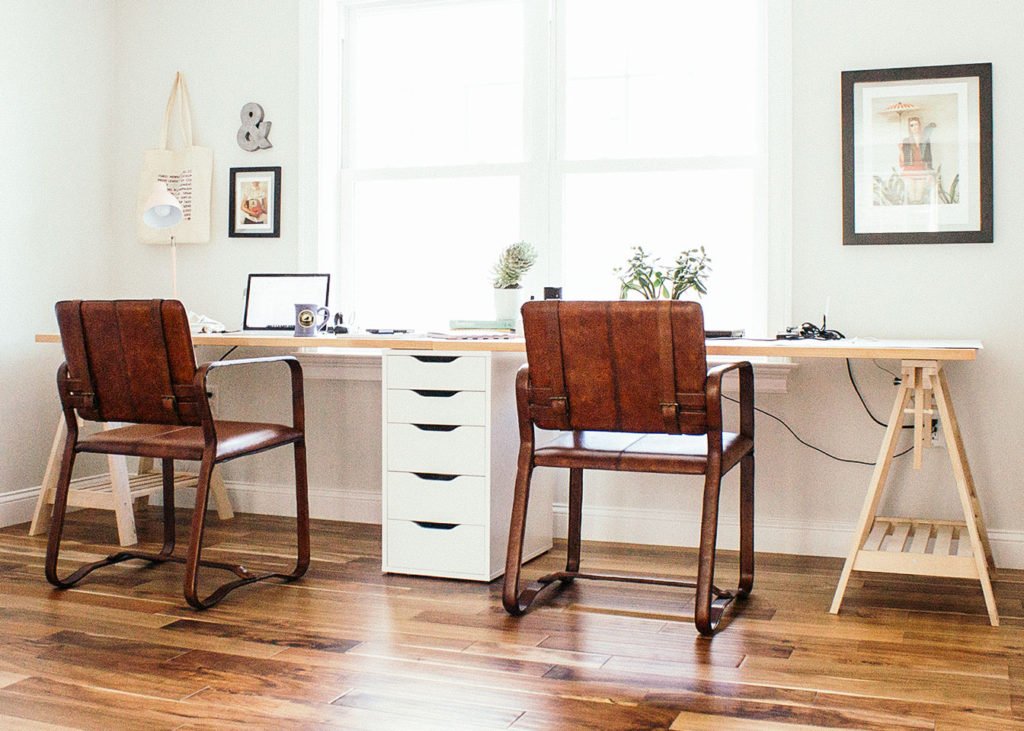
And it just so happened that I still had the butcher block top I used for these just sitting in my garage, waiting for a project.
In this post, I’ll show you how I made my modern butcher block desk in just five easy steps.
Pin for later!
This post contains some affiliate links for your convenience. Click here to read my full disclosure policy. Thanks for supporting Bloom in the Black!
This may be fairly obvious, but first, you’re going to need to buy an unfinished butcher block countertop or tabletop. I purchased mine at IKEA back in 2017 (I believe it’s a maple butcher block), and I haven’t been able to find it again online, but this unfinished butcher block countertop is very similar.
If you’re feeling handy or particularly ambitious, you could make one of your own using the technique I shared in this simple DIY laptop desk build.
How to make a butcher block desk
To make this new desk, you need to sand, stain, and seal an unfinished butcher block table top or counter and attach the legs of your choice. This is probably the easiest furniture-building project ever. Perfect for beginners.
Step 1: Sand your butcher block
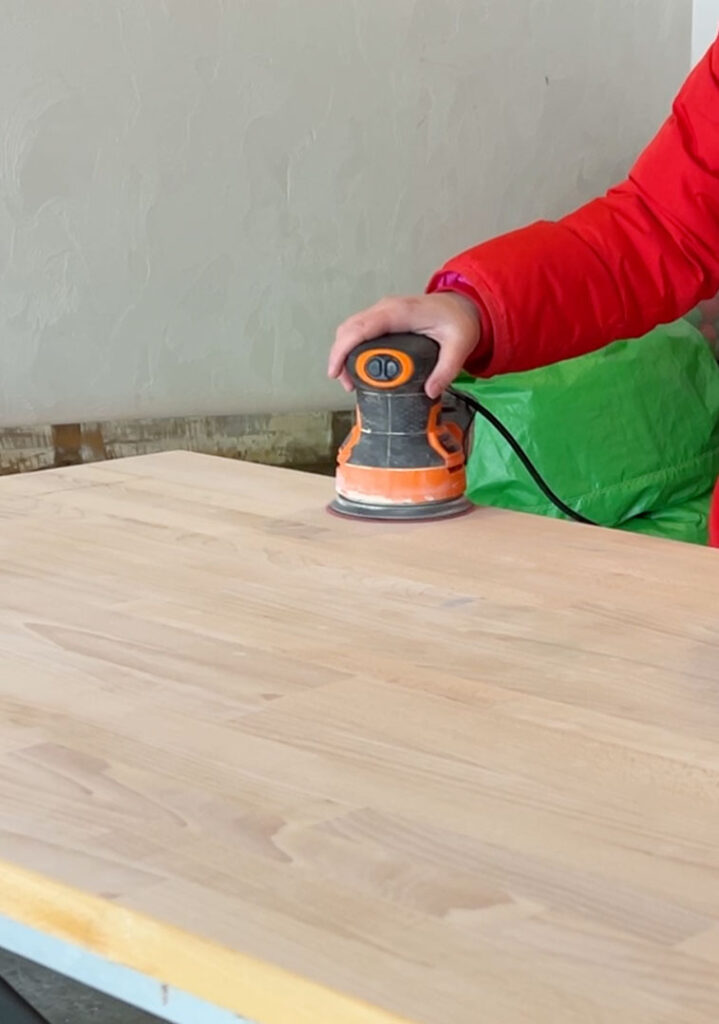
You might be thinking that sanding a brand new piece of butcher block is overkill, but it’s the key to getting a professional-looking finish. At the very least, sand with a 220 grit sandpaper.
Even better?
Sand the desktop with an 80, 120, 180, then finish with 220. It might be a bit of overkill, but your butcher block will take stain easily and evenly if you take care to sand well.
You could absolutely hand sand this if you have arms of steel, but I opted to use my cheap orbital sander. It makes the process go so much faster!
Step 2: Apply stain
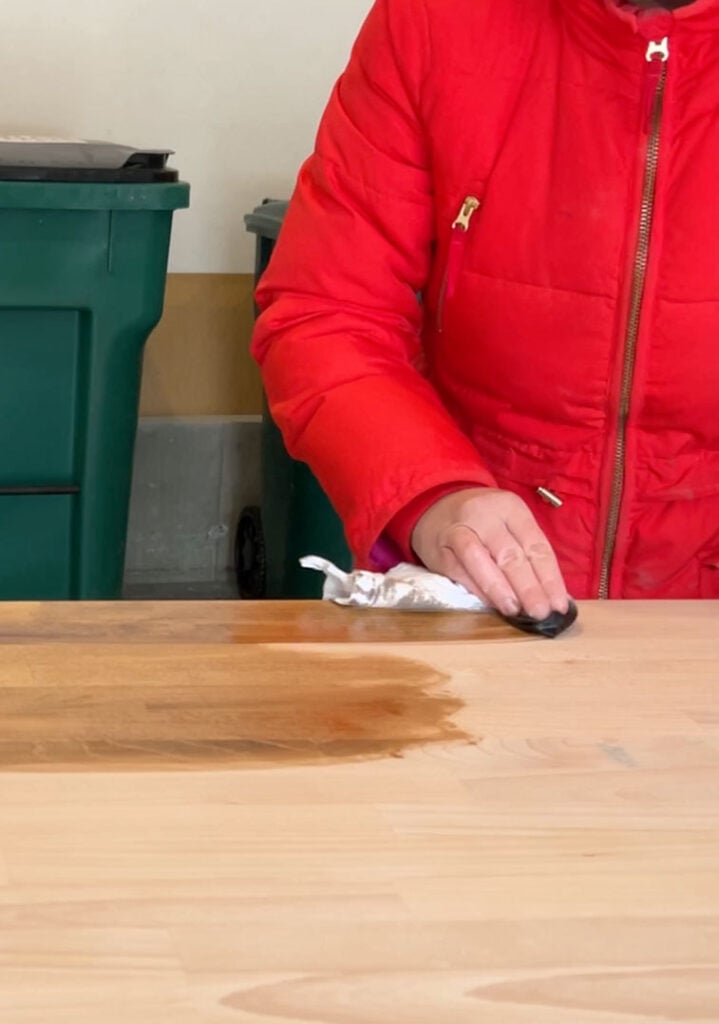
Using a rag (my recommendation) or a clean brush, wipe a coat of stain onto your butcher block top, following the direction of the grain.
Do not wipe back and forth. Always move your brush or rag in the same direction to get the best finish.
Depending on how dark you want it, wipe the excess stain off with a clean rag after 5 to 15 minutes (follow the instructions on your particular can of stain if you aren’t sure).
I used one coat of Minwax Early American and wiped it off after 5 minutes for reference.
Now, you could add a coat of wood conditioner before adding the stain for an even better finish, but my hardware store was out, and I didn’t feel like waiting to do this project. It still came out great, so if you don’t have any on hand, you’re probably ok as long as you sanded well.
Allow to cure for 24 hours before moving on to the next step. Even if the can says it will dry in less. Better safe than sorry!
Step 3: Seal the desk top
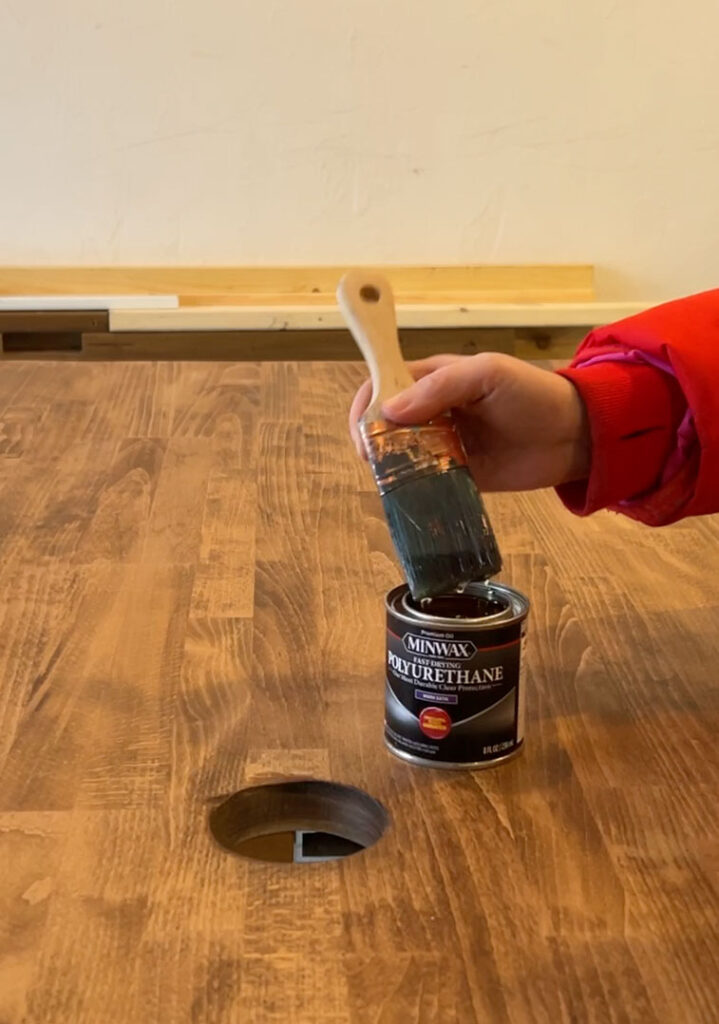
Next, apply a top coat of wipe-on polyurethane to seal the wood. This step will prevent stains from penetrating the butcher block and give your desktop a buttery, smooth feel.
A really important detail to keep in mind is that you need to match the base of your stain to your polyurethane. Simply stated: if you use a water-based stain, use a water-based poly. If you use an oil-based stain, use oil-based poly. This isn’t a mix and match situation.
Allow each coat to dry thoroughly before applying the next coat. You want to add enough coats to achieve an even sheen with no dull spots.
I did two coats because it was freezing in my garage, but I really should have done at least three.
Maybe I’ll add another coat in the spring…
Step 4: Measure for the legs
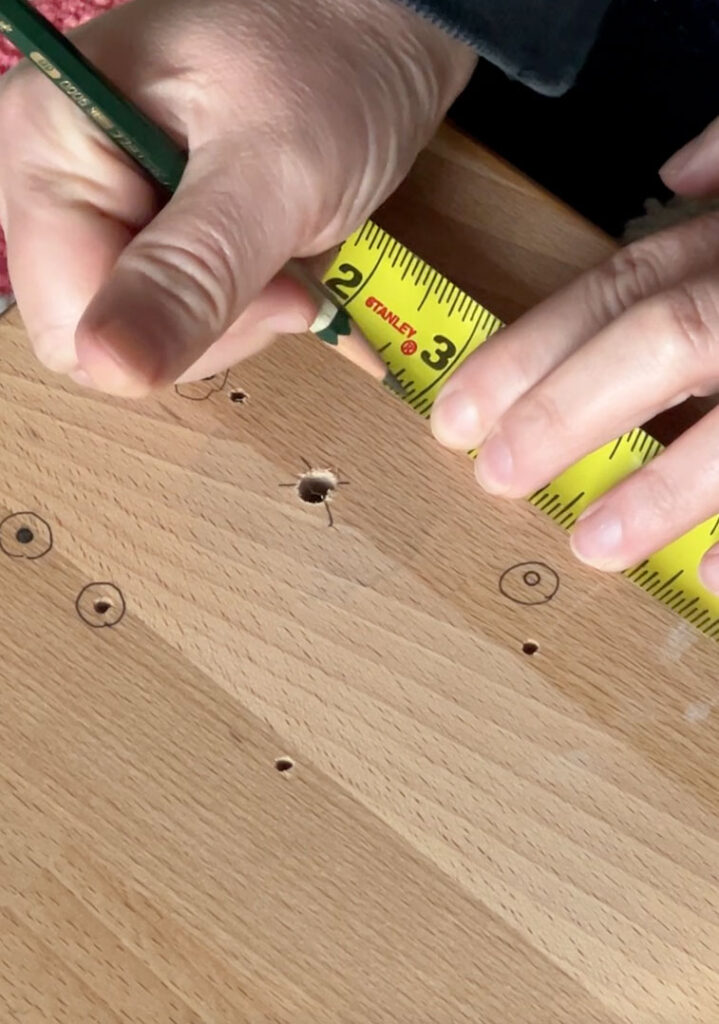
Grab a measuring tape and decide where you want to attach your legs. You want everything to be perfectly symmetrical, so don’t eyeball this!
I recommend flipping your butcher block top face down on the floor and placing one leg where you want it installed. Then measure from the edge of the desktop to the outer edge of the leg and mark it with a pencil. Take that measurement using your tape measure and apply it to the other three corners.
To see this in action, check out my quick tutorial video on YouTube (under 5 minutes):
Step 5: Attach the legs
This step will depend on what kind of legs you’re using.
A classic set of hairpin legs is an excellent choice for a modern desk that’s sturdy and easy to install. If you’re interested in learning how to install these properly, check out my tutorial on how to build a hairpin leg coffee table.
Wooden legs are a classic choice, but the installation of these varies a lot. Most legs, like these dramatic turned wood table legs, for example, require you to provide your own hardware and drill your own holes.
That’s a tutorial for another day.
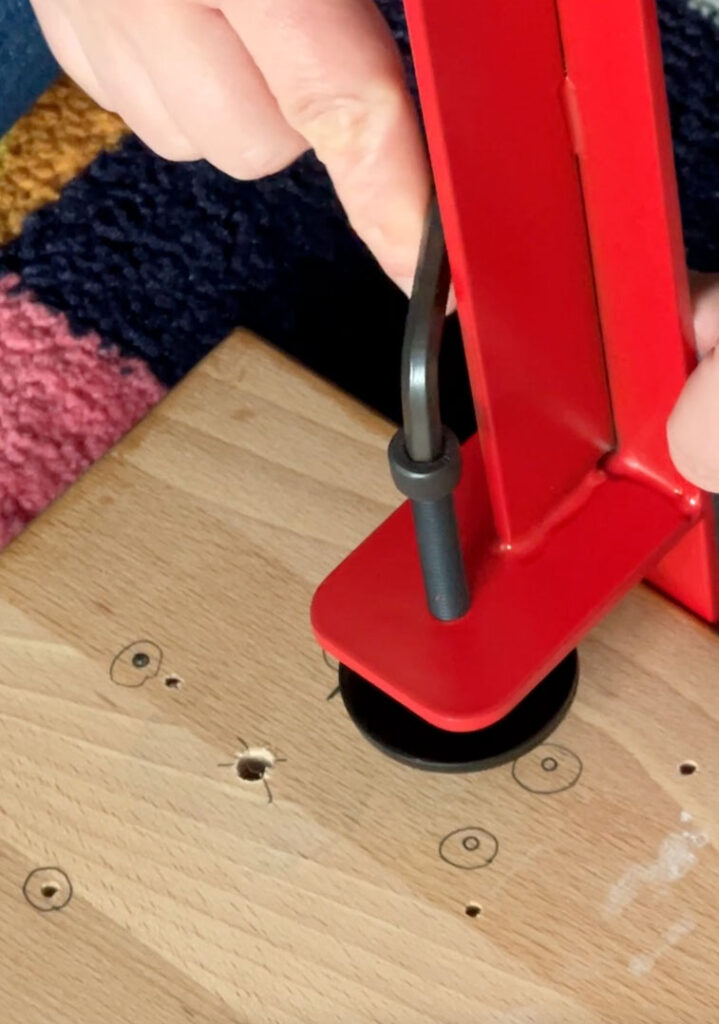
For this home office desk build, I opted for these stunning industrial schoolhouse style steel legs. The best part? They require ZERO drilling. They attach using an included allen wrench and attached clamp.
Genius!
Using these legs, I just had to position each leg at the mark I made, and tighten the clamp. Easy peasy!
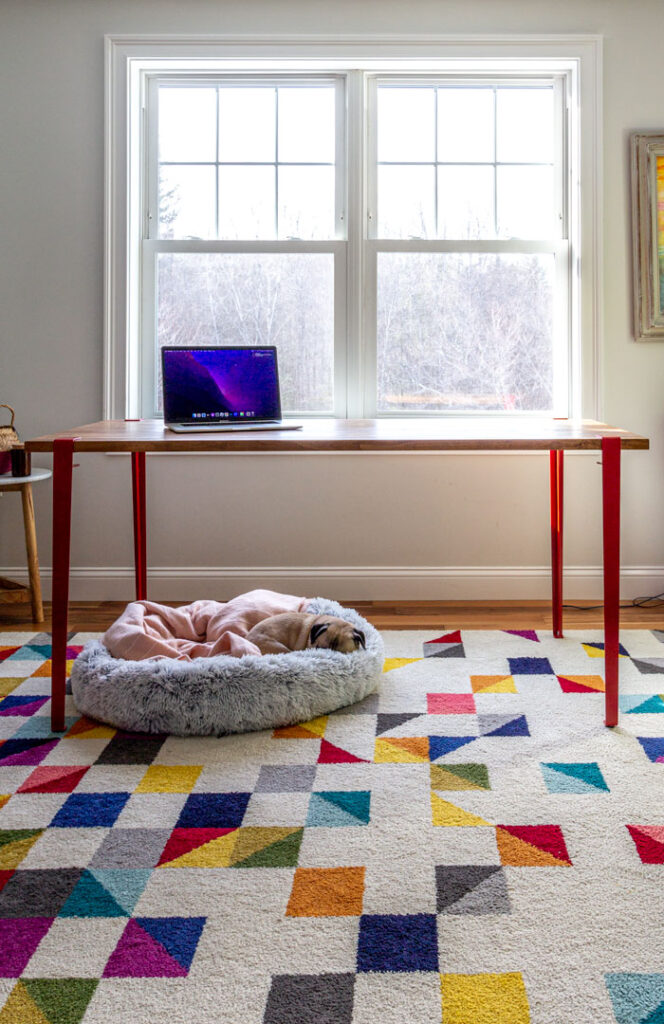
So what do you think? Will you try the easy butcher block desk DIY? For more great projects like this, check out my entire DIY collection.