How to Make a Footed Wood Tray: The Perfect Centerpiece
My kitchen FINALLY has an island, and I’ve been trying to dream up the perfect centerpiece to add to it. Something simple but impactful.
I realized that a long wooden tray would be the perfect place to start. I could add decor on top to create a centerpiece or clear it off to use for serving snacks.
In this post, I’ll show you how to make a footed wooden tray that looks like reclaimed wood, is food-safe, and has the exact dimensions you need for your dining area.
Pin for later!

This post contains some affiliate links for your convenience. Click here to read my full disclosure policy. Thanks for supporting Bloom in the Black!
I was browsing the web for ideas and saw this gorgeous reclaimed wood decorative tray on Anthropologie:
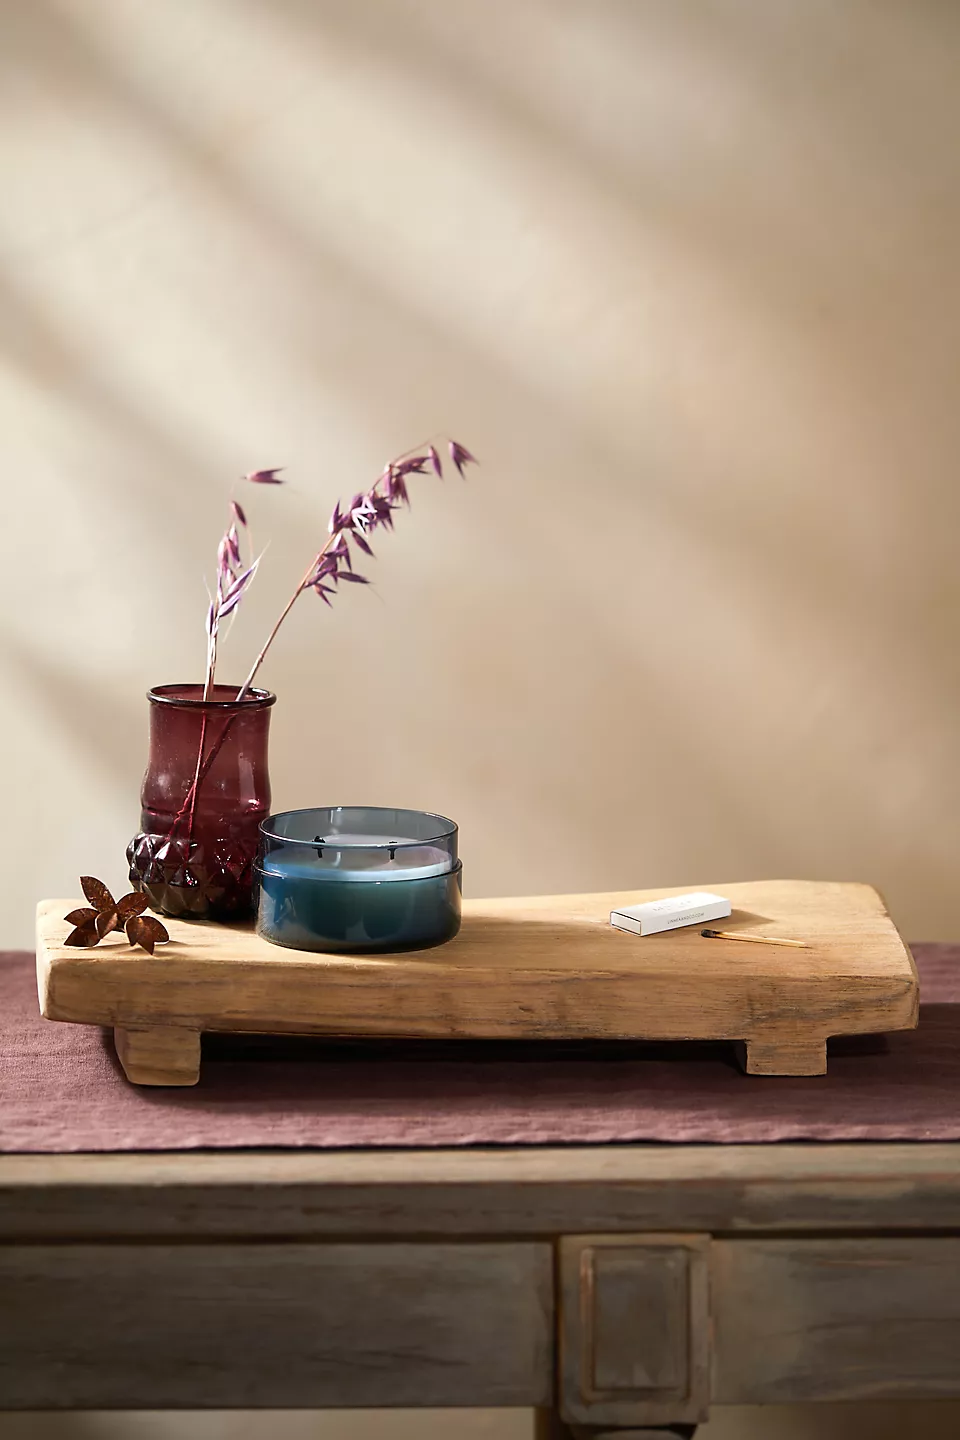
I absolutely LOVE the look, but it’s a little a lot shorter than I need, and it’s not food safe. Since I’ll be using it on my island, I’d love the option to use it as a charcuterie board if the opportunity presented itself.
Last year I made a giant DIY serving board over a holiday weekend, and I realized I could easily make my own version of this tray using the same techniques.
Materials and Tools
Step 1: Cut your wood pieces
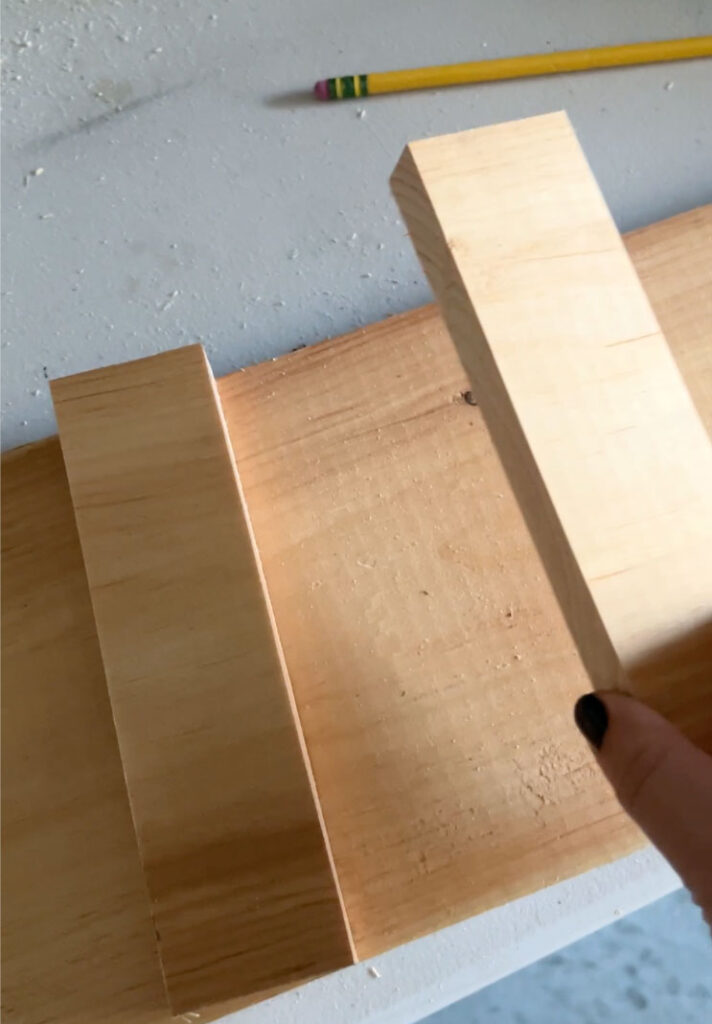
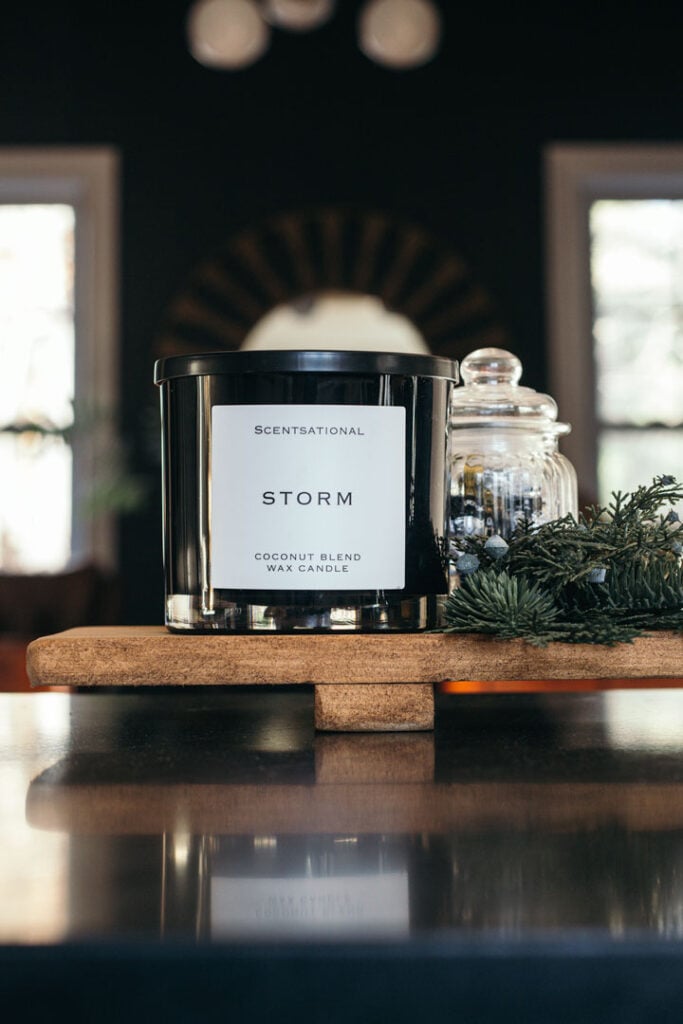
Using either a miter saw or a hand saw, cut the 1 x 8 board to the length that you want your tray. This will vary based on the size of the table or island you plan to put it on. Since my island is 105″ long, I opted to create a 42″ long tray (a little longer than 1/3 of the length of the island).
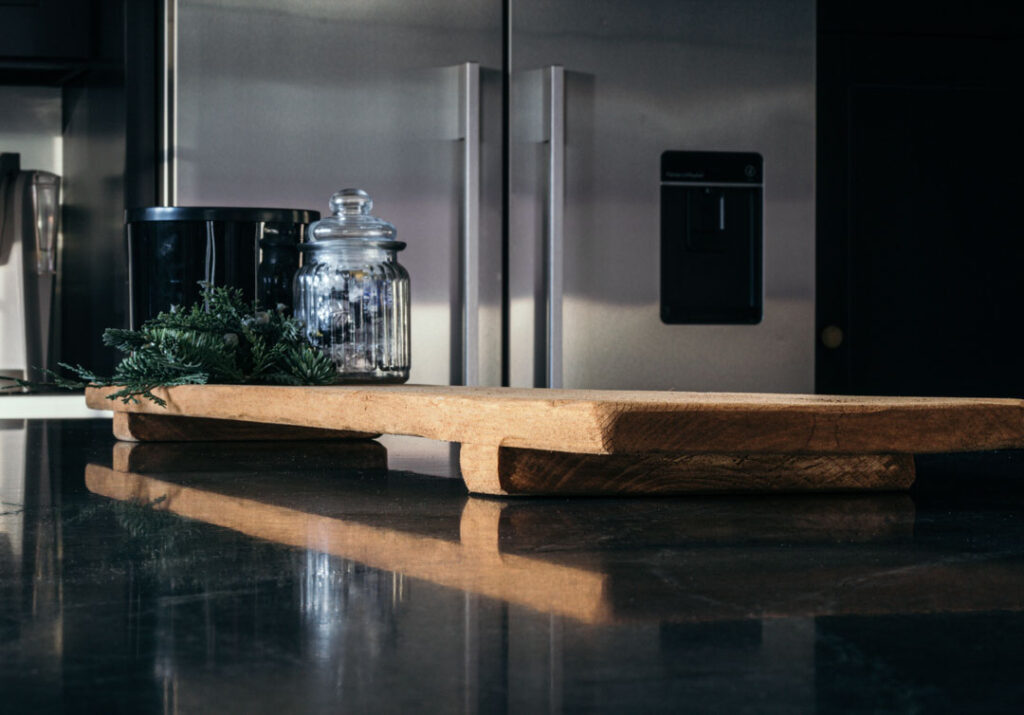
Next, cut two 2″ wide pieces from the same board. These will be the feet of the tray.
Step 2: Attach the feet
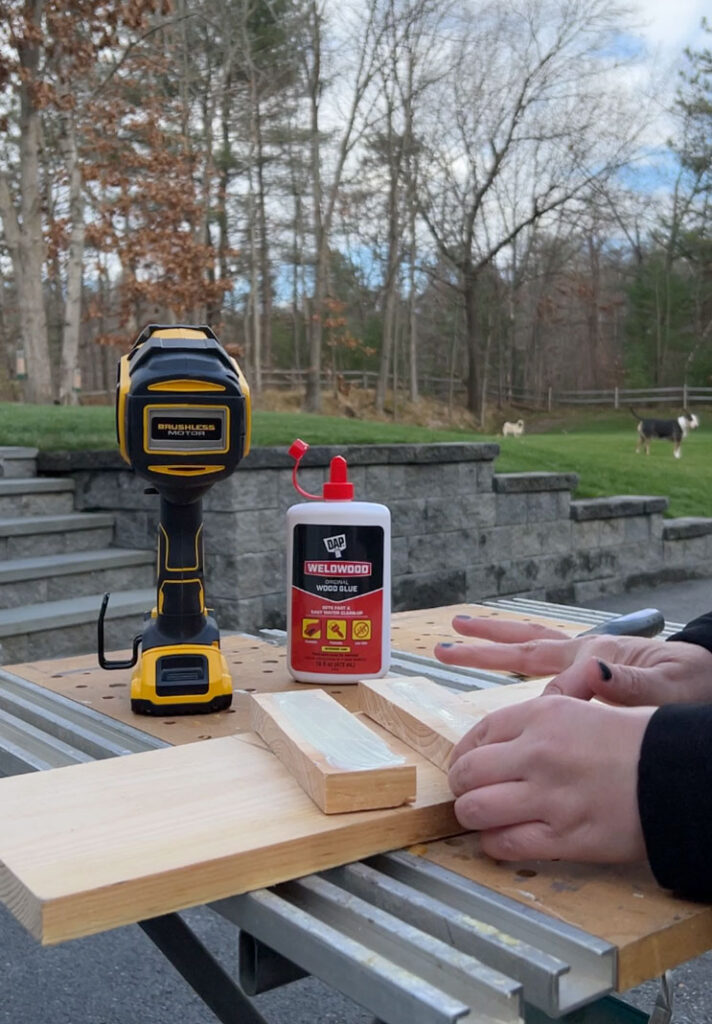
Run a bead of waterproof wood glue across the wide part of each of the feet and smooth to coat the surface. A silicone brush is great for spreading the glue, but I have to admit, I usually use my fingers. It’s messy.
Do as I say, not as I do 😉
Place each of the feet about 3″ in from each end of the board, glue side down, to attach tp the tray top. Be sure that the side of the board you like the look of best is facing up. Meaning, not the side you attach the feet to.
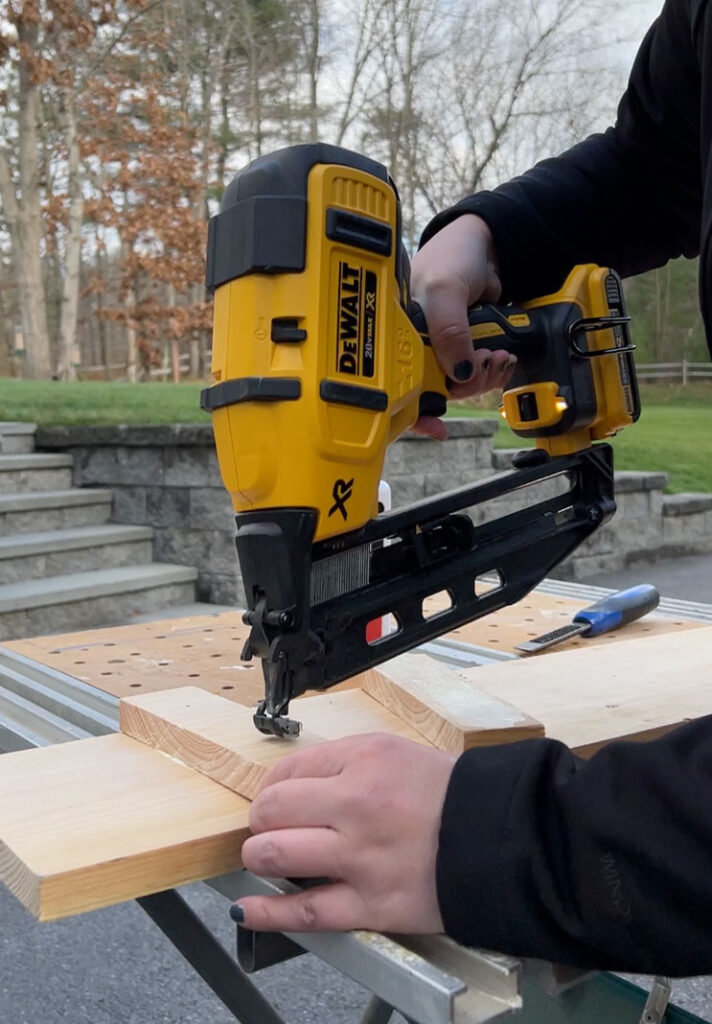
I used a couple of pin nails to hold the boards in place while the glue dried so that I could move to the next step right away. If you don’t mind waiting for an hour or two for the glue to dry (or don’t have a pin nailer), you can clamp the feet to keep them in place. Or even just place some heavy paint cans on top of them.
Step 3: Distress the wood
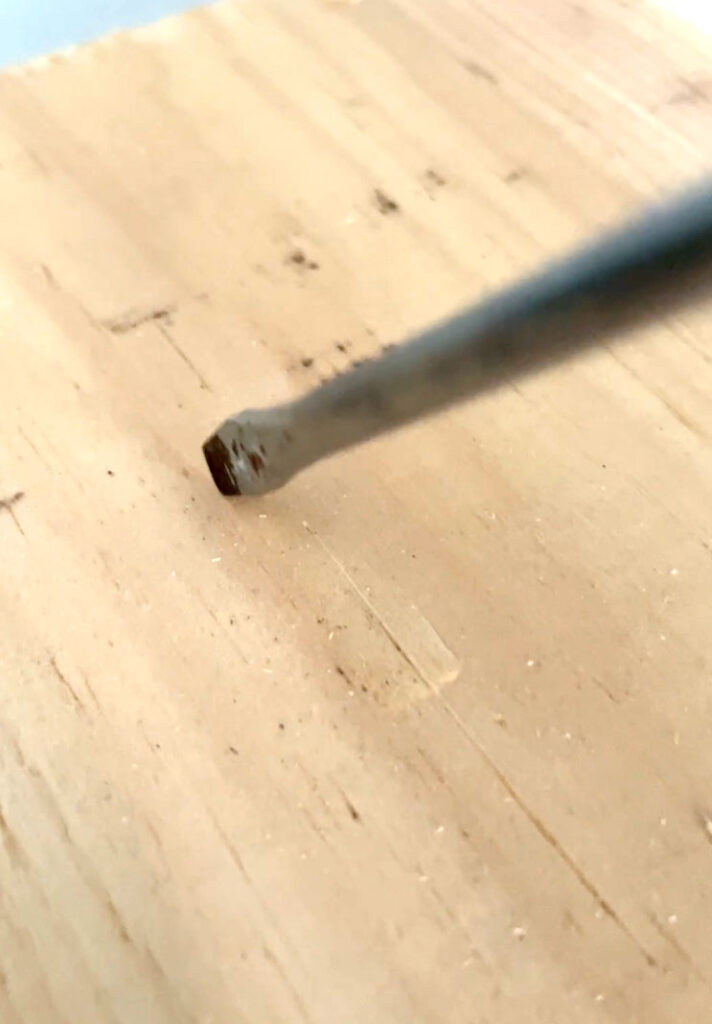
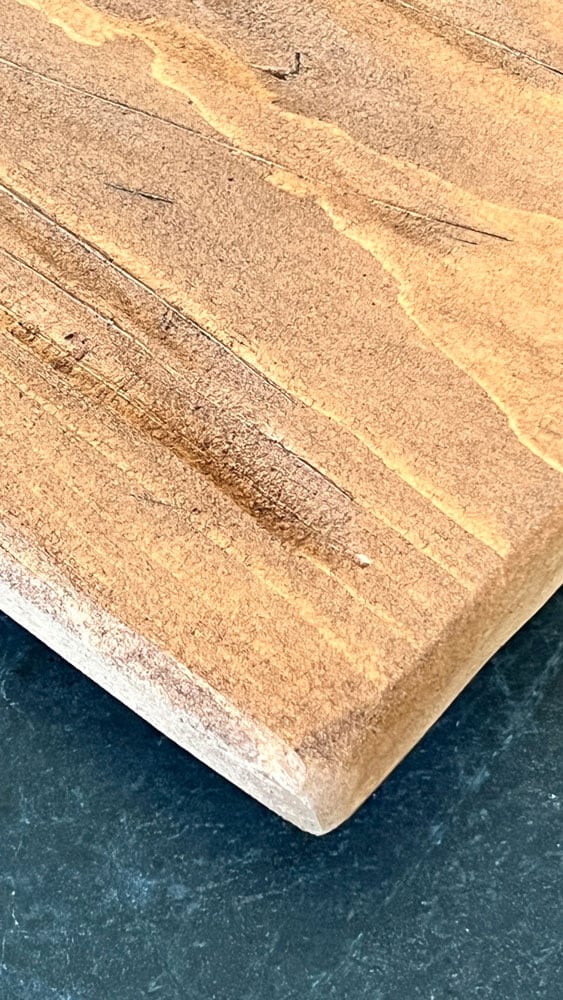
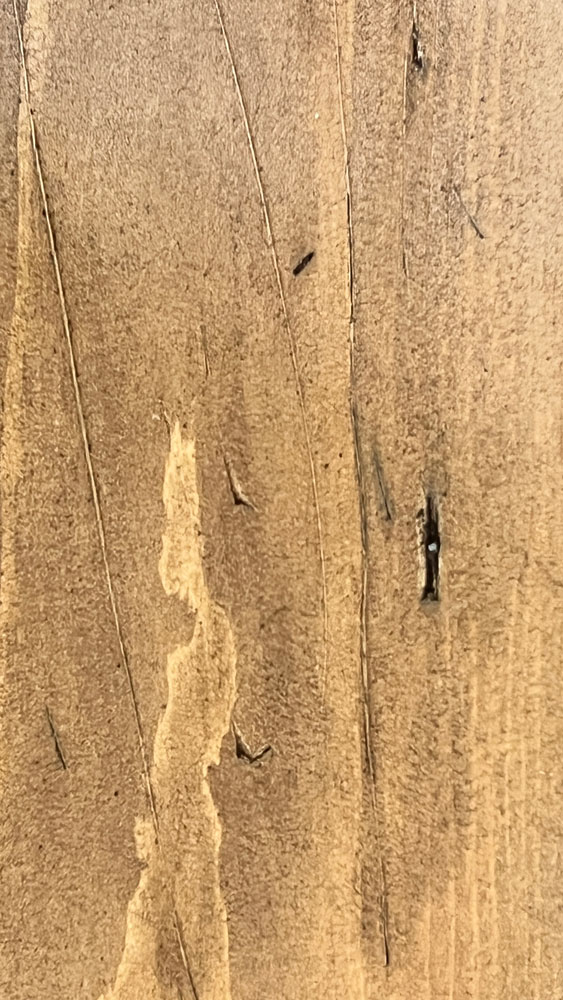
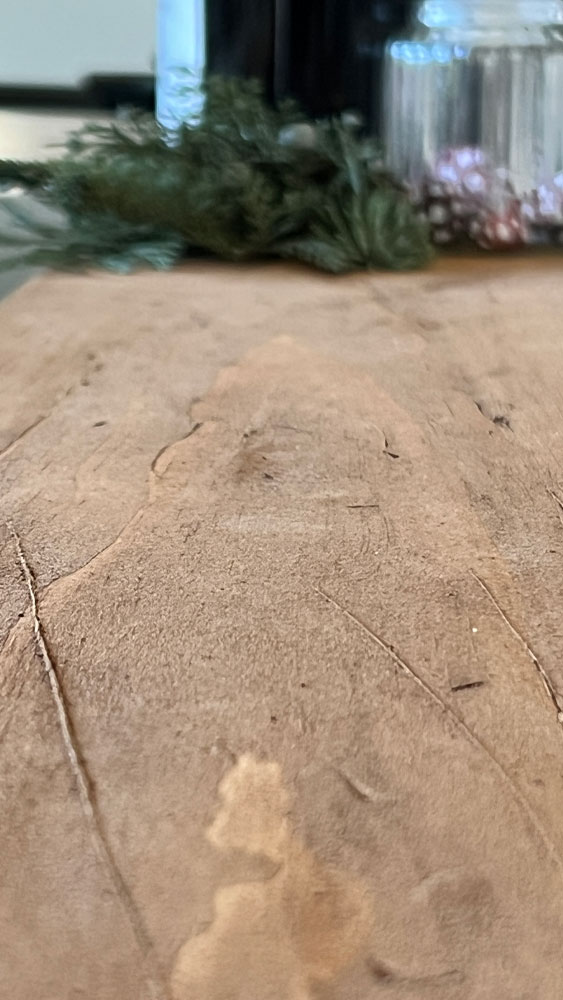
Now comes the fun part. Using a screwdriver, hammer, file, etc. (basically anything that can gouge wood), randomly scrape, pound, and basically beat the heck out of your wood.
This is a weirdly therapeutic process.
You really can’t go wrong. I stabbed my top board a few times with a flathead screwdriver, then dragged it along the board to create some fine grooves. Then I took a wood file with a chiseled tip and created some deeper grooves with the chisel and finer scratches using the file. I finished up with some whacks of the hammer. to add dents.
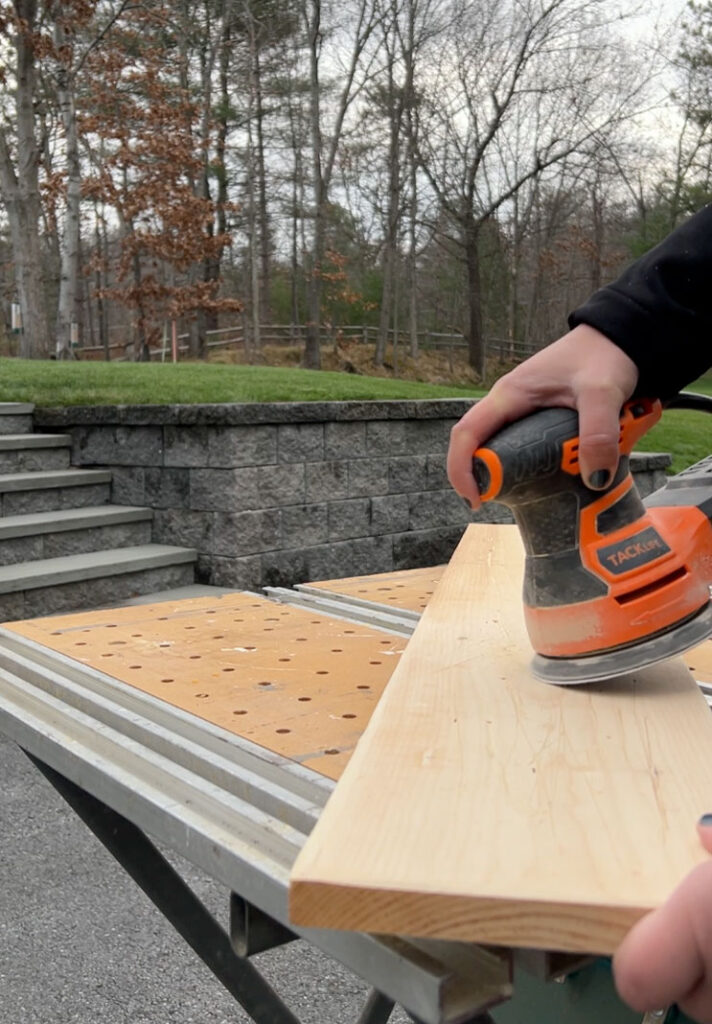
Next, I used my orbital sander fitted with 60-grit sandpaper to add more dips and grooves and to wear down the edges. My exact sander is no longer available, but this one from Amazon is a great alternative and super affordable.
Use a high spin setting and press hard to create that dramatic wear. Tilt the sander to use the edge to almost chisel deep valleys into the flat parts of the wood.
Step 6: Stain the board with a food-safe finish
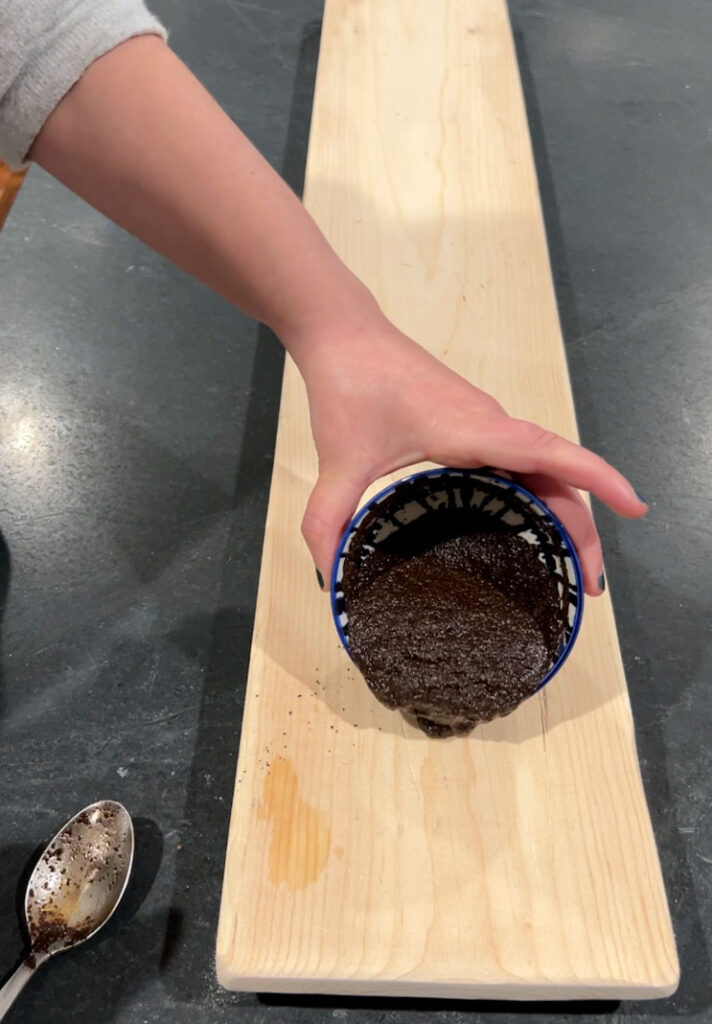
To highlight all of the distressing we just did, we’re going to stain the tray with coffee. Yes, coffee is a little unconventional, but it’s cheap, effective, and entirely food-safe. If you don’t plan to use your footed tray for food service, then feel free to use a commercial stain if you’re prefer.
Scoop 2 or 3 overflowing tablespoons of ground coffee (not used, scoop it fresh from the can) into a small bowl and mix with water to create a gritty paste.
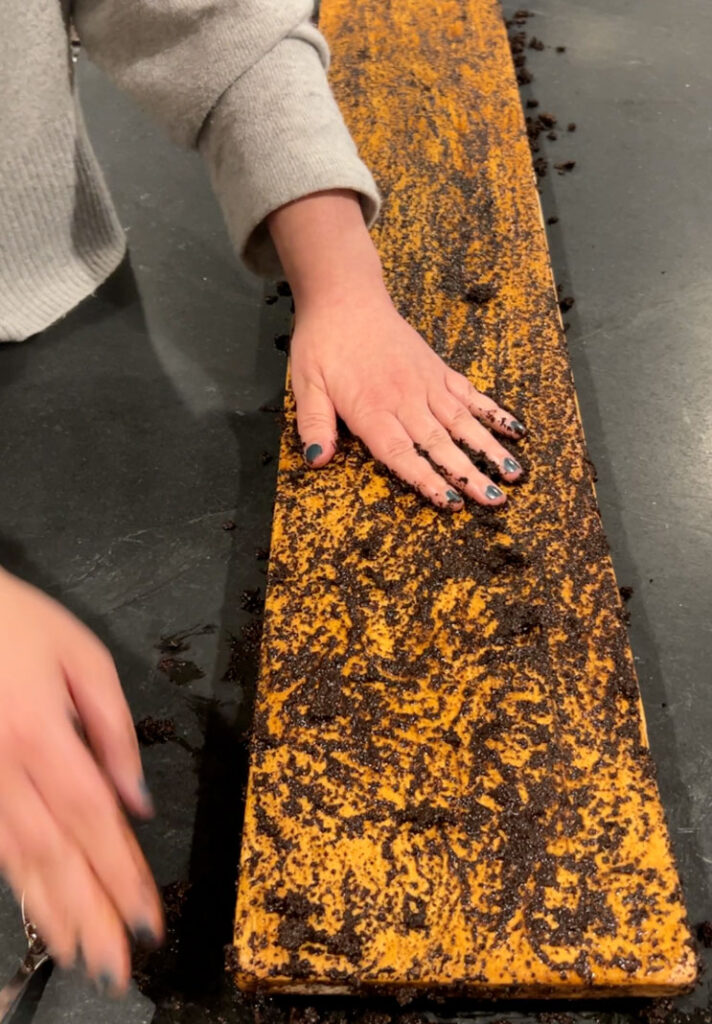
Pour the coffee paste onto your footed tray and rub it on the entire surface. Pay special attention to all of those cracks and crevices you created, and allow to sit for about 15 minutes.
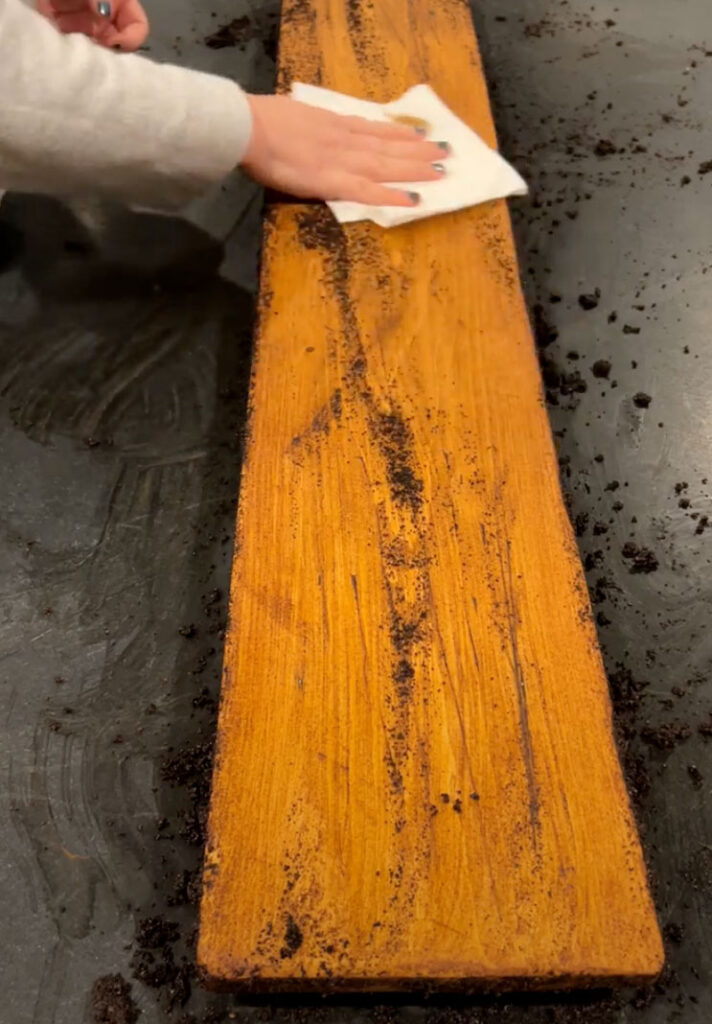
Then, wipe the coffee grounds away with a paper towel and admire how authentically reclaimed your wood tray looks now! The coffee will stain all of the “damaged” parts a much deeper shade of brown and really bring out all of the uneven planes you created.
Step 6: Condition the wood (optional)
You can use butcher block conditioner or food-grade mineral to create a more water-resistant surface, but I personally like how the tray looks without this added finish. If you do choose to condition the wood, this is the butcher block conditioner I use regularly on my other cutting and serving boards.
This footed tray would make an amazing hostess gift! For more creative hostess gift ideas, check out this post.
From one 1 x 8 x 8 pine common board, you could make two of the same size trays I showed you here, or even more if you plan to make them smaller. These “reclaimed” wood trays make an amazing affordable gift, even at current lumber prices.
Give this one a shot, and let me know what you think!
Want more? Here’s the full collection of Bloom in the Black DIYs.