A DIY Girl’s Bedroom Makeover (On a Budget!)
My girls had a shared bedroom that we never did a whole lot with. When we first moved in, there were so many rooms we needed to tackle first that we just tossed a couple of mattresses on the floor with their toys and called it done.
For a couple of years they were fine with that.
But as the rest of the house started to come together the girls (justifiably) wanted something with a bit more personality. And beds 🙂
In this post I’m going to share our entire girls bedroom makeover from start to finish. This room is chock full of DIYs and fun design ideas for tweens sharing a room.
Pin for later!

This post contains some affiliate links for your convenience and Handy Products generously gifted the paint bucket and trays. Click here to read my full disclosure policy. Thanks for supporting Bloom in the Black!
The Girls’ Bedroom: Before
This should be quick because where we started was literally a white box with mattresses on the floor and a couple of cheap toy bins.
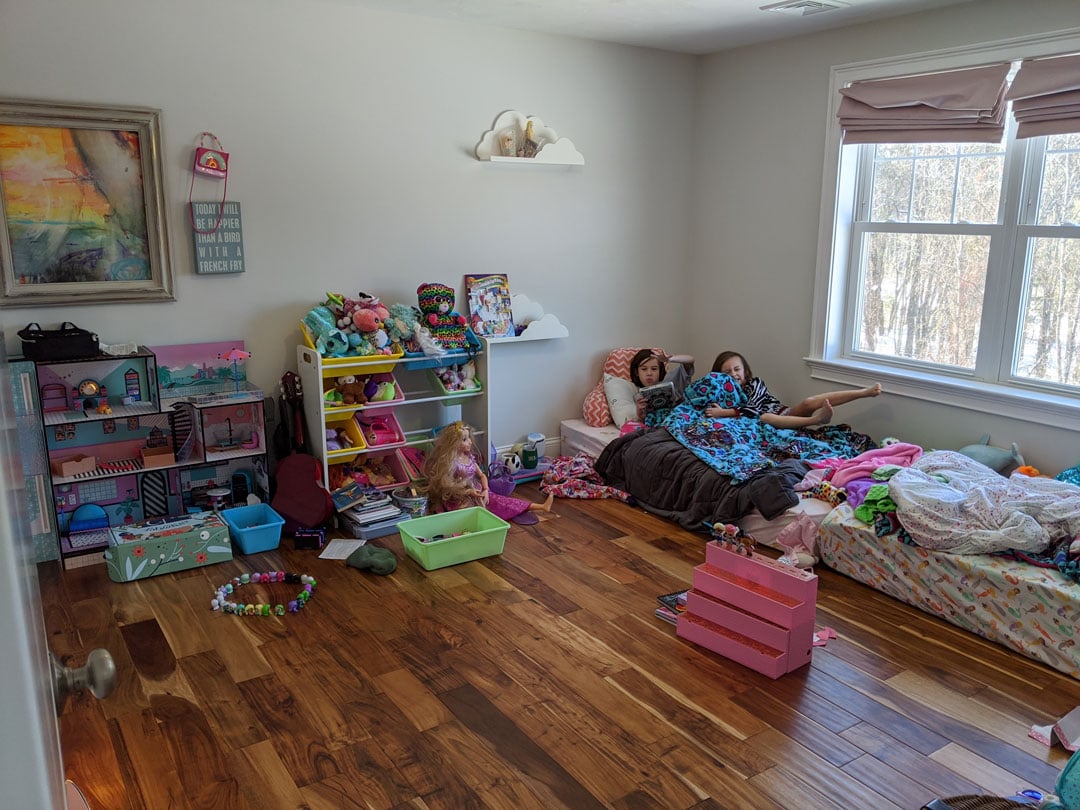
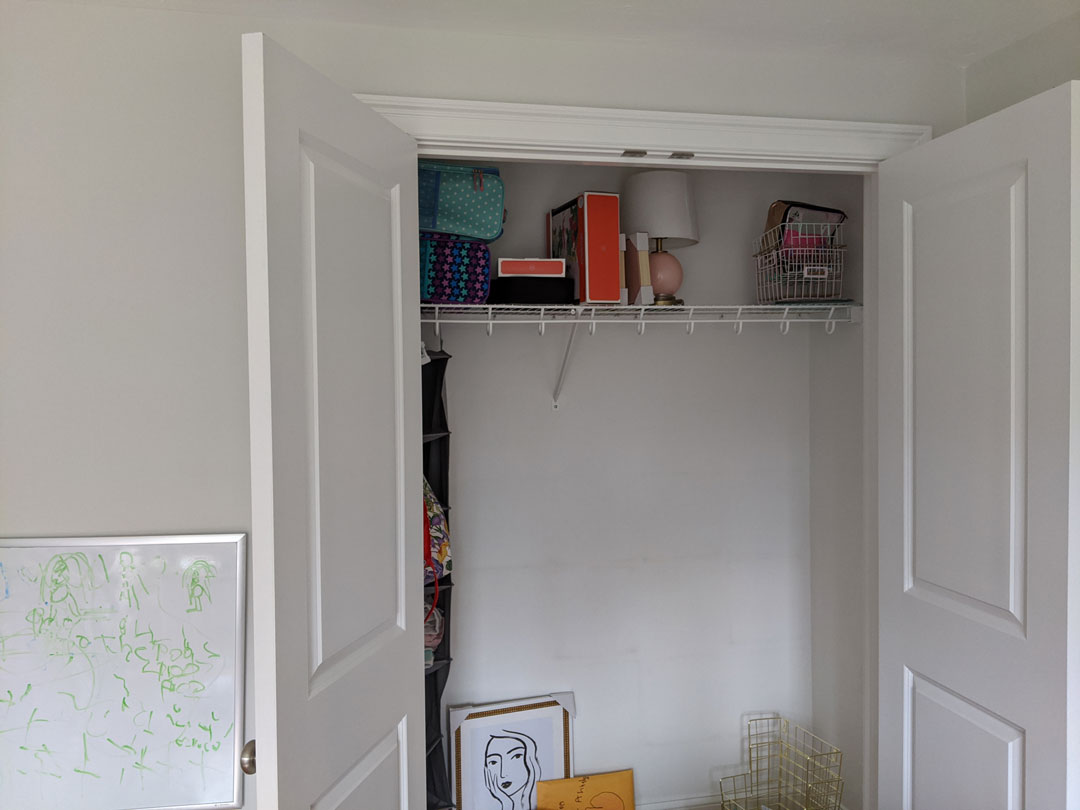
And an underused, builder-basic closet. Two sets of these laminate cubes were stacked in here to store all of their clothes. We didn’t use the wire shelf for anything but junk.
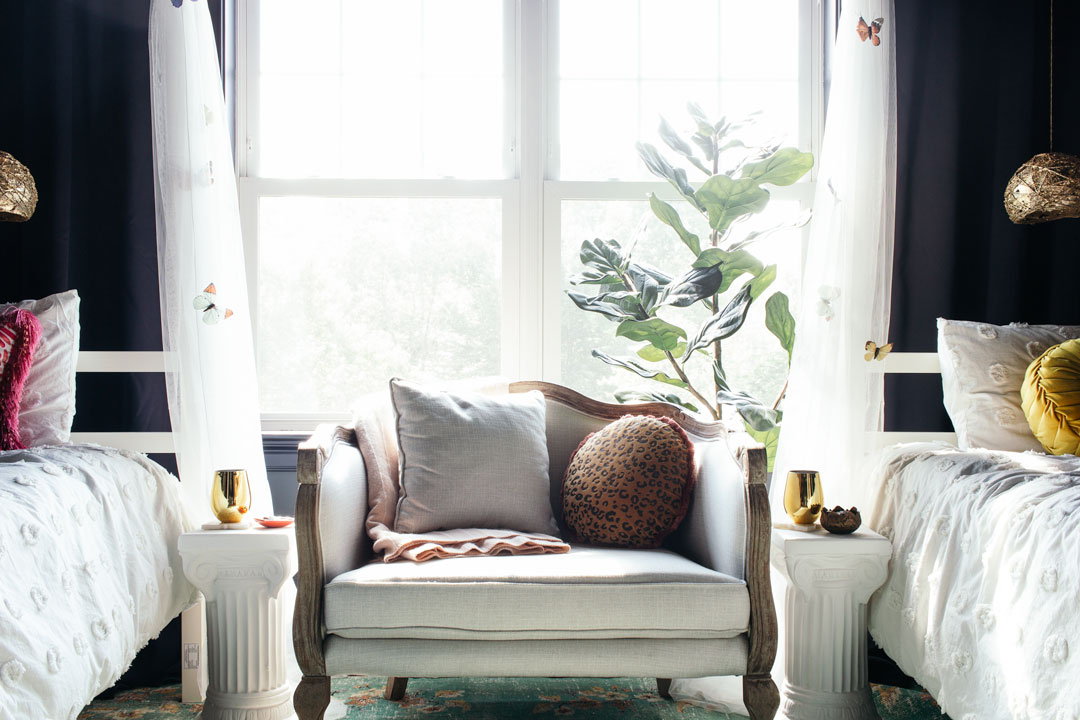
The functional goals for the room included an improved layout, since my girls share the room and it’s not particularly large. Also, to make it cozy and conducive to sleep. The holy grail of parenthood.
As far as visual inspiration we were aiming for a secret garden at night. This is a kid’s room after all so it needed an element of fun and magic. Sure, it’s cool if I like it but what matters is that THEY like it.
The Girls’ Bedroom: During
This was a radical bedroom makeover complete with tons of DIYs.
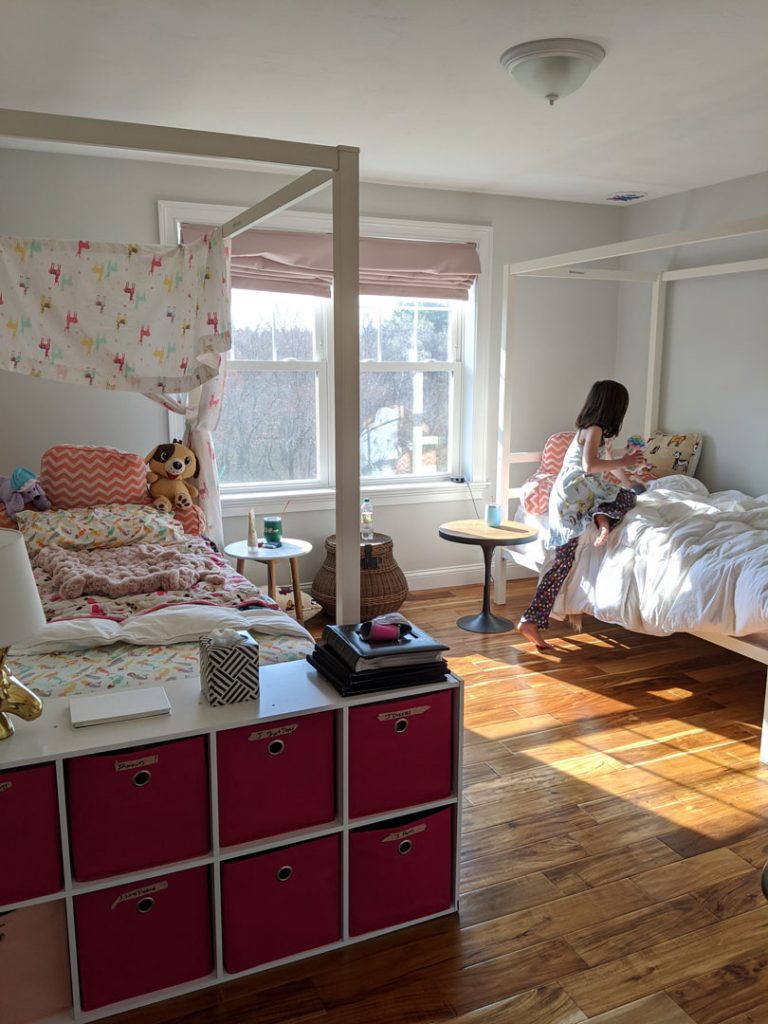
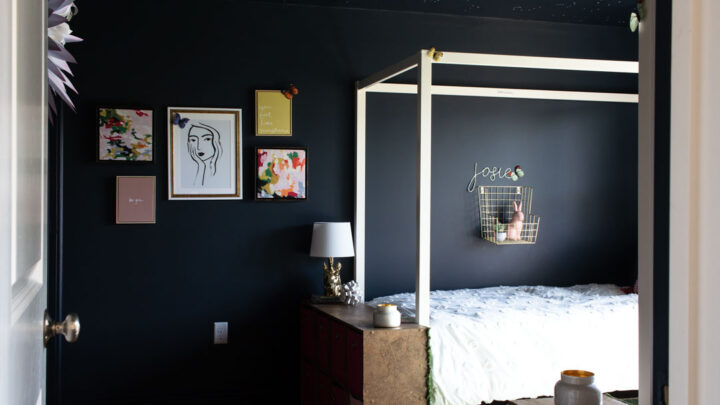
We added actual beds and reconfigured the layout:
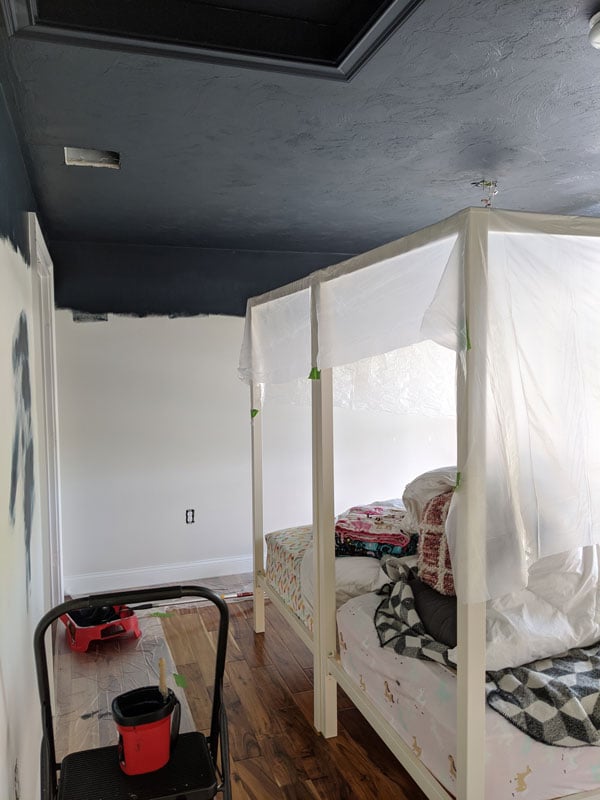
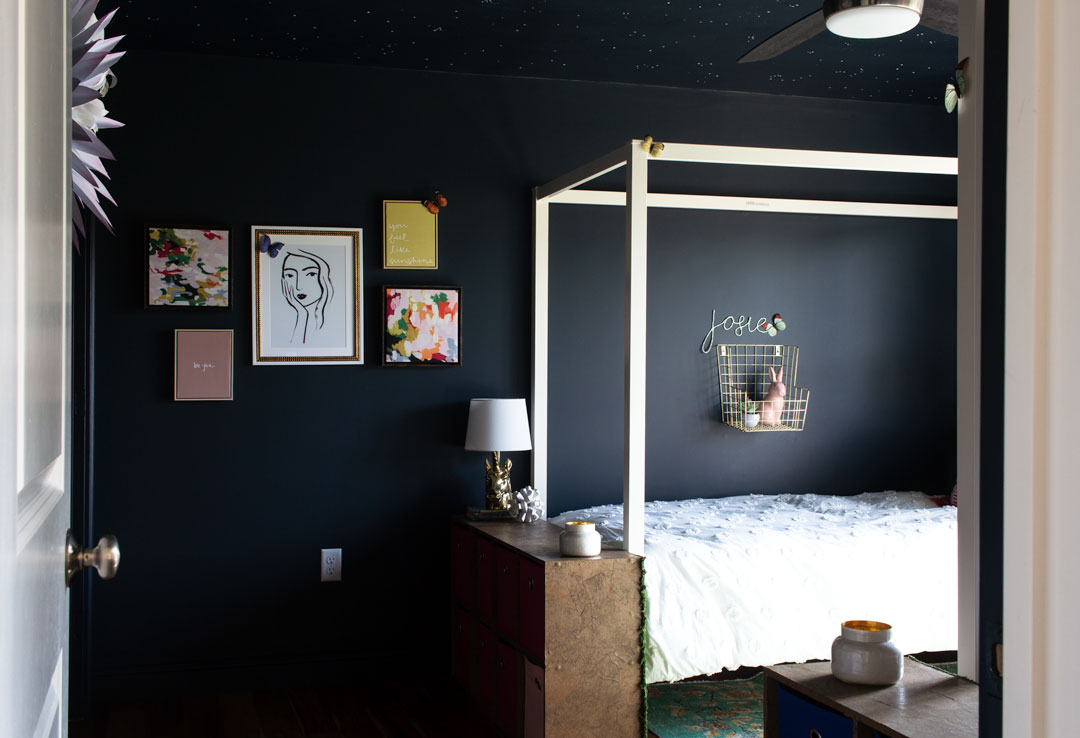
The white walls were painted a rich midnight blue, complete with matching ceiling and glowing stars:
I transformed the boring white laminate cubes by decoupaging them with grocery bags:
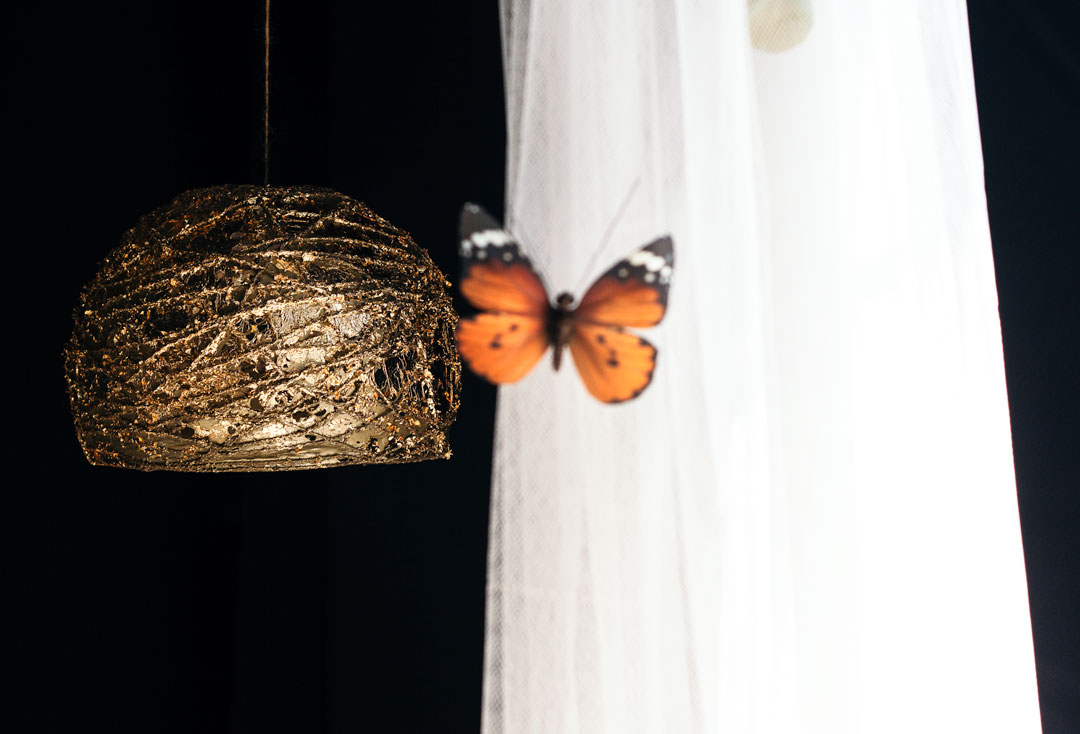
I made pendant lights out of string and some glue:
I painted the closet pink in preparation for turning it into a reading nook:
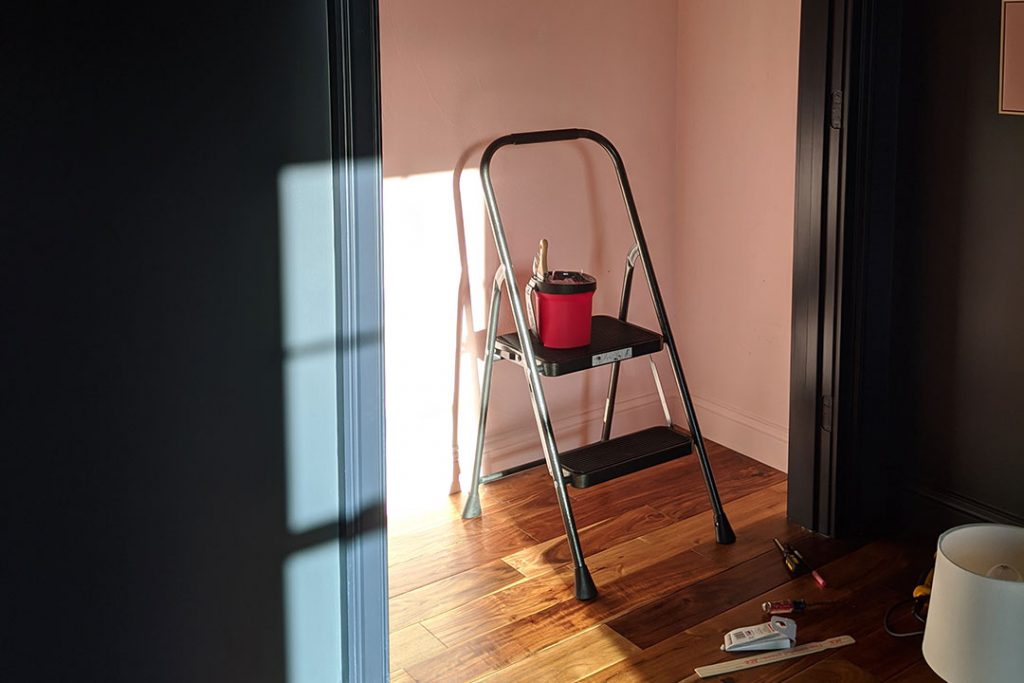
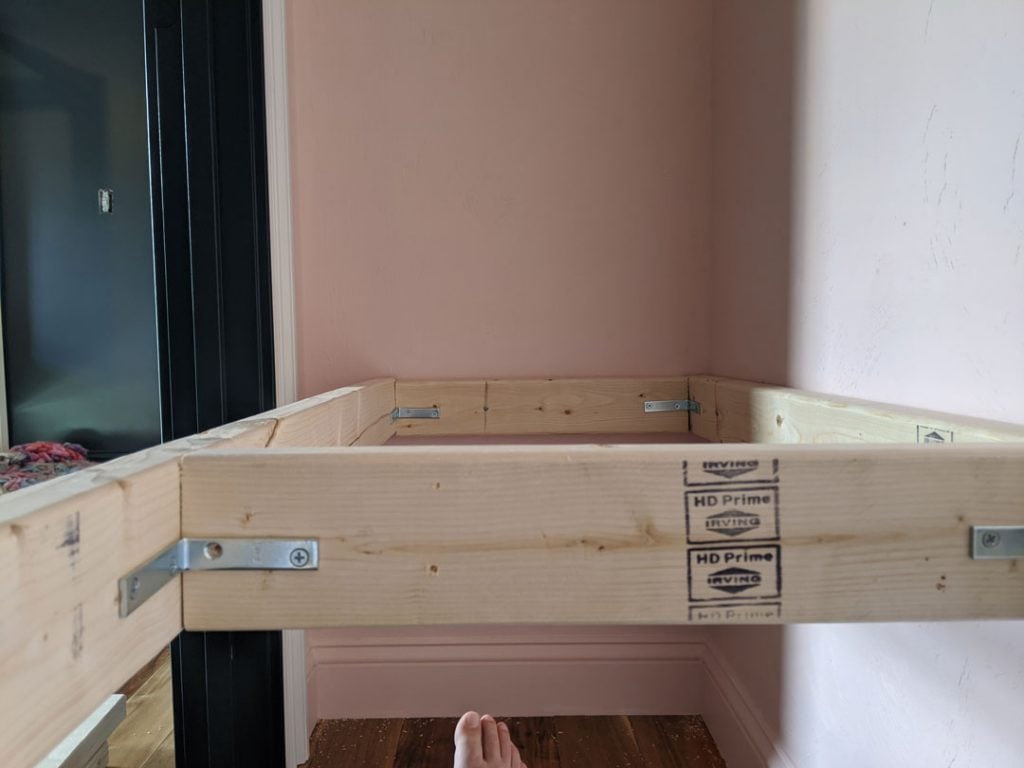
But first I needed to build a floating bench:
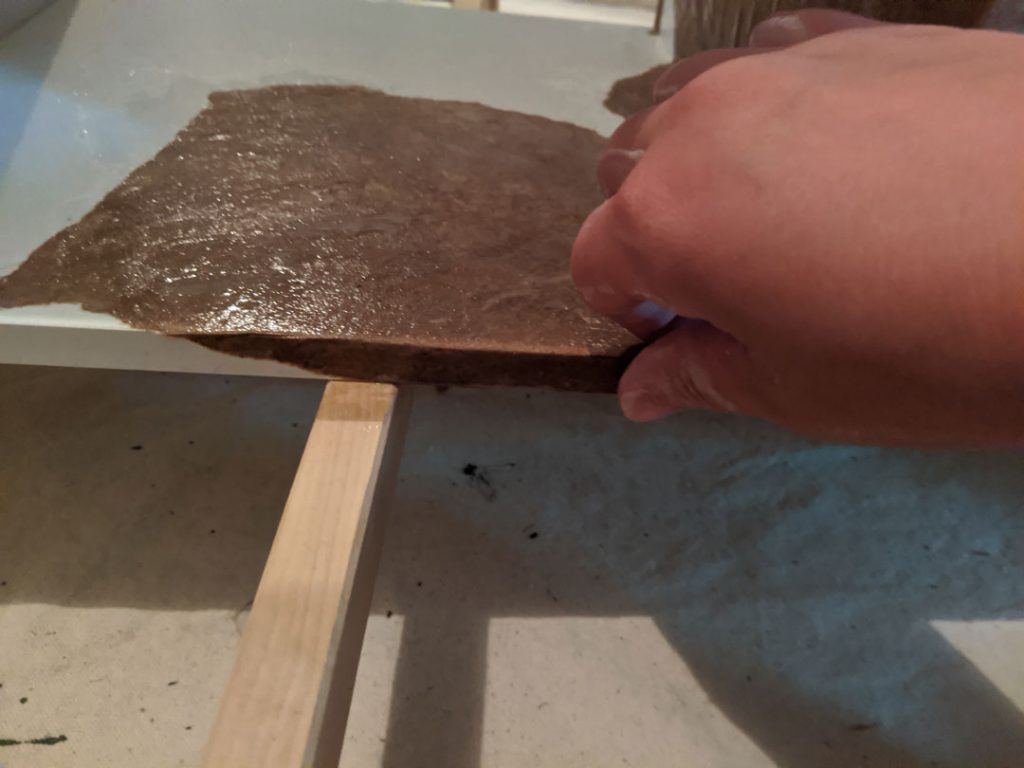
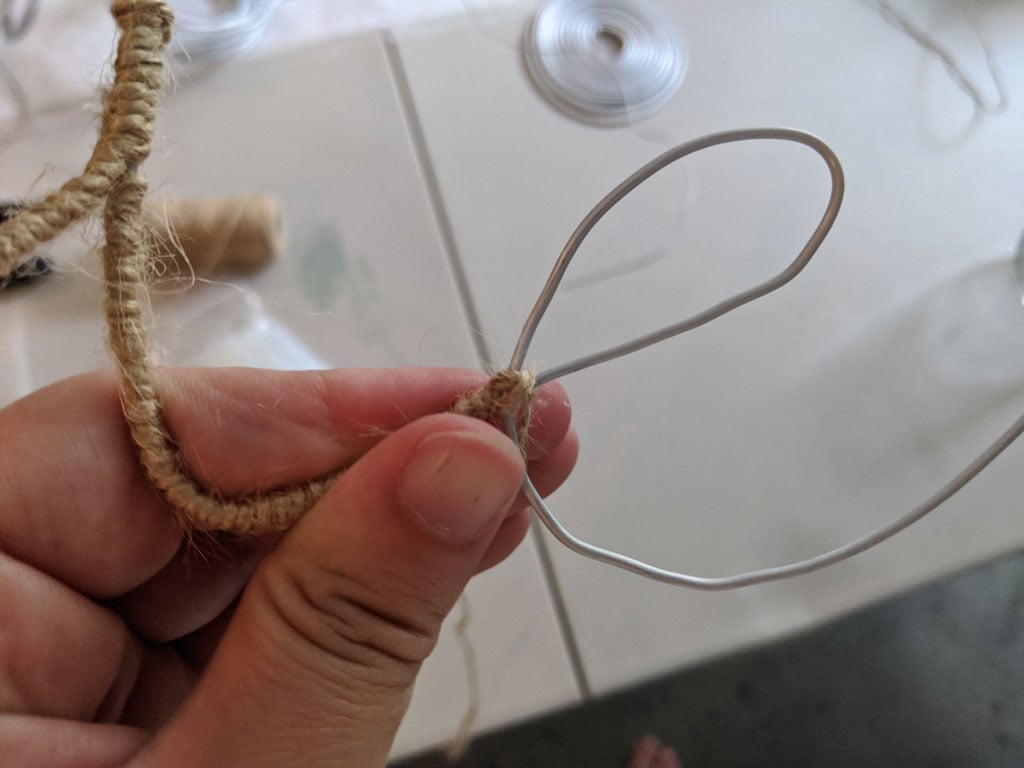
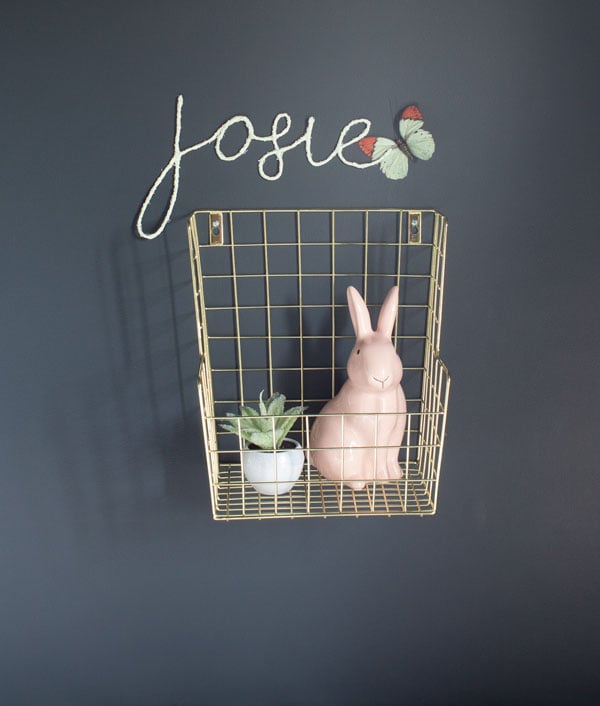
I created faux neon signs out of wire:
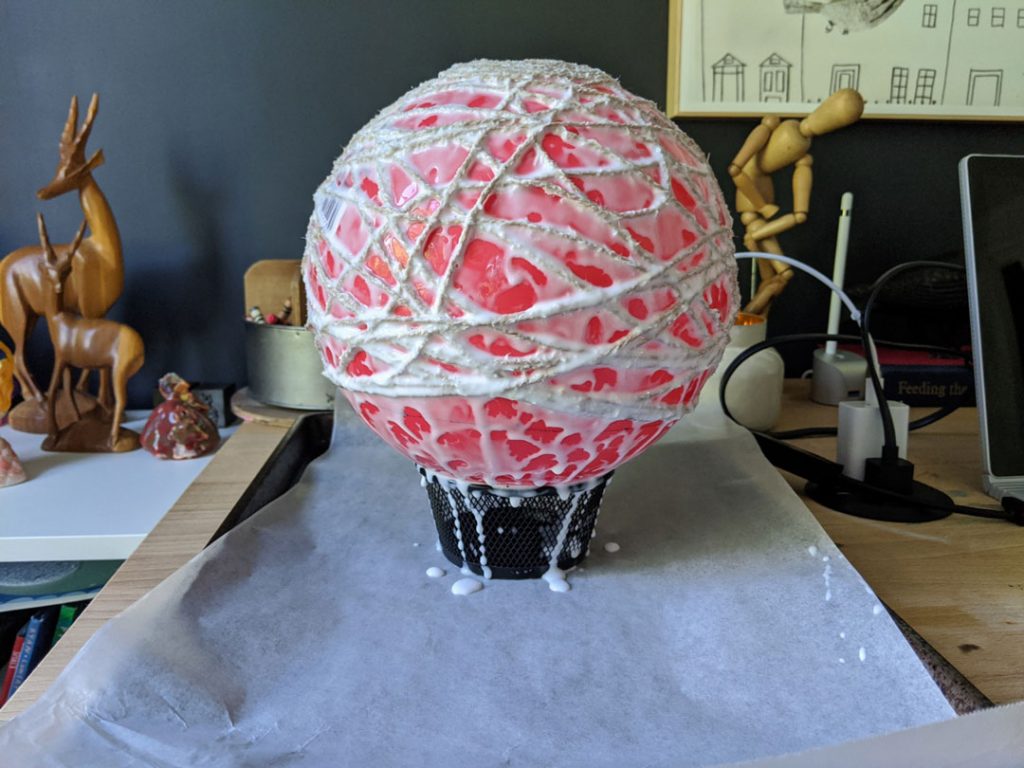
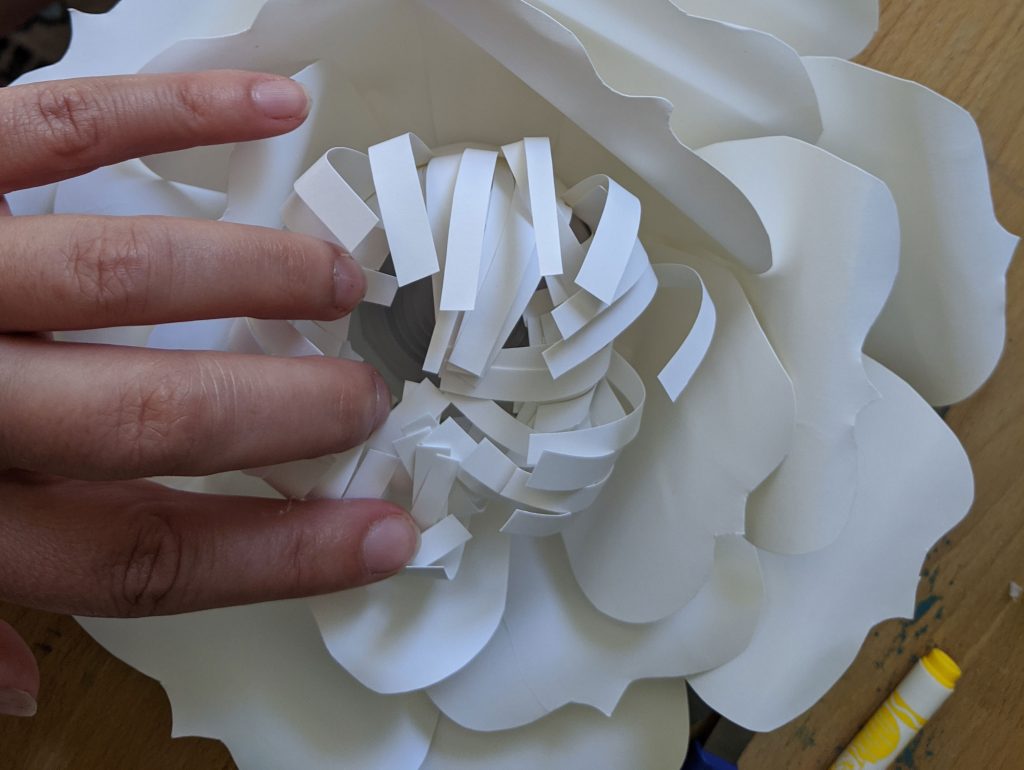
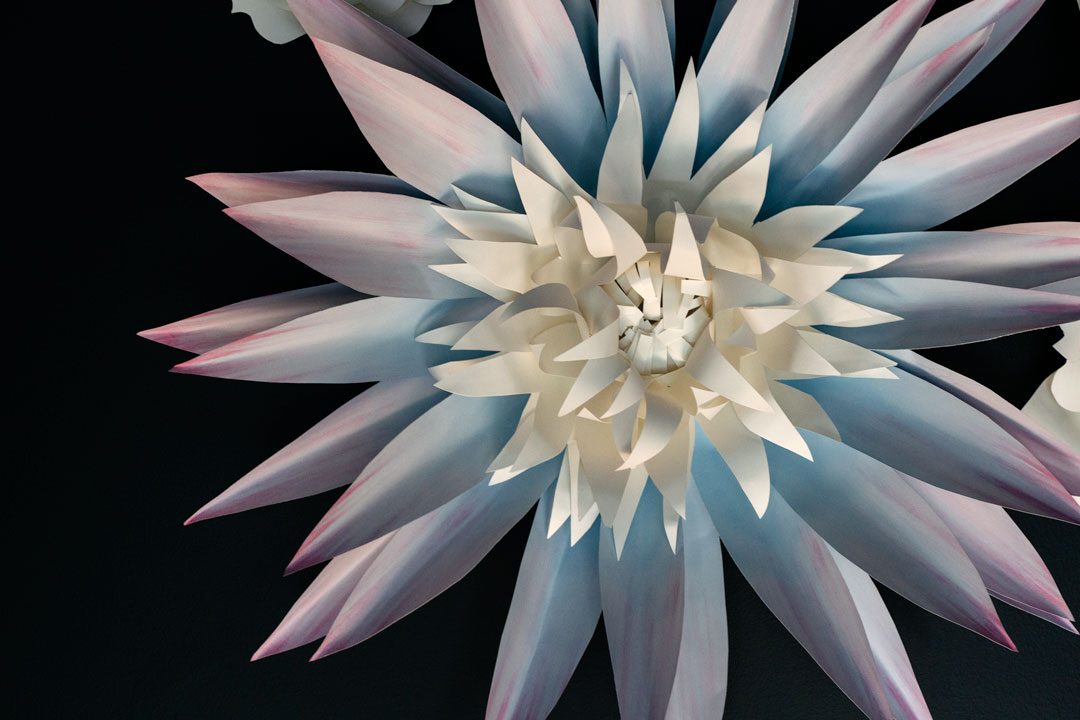
I made some giant paper flowers and turned some into lanterns:
And finally we shopped for the best possible deals to decorate the rest of the girls’ bedroom:
The Girls’ Bedroom: After
We nailed it across the board, put the “fun” into function, and now I can barely get them to leave the room.
It’s important to mention that Annabelle styled this entire shoot. Can a mama be any prouder???
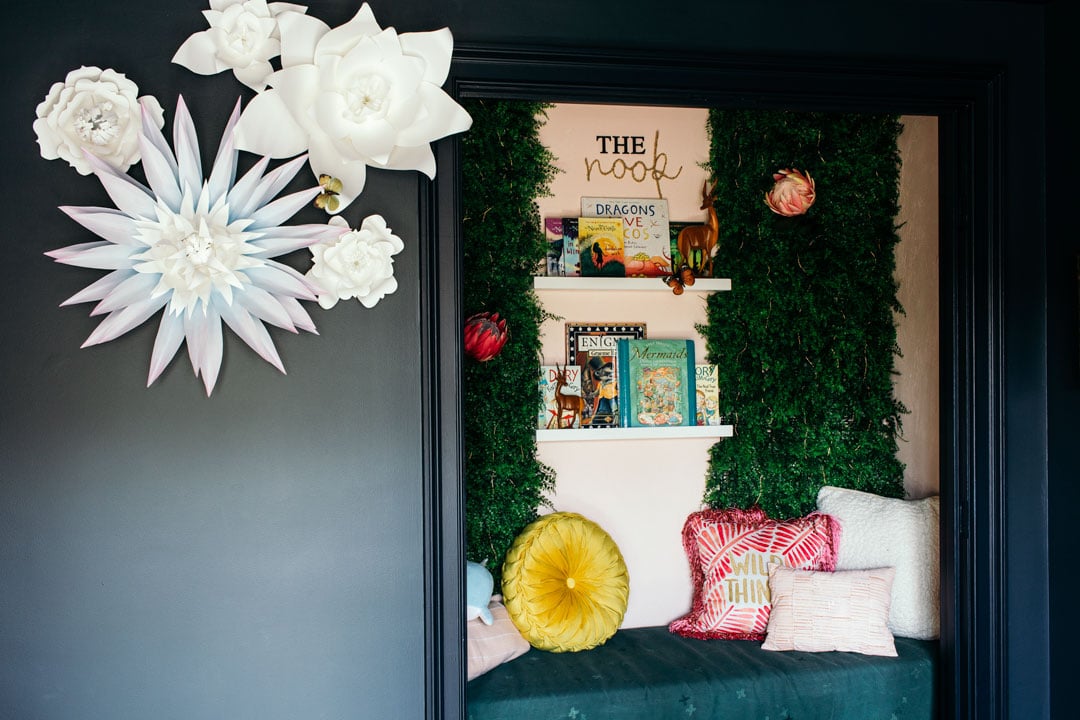
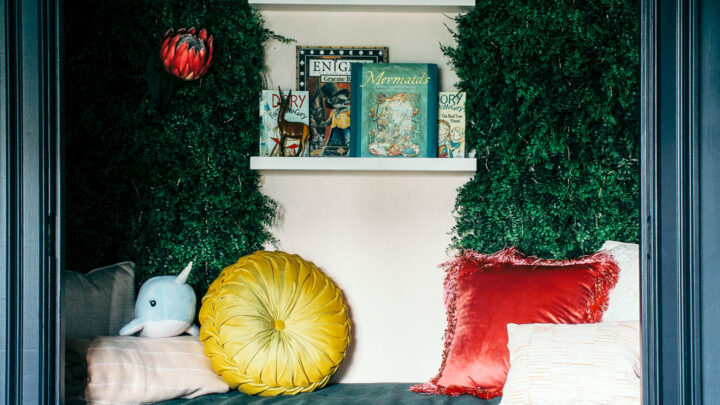
The paper flower wall and the reading nook
First let’s take a look at that paper flower feature wall. The original plan was to at least double the number of flowers on this wall, but we decided that this was just the right amount:
This is probably my favorite one. It actually doubles as a light (a lantern?). There are two light-up flowers and they add just the right touch of whimsy and magic. It’s a really fun feature that the girls can control by remote from their beds.

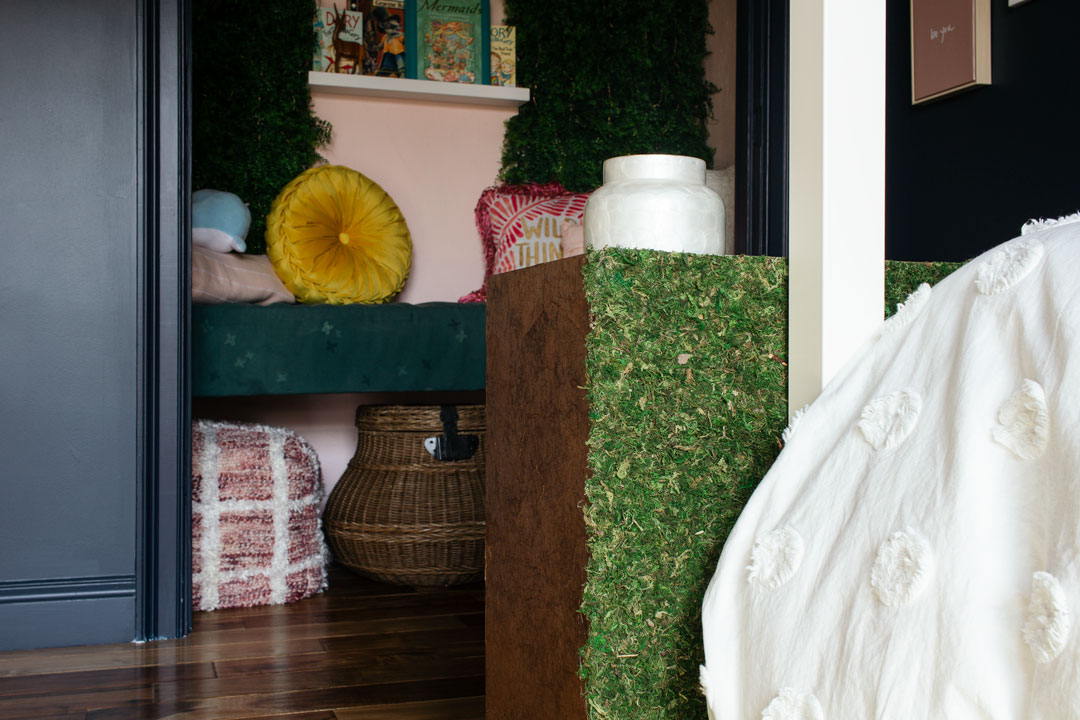
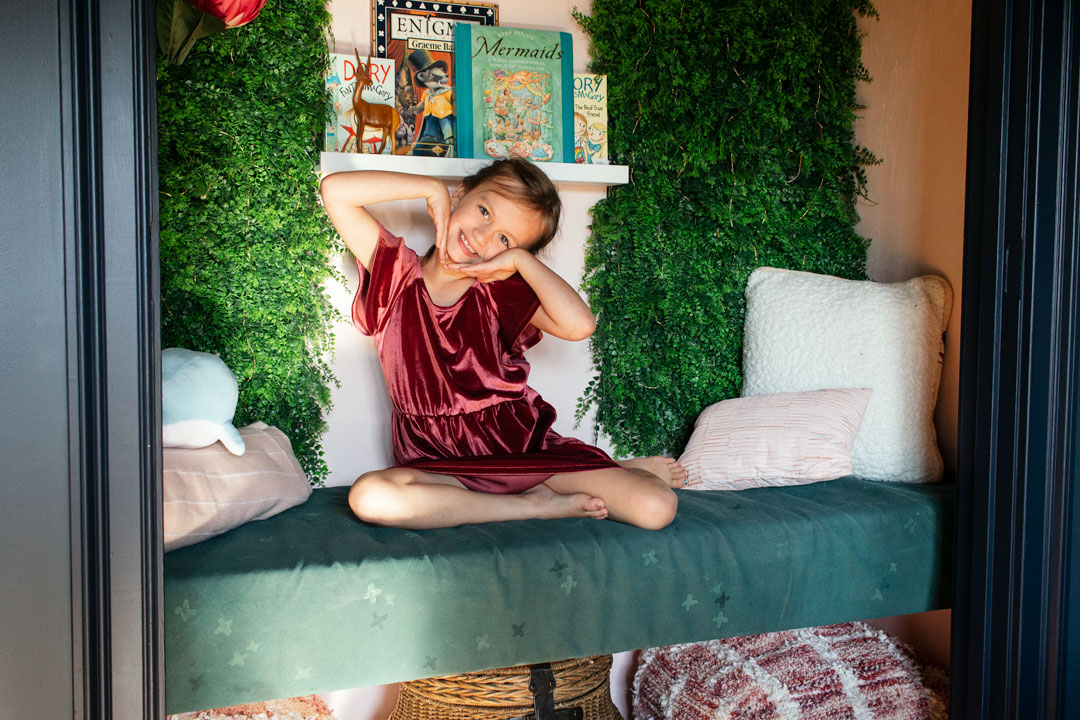
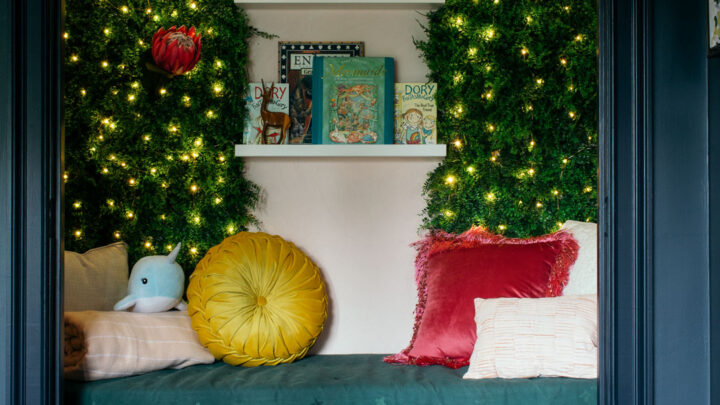
Easily the largest transformation in the room is the closet turned reading nook. We named it The Nook because, well, we seem to name everything. I’m looking at you BFF Ladies Club…
The reading nook turned out better than I ever imagined it! And it’s reaaaalllly hard to shoot properly without the right camera lens and pro lighting. I did my best:


The lighting features are positively magical at night when they glow through those walls of faux fern. Josie actually sleeps in here sometimes. Here’s the full post on turning a closet into a reading nook, plus a tutorial on how to make that upholstered floating bench.
The beds, the walls, and more lights
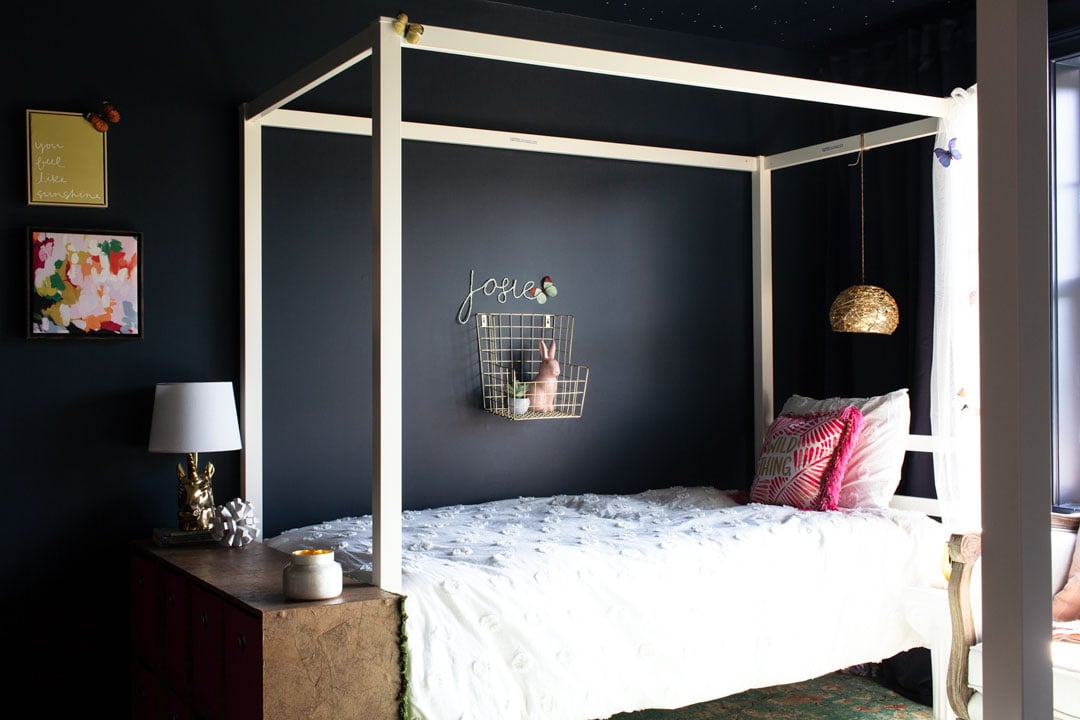
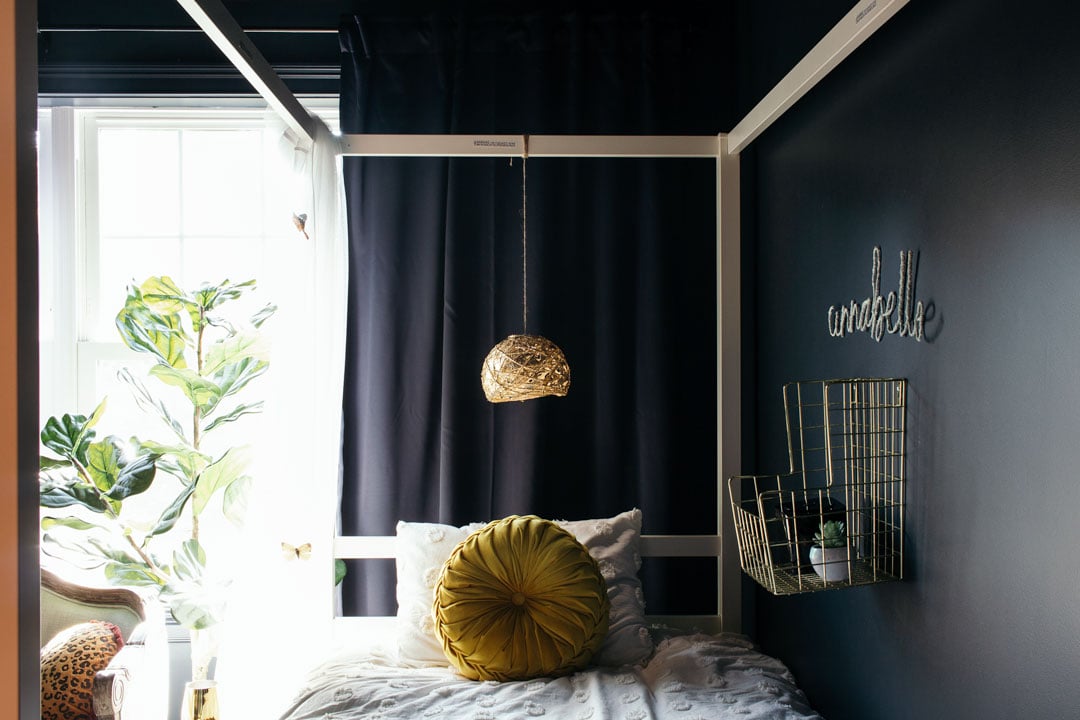
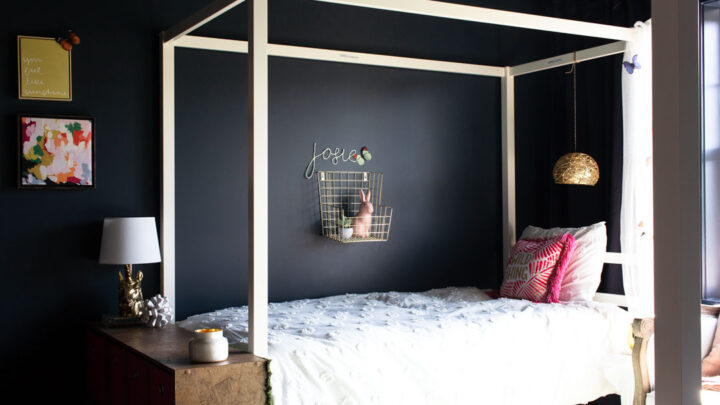
Those deep, dark midnight walls. They were a bit controversial at first, but now that everything else is in? They make so much sense. I love how the whites pop so crisply off the navy black.
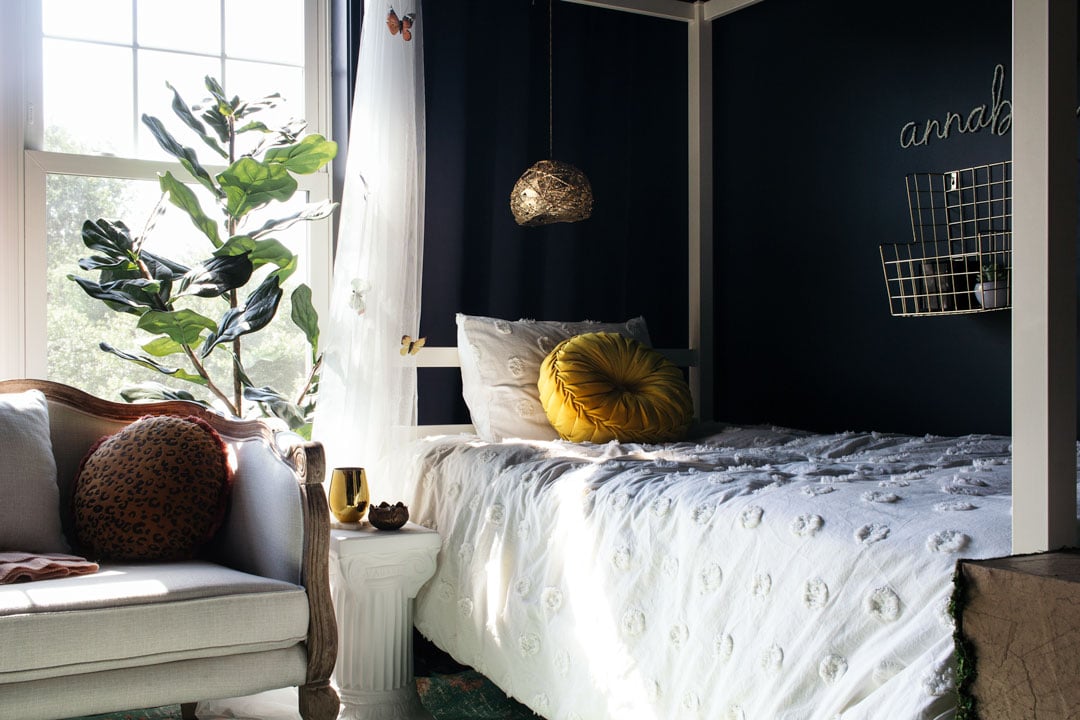
We also used lots of gold to add more of that magic and sparkle. These lamps? We made them for under $10 each. Interested in making your own? Here’s the tutorial.
The aim was to make them almost look like a beehive or nest of some sort dipped in gold to tie in with the garden theme.
So important to mention though — this hanging spot is NOT appropriate for very young kids due to the strangulation hazard. My kids are at the age of reason and we had a conversation about not ever playing around with the lamps.
The glow up
What’s a night-themed kids’ bedroom without some glow in the dark elements? I painted an entire glowing galaxy of stars on the ceiling. You can see bits of it in the first photo and in a few others, but it has sadly proved to be impossible to shoot glowing in the dark
I did however manage to capture these faux neon signs we made:
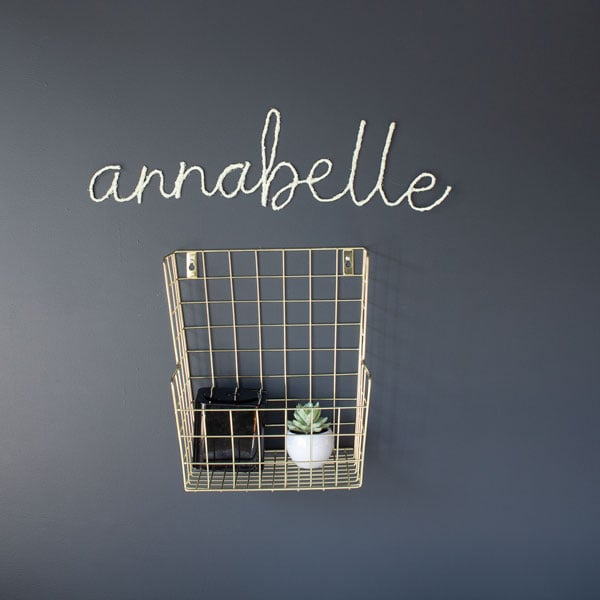
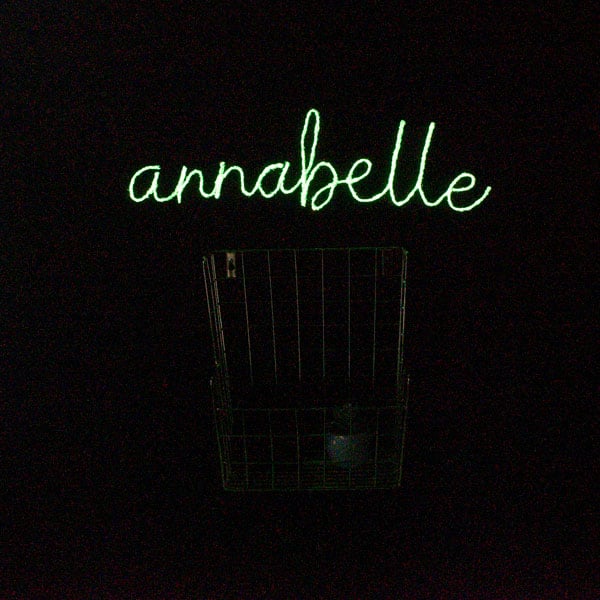
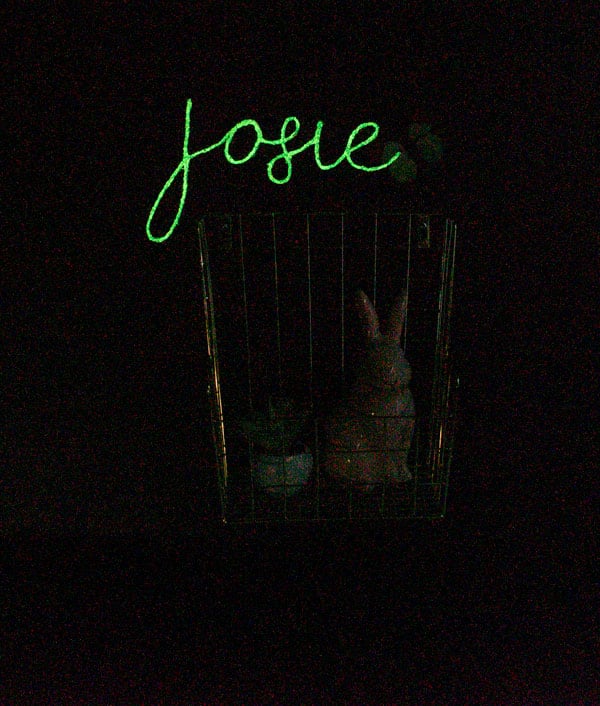
Learn how to make these word art signs here!
The details
Here are some final details I wanted to be sure to call out!
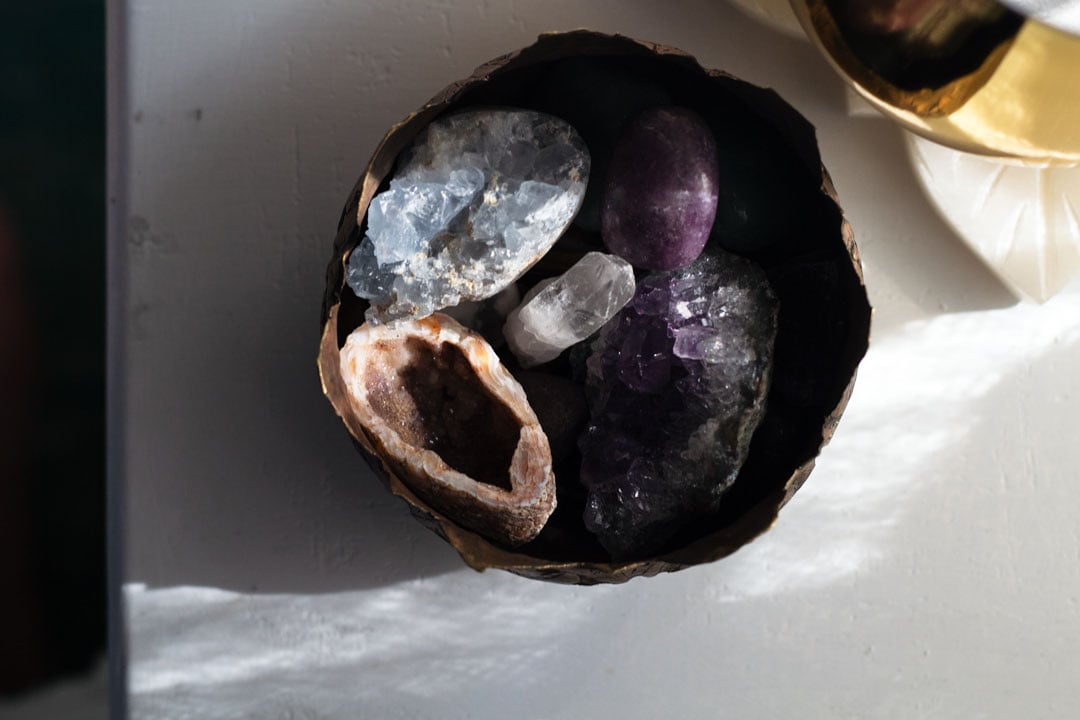
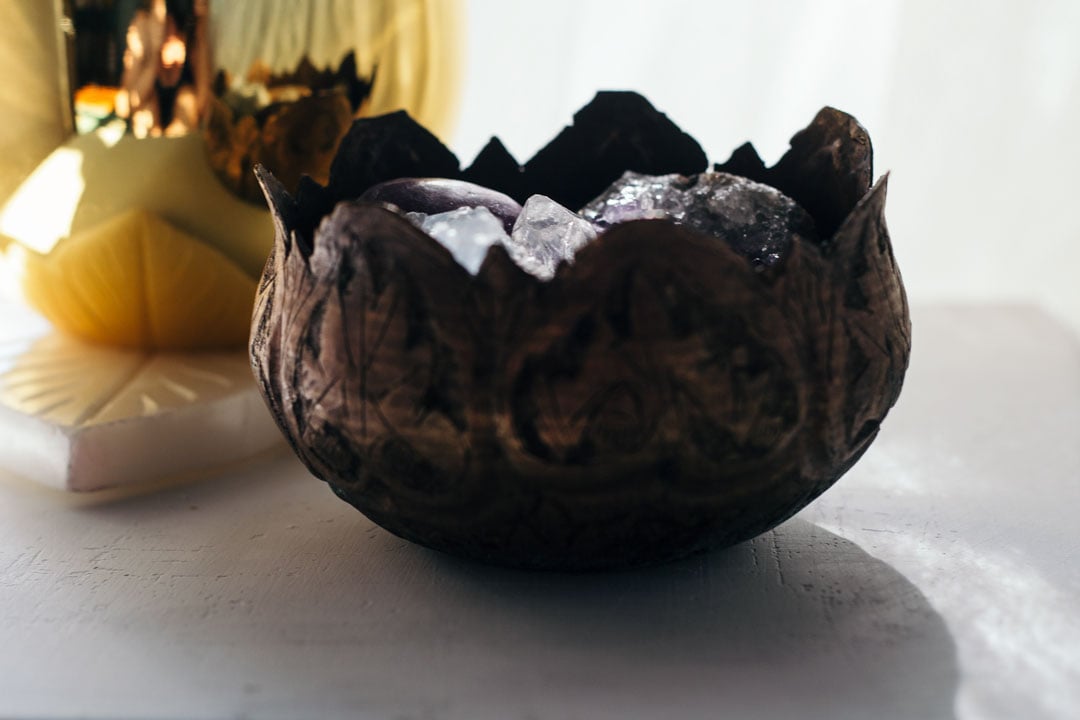
Annabelle filled little bowls around the room with crystals to give them “sweet dreams, bravery, and positive energy”:
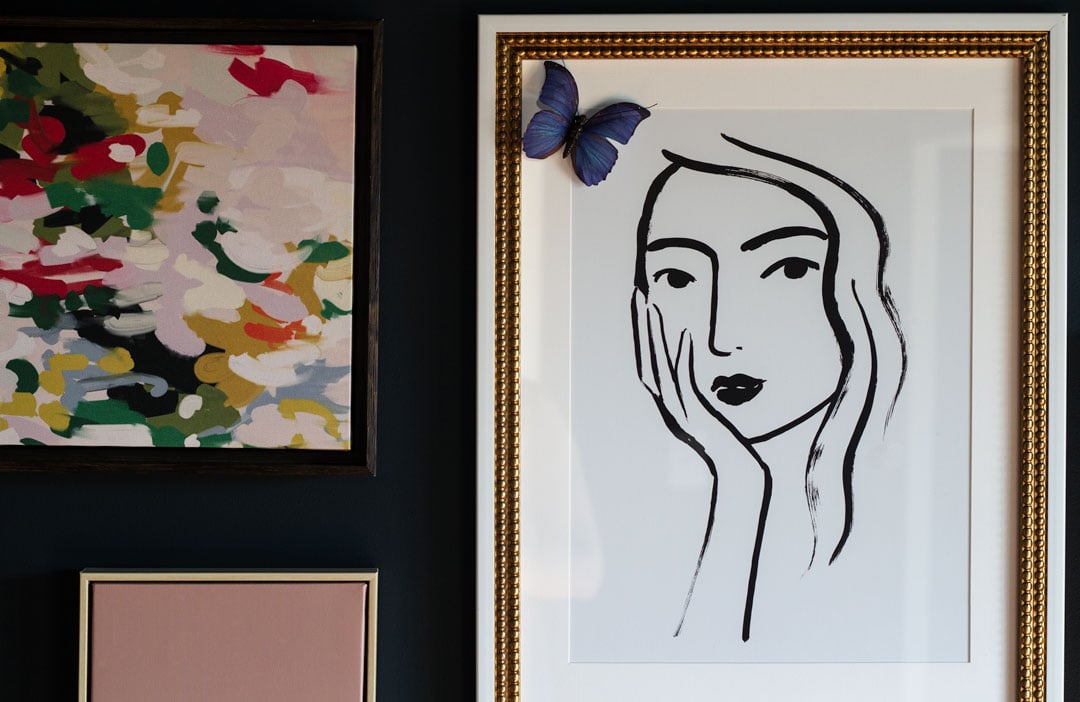
Josie’s concept from the get-go included adding these butterflies all around the room as if they’d just happened to land there. It was a brilliant idea:
I FINALLY found a tiny settee in the kid’s section of my local HomeGoods. It was a little more than I wanted to spend but was still a great deal and fits perfectly. We’re planning to add some patterned fabric to the seat down the road.
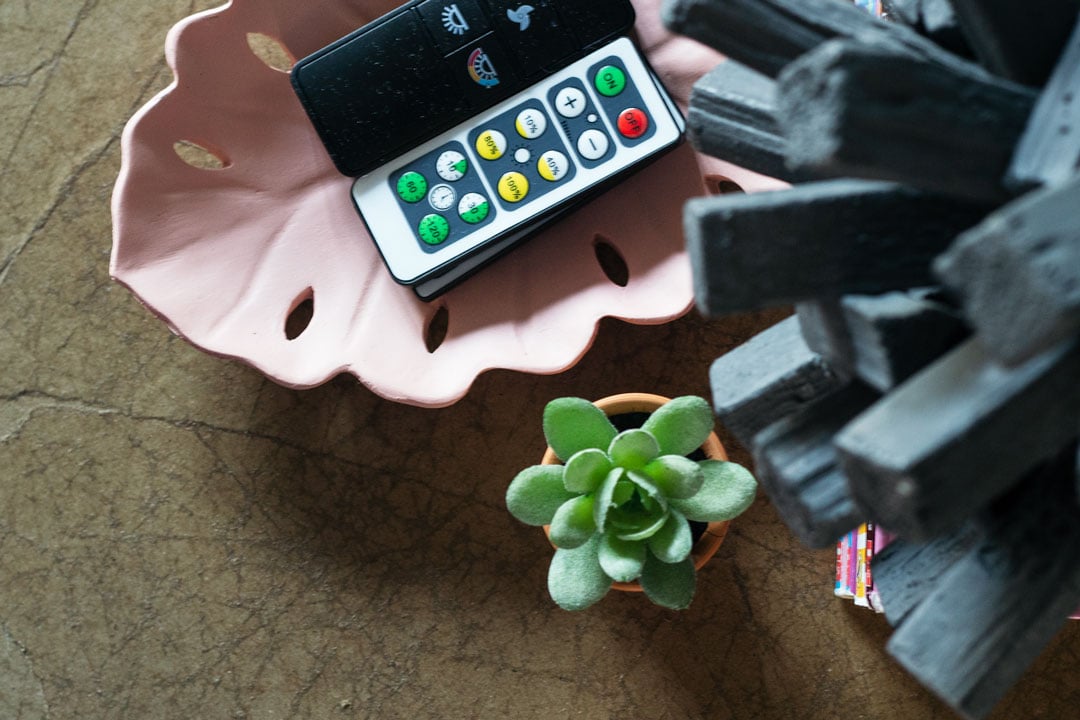
Literally all of the lights in this room are powered by remote so we needed a pretty tray to hold them all. Pray that we never lose them!
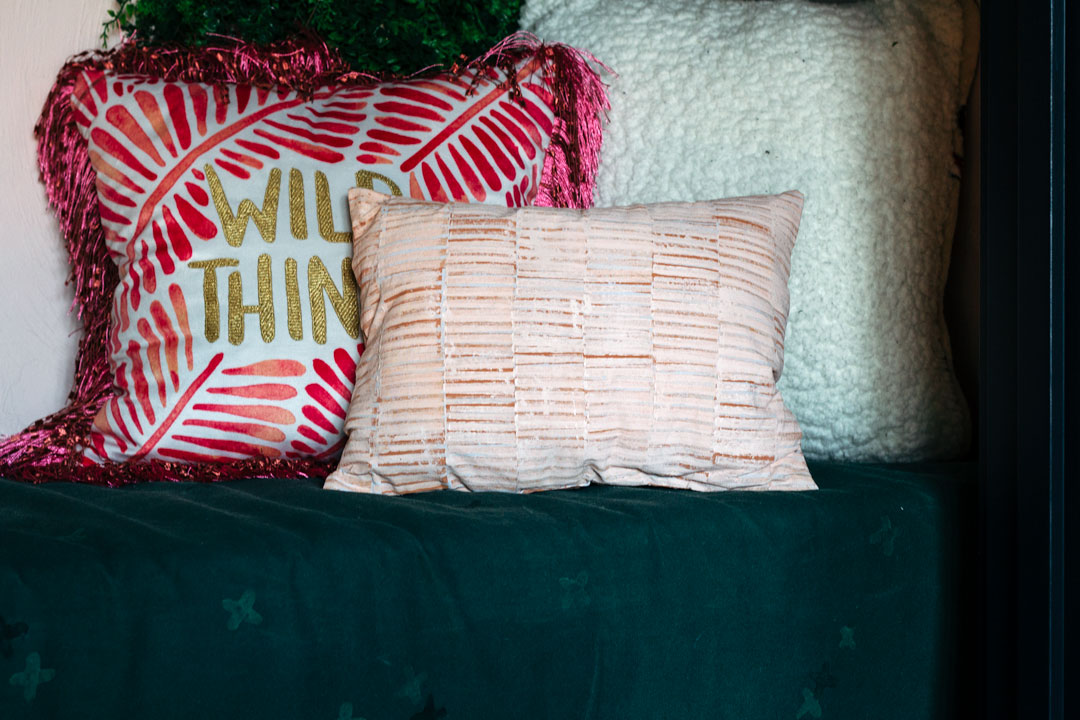
I potato printed a scrap of fabric and turned it into this sweet little no-sew pillow.
I posted the tutorial on how I decoupaged these storage cube organizers with paper bags, but I never showed you the backs! I ended up covering them with sheet moss glued to presentation boards from the dollar store. It’s all about the little details 🙂
And most importantly, my codesigners, without whom this room transformation would have been far less magical!

Shop the Girls' Bedroom
Interested in any of the products you see in this tween dream of a bedroom? Simply click the links below to shop!
Yellow Velvet Round Pintuck Pillow
Comfy golden yellow round pillow in velvet with pintuck pleating.

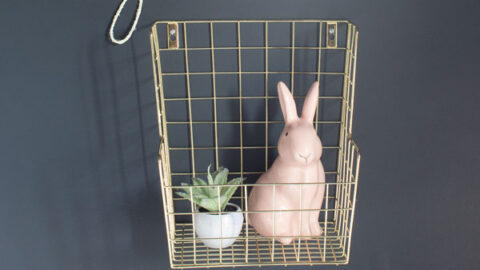
Gold Wall Hanging Storage Basket
Hanging storage basket in gold wire grid is perfect for bedside toy or book storage.

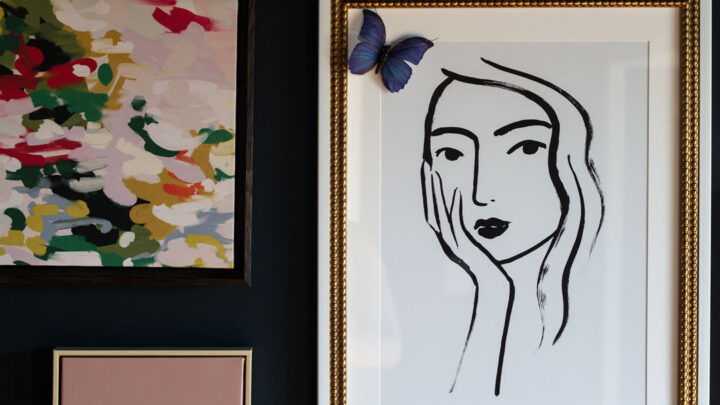
Line Drawing
Modern line art portrait adds the perfect amount of contrast to the softer artwork around it.
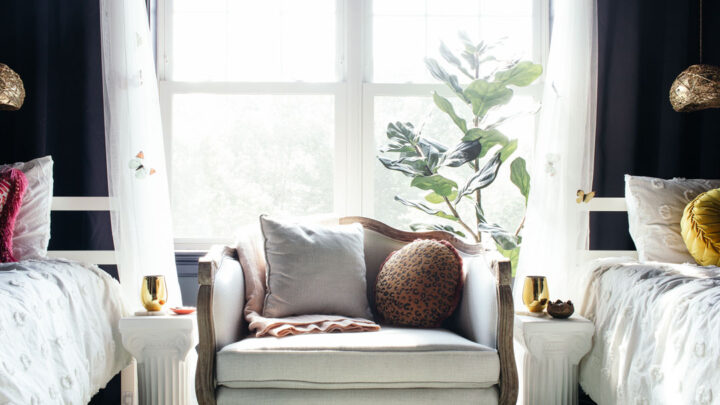
French Linen Settee
Small french provincial sette in neutral linen. The version in the photo is sold out but the link is very similar.
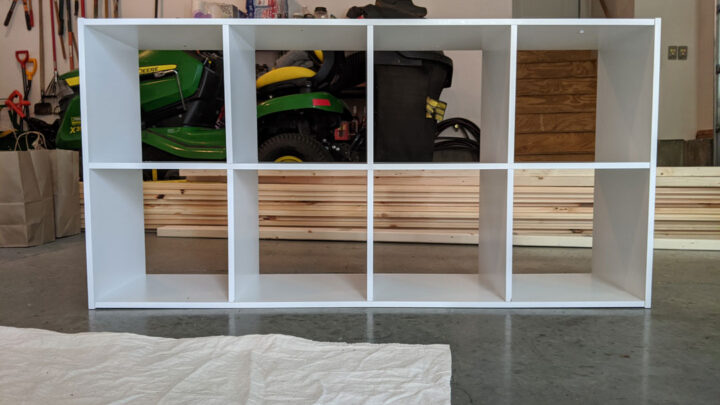
6-Cube Organizer Shelf
I used a similar white laminate storage cube as the base for the decoupaged version.

Geo Moon Light Sculpture
I custom made the twinkle light sign in the reading nook, but this one has a similar vibe.

Another One Room Challenge in the books.

This post contains some affiliate links for your convenience. Click here to read my full disclosure policy. Thanks for supporting Bloom in the Black!